
2bleu’s Sweet Chicken and Gravy: A Symphony of Comfort
The aroma of roasting chicken is, to me, the very essence of home. It’s the scent that used to greet me on Sunday afternoons, a promise of warmth and togetherness that filled our old farmhouse kitchen. This particular recipe, a beautifully adapted version of something truly special, brings back a flood of those cherished memories. The subtle sweetness intertwined with savory herbs and the impossibly rich gravy, all coating a perfectly cooked chicken, is a culinary embrace that I’m thrilled to share with you. It’s a dish that speaks of comfort, tradition, and a touch of everyday magic.
Recipe Overview
- Prep Time: 15 minutes
- Cook Time: 1 hour 40 minutes
- Total Time: 1 hour 55 minutes
- Servings: 4
- Yield: 1 whole chicken with gravy
- Dietary Type: Classic Comfort
Ingredients
Here’s what you’ll need to create this comforting classic:
For the Chicken:
- 1 whole chicken, cleaned and patted dry with paper towels
- 1/4 cup butter, softened
- 2 garlic cloves, minced (roasted if desired)
- 1/4 ounce fresh thyme, stems removed (divided in half, reserving 1 sprig with stem attached for garnish)
- 2 tablespoons honey, warmed
- 1/2 teaspoon vanilla extract
- 1/2 teaspoon salt
- 1/2 teaspoon black pepper
- 1 (10 1/2 ounce) can chicken broth
For the Sweet Gravy:
- 1 cup 2% low-fat milk
- 1/4 cup all-purpose flour
- 3 tablespoons butter
Equipment Needed
- Oven
- Roasting pan
- Small bowl
- Microwave-safe bowl
- Saucepan
- Whisk
- Meat thermometer
- Gravy dish
Instructions
Let’s bring this beautiful dish to life, step by step:
-
Prepare Your Workspace and Preheat: Begin by preheating your oven to a welcoming 400°F (200°C). This initial high heat will help create a lovely golden-brown exterior on your chicken.
-
Create the Herb Butter: In a small bowl, combine the softened butter, minced garlic, and half of the fresh thyme leaves that you’ve removed from their stems. Mix these ingredients together thoroughly until they form a fragrant paste.
-
Infuse the Chicken with Flavor: Gently lift the skin from the chicken breast and thighs with your fingers, creating little pockets. Carefully slide some of the herbed butter mixture underneath the skin, distributing it as evenly as possible. This allows the flavors to penetrate the meat directly. Then, spread the remaining seasoned butter all over the outside of the chicken. Don’t forget the legs and wings!
-
Prepare the Sweet Broth Mixture: In a microwave-safe bowl, combine the warmed honey, vanilla extract, salt, black pepper, the other half of the fresh thyme (ensure it’s also de-stemmed), and the chicken broth. Microwave this mixture for about 30 seconds, or until it’s nicely warmed through. This brief warming helps to meld the flavors.
-
Begin the Roasting Process: Place the prepared chicken into a roasting pan. Pour the warmed honey and broth mixture over the chicken and into the bottom of the pan.
-
First Roasting Phase: Cook the chicken in the preheated oven for 1 1/2 hours. During this time, the chicken will begin to develop a beautiful color and tenderize. It’s crucial to monitor the chicken’s browning. If the bird starts to brown too quickly, you can loosely cover it with aluminum foil to prevent scorching.
-
Internal Temperature Check (Initial): After 1 1/2 hours of roasting, use a meat thermometer to check the internal temperature of the chicken. It should register 165°F (74°C) in the thickest part of the thigh, avoiding the bone.
-
Second Roasting Phase for Ultimate Tenderness: Remove the chicken from the oven. Now, carefully drain the pan juices into a separate container to collect the flavorful broth. Return the chicken to the oven. Continue cooking until the internal temperature reaches 180°F (82°C). This higher temperature ensures the chicken is exceptionally tender and juicy, especially around the dark meat.
-
Prepare the Gravy Base: Once the chicken has reached its final temperature, remove it from the oven. Let the chicken rest for about 5 minutes before carving or serving. While the chicken rests, attend to the pan drippings. Using a spoon, skim off the excess fat from the collected broth. You should aim to have at least 1 cup of broth remaining after skimming. If you don’t have quite a cup, you can supplement with a little extra chicken broth or water.
-
Simmer and Thicken the Gravy: Pour the skimmed broth into a saucepan and place it over medium-high heat. Simmer the broth for about 2 to 3 minutes to concentrate its flavor. While the broth is simmering, in a small bowl, whisk together the milk and flour until smooth. This is your slurry.
-
Finish the Gravy: Add the milk and flour mixture to the simmering broth in the saucepan. Along with this, add the 3 tablespoons of butter. Stir or whisk gently and consistently until the gravy begins to thicken to your desired consistency. Continue whisking to ensure a smooth, lump-free gravy.
-
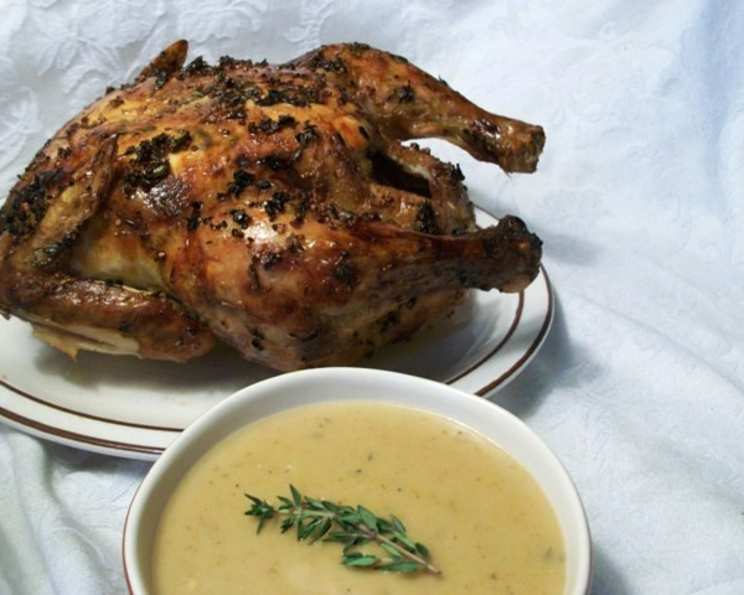
Serve and Enjoy: Remove the gravy from the heat. Pour the luscious gravy into a gravy dish. Top the gravy with the reserved sprig of thyme for a beautiful garnish. Serve the chicken hot, with generous spoonfuls of the sweet and savory gravy on the side.
Expert Tips & Tricks
- Roasting Garlic: For an even deeper, sweeter garlic flavor, roast your garlic cloves alongside the chicken or separately until soft and caramelized before mincing them for the herb butter.
- Butter Under the Skin: Don’t be shy about gently loosening the skin. This is where the magic happens, allowing the butter and herbs to infuse directly into the breast meat, preventing it from drying out.
- Skimming Fat: A clean spoon is your best friend for skimming fat. Doing this when the drippings are still warm makes it much easier.
- Gravy Consistency: If your gravy is too thick, thin it with a splash more milk. If it’s too thin, you can create another small slurry of milk and flour and whisk it in, letting it simmer for a minute or two.
- Resting the Chicken: This is a non-negotiable step! Allowing the chicken to rest for at least 5-10 minutes after cooking lets the juices redistribute throughout the meat, resulting in a far more succulent and flavorful chicken.
Serving & Storage Suggestions
This chicken is a star on its own, but it pairs wonderfully with a variety of classic sides. Consider serving it with creamy mashed potatoes, roasted root vegetables, a simple green salad, or fluffy rice to soak up all that delicious gravy. For a truly comforting meal, a slice of crusty bread is always a welcome addition.
Leftovers can be stored in an airtight container in the refrigerator for up to 3-4 days. Reheat gently in the oven or on the stovetop, adding a little extra broth or water to the gravy if needed to revive its consistency. While it’s best enjoyed fresh, properly stored leftovers can still be quite delightful.
Nutritional Information
This is an estimate and will vary based on the size of the chicken and exact ingredient amounts.
| Nutrient | Amount per Serving | % Daily Value |
|---|---|---|
| Calories | 1009.2 kcal | |
| Calories from Fat | 673 g | |
| Total Fat | 74.9 g | 115 % |
| Saturated Fat | 28.8 g | 144 % |
| Cholesterol | 302.1 mg | 100 % |
| Sodium | 937.5 mg | 39 % |
| Total Carbohydrate | 18.9 g | 6 % |
| Dietary Fiber | 0.6 g | 2 % |
| Sugars | 12.1 g | 48 % |
| Protein | 62.1 g | 124 % |
Variations & Substitutions
- Herb Variations: While thyme is classic, feel free to experiment with other herbs like rosemary, sage, or a combination for a different aromatic profile.
- Sweetener Swap: If honey isn’t your preference, maple syrup or even a touch of brown sugar can be used in the broth mixture, though it will alter the sweet notes slightly.
- Milk Alternative: For a dairy-free gravy, unsweetened almond milk or oat milk can be used, though the richness might be slightly different. Ensure your flour is also gluten-free if needed.
- Garlic Intensity: If you love garlic, feel free to add an extra clove or two to the herb butter.
FAQs
Q: Why is the chicken cooked to 180°F?
A: Cooking the chicken to 180°F in the thigh ensures that the dark meat becomes exceptionally tender and practically falls off the bone, while the breast meat, which cooks faster, remains moist.
Q: Can I make the gravy ahead of time?
A: Yes, the gravy can be made ahead of time and gently reheated on the stovetop. You may need to add a little extra milk or broth to achieve the desired consistency.
Q: How can I make this dish even more flavorful?
A: Consider brining the chicken overnight before roasting for an extra layer of moisture and flavor.
Q: What’s the best way to prevent the chicken skin from burning?
A: If you notice the skin browning too quickly, loosely tent the chicken with aluminum foil. This allows it to continue cooking through without excessive browning.
Q: Can I use a different cut of chicken?
A: This recipe is optimized for a whole chicken, as the bones and connective tissues contribute to the pan drippings used for the gravy. However, you could adapt it for bone-in chicken pieces, adjusting cooking times accordingly.
Final Thoughts
This Sweet Chicken and Gravy is more than just a recipe; it’s an invitation to create moments of warmth and delicious connection around your table. It’s a dish that’s both impressive enough for a special occasion and comforting enough for a weeknight. I encourage you to try it, to savor the tender chicken and the lusciously sweet gravy. And please, let me know how it turns out – I’d love to hear about your own culinary memories it inspires! Perhaps a crisp, dry white wine or a light-bodied red would be a delightful pairing for this wonderfully satisfying meal.