
The Humble Powerhouse: My Go-To 9-Grain Bread
There’s something profoundly comforting about a loaf of hearty, homemade bread. For me, it’s a sensory experience that starts with the gentle hum of the bread machine, progresses to the warm, yeasty aroma filling the kitchen, and culminates in the satisfying heft of a crusty, nutrient-dense loaf. This particular 9-grain bread holds a special place in my heart. It’s the bread that consistently graces my table, a reliable foundation for countless breakfasts and lunches, and a reminder that nourishing food can be both incredibly simple and deeply delicious. It’s the kind of bread that makes you feel good, from the inside out, with every single bite.
Recipe Overview
- Prep Time: 15 minutes
- Cook Time: 22 minutes (bread machine cycle + baking)
- Total Time: 1 hour 52 minutes
- Servings: 10
- Yield: 5 mini loaves
- Dietary Type: Contains Dairy (powdered milk)
Ingredients
Here’s what you’ll need to create this wholesome loaf. The beauty of this recipe lies in its straightforward ingredient list, allowing the grains to shine.
- 1 1/3 cups warm water
- 3 tablespoons powdered milk
- 2 tablespoons olive oil
- 2 tablespoons honey
- 1 teaspoon salt
- 1 egg
- 1 cup whole wheat flour
- 2 1/2 cups bread flour
- 1 tablespoon ground flax seeds
- 1 tablespoon sunflower seeds
- 3/4 cup seven-grain cereal
- 1 tablespoon active dry yeast
Equipment Needed
You’ll need a few key pieces of equipment to bring this recipe to life, primarily a bread machine and standard baking supplies.
- Bread machine
- Measuring cups and spoons
- Mixing bowls (if forming loaves manually after machine cycle)
- Baking sheets (if forming loaves manually)
- Oven
- Wire cooling rack
Instructions
The magic of this recipe is that much of the heavy lifting is done by a bread machine, but there’s still a touch of hands-on love involved.
-
Prepare the Grain Mixture: In a small measuring cup, add the ground flax seeds and sunflower seeds. Then, carefully fill the remainder of the cup to the 3/4 mark with the seven-grain cereal. Set this aside. This ensures your grains are evenly distributed within the dough.
-
Load the Bread Machine: Add the ingredients to your bread machine in the order specified by the manufacturer. Generally, this means adding the wet ingredients first, followed by the dry ingredients, and finally the yeast, ensuring it doesn’t come into contact with the liquid until the machine starts. So, add the warm water, powdered milk, olive oil, honey, salt, and egg. Next, add the whole wheat flour and bread flour, followed by your prepared flax, sunflower, and seven-grain cereal mixture. Lastly, create a small well in the center of the flour and add the active dry yeast.
-
Start the Bread Machine Cycle: Close the lid of your bread machine and select the appropriate cycle for your machine (typically a whole wheat or basic dough cycle). Allow the machine to complete its mixing and rising process. This usually takes around 1 hour and 30 minutes, depending on your machine.
-
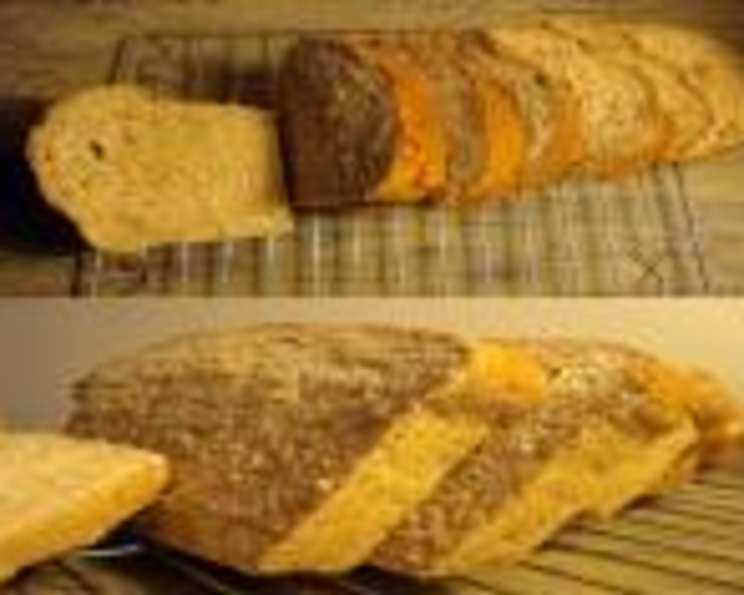
Shape the Loaves: Once the dough has finished mixing and its initial rise within the bread machine, carefully remove the dough from the machine. It should be a soft, elastic ball. Turn the dough out onto a lightly floured surface. Divide the dough into 5 equal portions. Shape each portion into a mini loaf, roughly the size and shape of a small brick or a mini baguette.
-
Second Rise: Place the formed mini loaves onto baking sheets lined with parchment paper (if using a standard oven for baking). Cover them loosely with a clean kitchen towel or plastic wrap and let them rise in a warm place for about 1 hour, or until they have visibly increased in size and appear puffy.
-
Bake the Bread: Preheat your oven to 350 degrees Fahrenheit (175 degrees Celsius). If you have a convection setting, use it. Bake the mini loaves for 22 minutes.
-
Adjust for Regular Ovens: If you are baking this in a standard oven (without a convection setting) or prefer a more thoroughly baked loaf, you will need to add approximately 1/3 more time to the baking duration. Keep an eye on the loaves, and if they begin to brown too quickly, you can loosely tent them with aluminum foil. The bread is done when the crust is golden brown and the internal temperature reaches between 190-200°F (88-93°C) when tested with an instant-read thermometer.
-
Cooling: Once baked, carefully remove the loaves from the oven and transfer them to a wire cooling rack to cool completely. This step is crucial for allowing the internal structure of the bread to set, preventing a gummy texture.
Expert Tips & Tricks
- Yeast Activation: Always ensure your active dry yeast is fresh. If you’re unsure, you can “proof” it by dissolving it in a small amount of the warm water (around 1/4 cup) with a pinch of honey for 5-10 minutes. If it becomes foamy, it’s active and ready to use.
- Water Temperature: The warm water should be around 105-115°F (40-46°C). Too hot and it will kill the yeast; too cool and it won’t activate properly.
- Grain Texture: For a more pronounced grain texture, you can lightly toast the seven-grain cereal before adding it to the bread machine. Be careful not to burn it.
- Dough Consistency: If your dough seems too wet or too dry after the initial mixing in the bread machine, you can add a tablespoon of bread flour at a time if too wet, or a teaspoon of warm water at a time if too dry. Make these adjustments sparingly.
- Mini Loaf Proportions: For perfectly uniform mini loaves, using a kitchen scale to divide the dough ensures consistency.
Serving & Storage Suggestions
This 9-grain bread is incredibly versatile. It’s delicious on its own, lightly toasted, or served as a base for your favorite spreads.
- Serving: Serve warm, fresh from the oven, with a generous smear of butter or your preferred jam. It also makes an exceptional base for avocado toast, sandwiches, or alongside a hearty soup or stew.
- Storage: Once completely cooled, store leftover loaves in an airtight container or bread bag at room temperature for up to 3 days. For longer storage, wrap the cooled loaves tightly in plastic wrap, then in aluminum foil, and freeze for up to 3 months. To reheat from frozen, thaw at room temperature, then toast or warm in a low oven (around 300°F/150°C) for a few minutes until heated through.
Nutritional Information
This 9-grain bread is a nutrient-dense option, packed with fiber and whole grains.
| Nutrient | Amount per Serving | % Daily Value |
|---|---|---|
| Calories | 223 kcal | 11% |
| Total Fat | 5.3 g | 7% |
| Saturated Fat | 1.1 g | 5% |
| Cholesterol | 20.9 mg | 7% |
| Sodium | 251.5 mg | 11% |
| Total Carbohydrate | 37.8 g | 14% |
| Dietary Fiber | 2.7 g | 10% |
| Sugars | 4.6 g | 5% |
| Protein | 6.9 g | 14% |
Note: Nutritional values are estimates and can vary based on specific ingredients and portion sizes.
Variations & Substitutions
While this recipe is wonderful as is, feel free to experiment with variations:
- Dairy-Free: Substitute the powdered milk with a dairy-free milk powder or omit it entirely and add an extra 1/4 cup of water.
- Seed Variety: Feel free to swap out the sunflower seeds for other seeds like pumpkin seeds, sesame seeds, or a mix of your favorites.
- Sweetness: If you prefer a slightly sweeter bread, you can increase the honey by an extra tablespoon.
- Grain Boost: Add a tablespoon or two of other grains like rolled oats, quinoa flakes, or millet for an even more complex texture and nutritional profile.
FAQs
Q: Can I make this bread without a bread machine?
A: Absolutely! You can mix the dough by hand or using a stand mixer, then let it rise in a greased bowl in a warm place until doubled in size (about 1-2 hours). Then, proceed with shaping and baking as directed.
Q: Why did my bread not rise properly?
A: This could be due to inactive yeast, water that was too hot or too cold, or insufficient rising time. Ensure your yeast is fresh and the water temperature is correct.
Q: How can I get a crispier crust?
A: For a crispier crust, you can spray the loaves with water a few times during the first 10 minutes of baking, or place a shallow pan of water on the bottom rack of your oven to create steam.
Q: Is this bread suitable for freezing?
A: Yes, this bread freezes exceptionally well. Ensure it is completely cooled before wrapping and freezing to prevent ice crystals from forming.
Q: What is the best way to store this bread to keep it fresh?
A: Storing the cooled bread in an airtight container or a bread bag at room temperature is ideal for maintaining freshness for a few days.
Final Thoughts
This 9-grain bread is more than just a recipe; it’s an invitation to embrace wholesome, homemade goodness. It’s a testament to how simple ingredients, combined with a little patience and care, can yield truly remarkable results. Whether you’re toasting it for breakfast, layering it for a sandwich, or simply enjoying a slice with a pat of butter, I hope this bread brings as much comfort and joy to your table as it does to mine. Don’t hesitate to share your creations and any delightful variations you discover – happy baking!