
I Swear I Made Them Myself Homemade Everything Bagels
There’s a particular aroma that fills my kitchen when I’m making bagels from scratch – a comforting, yeasty promise of chewy interiors and crisp exteriors. It’s an aroma that transports me back to those early days of experimenting in the kitchen, fueled by a healthy dose of culinary curiosity and a desire to replicate those perfect, store-bought bagels that always seemed just out of reach. The first time I successfully pulled a batch of these beauties from the oven, golden brown and smelling heavenly, it felt like unlocking a culinary secret, a small victory that still brings a smile to my face.
Recipe Overview
- Prep Time: 3 hours 10 minutes
- Cook Time: 30 minutes
- Total Time: 3 hours 40 minutes
- Servings: 6
- Yields: 6 Bagels
- Dietary Type: Vegetarian
Ingredients
Here’s what you’ll need to bring these incredible bagels to life:
- 1 cup warm water
- ¼ ounce active dry yeast (this is typically one standard packet)
- 1 ½ tablespoons granulated sugar
- 2 ½ cups all-purpose flour, plus more as needed
- 1 teaspoon salt
- 1 teaspoon vegetable oil, divided
- 1 ½ teaspoons granulated sugar (for the boiling water)
- 1 tablespoon yellow cornmeal
- 1 egg yolk, beaten (for the egg wash)
- Toasted chopped onion (for topping)
- Poppy seed (for topping)
- Sesame seeds (for topping)
- Kosher salt (for topping)
Equipment Needed
- Stand mixer with a dough hook attachment (optional, but highly recommended)
- Large mixing bowl
- Measuring cups and spoons
- Baking sheets
- Parchment paper or silicone baking mats (optional, for easier cleanup)
- Large pot
- Slotted spoon or spider strainer
- Wire cooling rack
Instructions
Crafting these homemade bagels is a rewarding process, but it requires a little patience. Don’t rush the rising times; they are crucial for achieving that classic bagel texture.
-
Activate the Yeast: In the bowl of your stand mixer (or a large mixing bowl if you’re doing this by hand), combine the warm water, active dry yeast, and the first measure of granulated sugar (1 ½ tablespoons). Give it a gentle stir. Let this mixture stand for about 5 minutes. You’ll know the yeast is alive and kicking when it becomes foamy and bubbly. This step is essential for ensuring your bagels will have a good rise.
-
Start the Dough: Gradually add 2 cups of the all-purpose flour and the salt to the foamy yeast mixture. If you’re using a stand mixer, attach the dough hook and mix on low speed until the ingredients are just combined.
-
Knead the Dough: Slowly add the additional ½ cup of all-purpose flour while the mixer is running on low. Once it starts to come together, you’ll likely need to incorporate the rest of the flour by hand. Turn the dough out onto a lightly floured surface. Continue to knead the dough until it becomes smooth and elastic, with no sticky residue. If the dough is still too sticky to handle, you can add up to ½ cup more flour, a tablespoon at a time, until it reaches the right consistency. A well-kneaded dough will spring back slowly when you gently poke it.
-
First Rise: Lightly grease a large bowl with ½ teaspoon of the vegetable oil. Place the kneaded dough ball into the bowl and roll it around to ensure all sides are lightly coated with oil. This prevents the dough from drying out. Cover the bowl tightly with plastic wrap or a damp kitchen towel and place it in a warm spot in your kitchen. Let it rise for about an hour, or until it has almost doubled in size. A slightly warm oven (turned off, of course!) can be a great spot for this.
-
Shape the Bagels: Once the dough has risen, gently punch it down to release the air. Turn the dough out onto a lightly floured surface and divide it into 6 equal pieces. For each piece, roll it into a 6-inch log. To form the classic bagel shape, bring the ends of each log together and moisten them slightly with water or a bit of the egg wash. Press the ends firmly to join them. It’s crucial that these ends are well-joined, or you’ll end up with bagel-shaped crescents after baking!
-
Second Rise: Lightly grease a baking sheet. Carefully place the shaped bagels onto the prepared baking sheet, ensuring they have a little space between them. Cover the bagels again and let them rise for another 20 to 30 minutes. It’s important not to let them over-proof at this stage; just a short, final rise is needed.
-
Preheat the Oven: While the bagels are having their second rise, preheat your oven to 400 degrees Fahrenheit (200 degrees Celsius).
-
Boil the Bagels: Fill a large pot with water and add the remaining 1 ½ teaspoons of granulated sugar. Bring the water to a rolling boil. Carefully drop the bagels into the boiling water, a few at a time, being careful not to overcrowd the pot. Boil them for 30 seconds to 1 minute on each side. This boiling step is what gives bagels their characteristic chewy texture and glossy crust. Use a slotted spoon or spider strainer to remove the bagels from the boiling water.
-
Prepare for Baking: As you remove the bagels from the boiling water, place them onto a baking sheet that has been oiled and then sprinkled with yellow cornmeal. The cornmeal adds a delightful texture and prevents sticking.
-
Bake and Top: Carefully place the oiled, cornmeal-dusted baking sheet with the bagels into your preheated 400 degrees Fahrenheit (200 degrees Celsius) oven. Bake for 5 minutes. Remove the baking sheet from the oven. Now, using a pastry brush, brush the tops of the bagels with the beaten egg yolk. This egg wash will give them a beautiful golden sheen and help the toppings adhere. Sprinkle generously with your desired toppings: toasted chopped onion, poppy seed, sesame seeds, and kosher salt.
-
Finish Baking: Return the topped bagels to the oven. Bake for an additional 28 to 32 minutes. About 20 minutes into this final baking time, turn the oven down to 375 degrees Fahrenheit (190 degrees Celsius). Continue to bake until the bagels are deeply golden brown and sound hollow when tapped on the bottom.
-
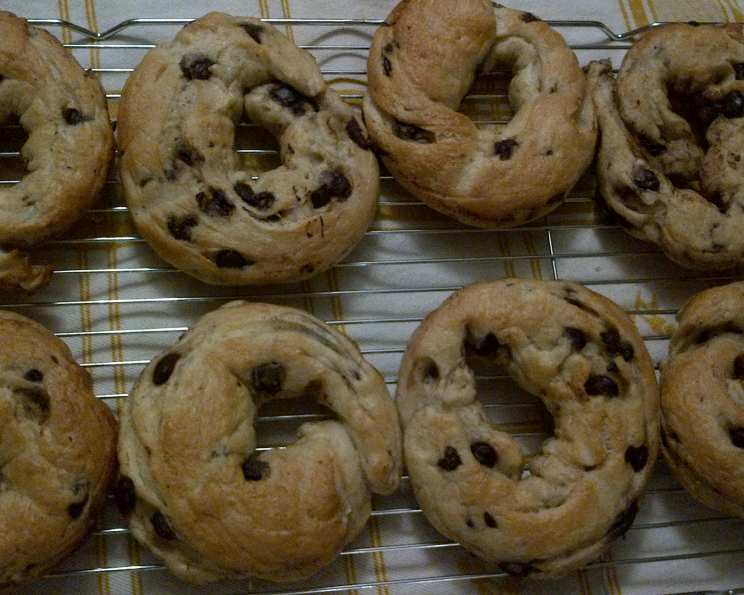
Cool: Once baked to perfection, remove the bagels from the oven and transfer them to a wire cooling rack to cool completely. This allows the steam to escape and ensures the crust remains crisp.
Expert Tips & Tricks
- The Water Temperature: For activating yeast, aim for water that feels comfortably warm on your wrist, around 105-115°F (40-46°C). Too hot and you’ll kill the yeast; too cool and it won’t activate properly.
- Flour Power: The amount of flour needed can vary slightly depending on humidity and the type of flour. It’s always best to add flour gradually during the kneading process until you reach the right dough consistency.
- Warm Spot for Rising: If your kitchen is chilly, you can create a warm spot by placing your covered dough bowl in a turned-off oven with the light on, or even in a microwave (again, turned off!).
- Boiling Batch Size: Don’t overcrowd the pot when boiling. Boiling in batches ensures the water temperature stays consistent and the bagels have enough room to cook evenly.
- Topping Adhesion: The egg wash is your best friend for getting those toppings to stick. Apply it while the bagels are still warm from the initial bake.
Serving & Storage Suggestions
Homemade bagels are best enjoyed fresh, ideally on the same day they are baked. They are absolutely divine sliced in half and toasted, then slathered with cream cheese, butter, or your favorite schmear. They also make fantastic sandwiches.
To store leftover bagels, allow them to cool completely. Store them in an airtight container or a resealable plastic bag at room temperature for up to 2 days. For longer storage, you can freeze them. Once completely cool, wrap them individually in plastic wrap, then place them in a freezer-safe bag or container. They will keep in the freezer for up to 2-3 months. To reheat frozen bagels, you can toast them directly from frozen or allow them to thaw at room temperature first.
Nutritional Information
Here’s an estimated breakdown of the nutritional content for one of these delicious homemade everything bagels:
| Nutrient | Amount per Serving | % Daily Value |
|---|---|---|
| Calories | 229 kcal | 11% |
| Total Fat | 2.1 g | 3% |
| Saturated Fat | 0.4 g | 2% |
| Cholesterol | 27.7 mg | 9% |
| Sodium | 392.1 mg | 16% |
| Total Carbohydrate | 45.5 g | 15% |
| Dietary Fiber | 1.8 g | 7% |
| Sugars | 4.3 g | 17% |
| Protein | 6.4 g | 12% |
Note: Nutritional information is an estimate and can vary based on specific ingredients used and portion sizes.
Variations & Substitutions
While this recipe delivers a classic everything bagel experience, feel free to get creative!
- Flour Power: For a slightly heartier bagel, you could try substituting up to ½ cup of the all-purpose flour with whole wheat flour.
- Sweetener Swap: While sugar feeds the yeast and aids in browning, you could experiment with a tablespoon of honey or maple syrup in place of the granulated sugar for activating the yeast, though it may slightly alter the flavor profile and browning.
- Seedless Option: If sesame or poppy seeds aren’t your favorite, simply omit them from the topping mix. The onion and salt alone make for a fantastic savory bagel.
- Sweet Bagels: If you’re in the mood for something sweeter, try omitting the savory toppings and dusting with cinnamon sugar after brushing with the egg wash.
FAQs
Q: Why are my bagels not chewy?
A: The chewiness of a bagel comes from the combination of proper kneading, boiling, and baking. Ensure you’ve kneaded the dough sufficiently until it’s elastic, and don’t skip the boiling step.
Q: My bagels spread out too much, what did I do wrong?
A: This usually happens if the dough has over-proofed, especially during the second rise, or if the ends of the bagel logs weren’t joined securely enough. Be mindful of the rising times and ensure a tight seal.
Q: Can I make these bagels without a stand mixer?
A: Absolutely! While a stand mixer with a dough hook makes kneading easier, you can achieve the same results by kneading the dough by hand on a floured surface for about 8-10 minutes until it’s smooth and elastic.
Q: How do I get my toppings to stick better?
A: The egg yolk wash is key! Apply it to the warm bagels immediately after their initial bake. Ensure you apply a generous, even coating.
Q: My bagels are too hard, what should I check?
A: Over-baking is the most common culprit for hard bagels. Make sure you are baking them until they are golden brown and sound hollow, but not excessively long. Also, ensure your oven temperature is accurate.
Final Thoughts
There’s a profound satisfaction that comes from biting into a warm, homemade bagel, knowing that you’ve created this culinary marvel yourself. These everything bagels, with their irresistible combination of chewy interior and crispy, flavorful exterior, are sure to become a staple in your baking repertoire. Serve them warm with your favorite toppings, or pile them high for a sensational breakfast sandwich. Gather your ingredients, embrace the process, and get ready to impress yourself – and anyone lucky enough to share them with you. Happy baking!