
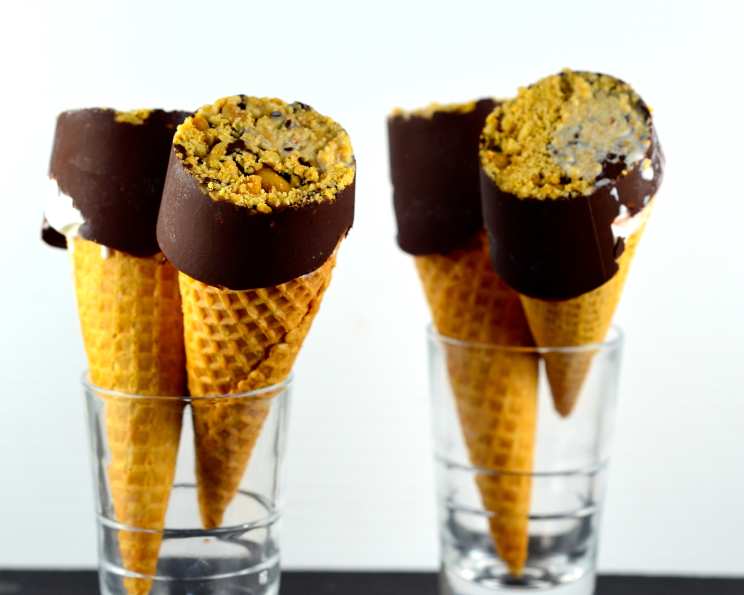
The Sweet Symphony of Childhood: Recreating Ice Cream Drumsticks (Copycat)
I still remember the sheer, unadulterated joy that surged through me as the familiar jingle of the ice cream truck echoed down my street. While the colorful popsicles and creamy bars were tempting, my heart (and stomach) belonged to a very specific treat: the Peanut Sundae Cone. That iconic combination of crunchy cone, rich chocolate, salty peanuts, and cool vanilla ice cream was pure magic. Recreating that nostalgic experience at home has been a delightful culinary adventure, and I’m thrilled to share this copycat recipe that captures every bit of that childhood bliss.
Recipe Overview
- Prep Time: 15 minutes
- Cook Time: 0 minutes (Freezing Time Included)
- Total Time: 3 hours 15 minutes
- Servings: 12
- Yield: 12 Ice Cream Drumsticks
- Dietary Type: Customizable (Standard recipe contains dairy and nuts)
Ingredients
This recipe is delightfully straightforward, relying on a few key components to deliver that signature taste and texture.
- 12 sugar ice cream cones
- 1 quart vanilla ice cream
- 1 cup chopped nuts (peanuts are traditional and highly recommended for that classic flavor)
- 1 cup chocolate chips (semi-sweet or dark work beautifully)
- 2 tablespoons shortening
Equipment Needed
The beauty of this recipe lies in its simplicity, requiring minimal specialized equipment.
- Microwave-safe bowl (for melting chocolate)
- Spatula
- 12 paper cups (standard size, like Dixie cups)
- Freezer
Instructions
The process is a delightful assembly line, culminating in a glorious freeze that transforms simple ingredients into a beloved frozen treat.
-
Begin by preparing your molds. Into each of the 12 paper cups, place 1 teaspoon of chopped nuts. Ensure the nuts are distributed evenly at the bottom of each cup.
-
Next, prepare the chocolate coating. In a microwave-safe bowl, combine the chocolate chips and shortening. Heat this mixture on high power for 1 minute.
-
Carefully remove the bowl from the microwave. Stir the chocolate and shortening until it is smooth and completely melted. If any stubborn chocolate bits remain, return the bowl to the microwave for 10-second intervals, stirring well after each interval, until fully melted and smooth.
-
Once your chocolate coating is perfectly smooth, stir the remaining chopped nuts into the chocolate mixture. This will ensure every bite has that delightful chocolate-nutty crunch.
-
Now, it’s time to coat the inside of your paper cups. Spoon 2 teaspoons of the chocolate nut mixture into each paper cup. Using a spatula, smooth the chocolate mixture about halfway up the sides of each cup. This creates the iconic crunchy chocolate shell that lines the inside of the cone. If necessary, you can gently tilt the cup to help the chocolate spread evenly.
-
Prepare your ice cream cones. Take one sugar ice cream cone and scoop one portion of vanilla ice cream into it. Gently press the ice cream down with the back of your spoon to ensure it’s compact and fills the cone well, without overflowing.
-
Invert the prepared cone, ice cream side down, directly into one of the paper cups that you have already lined with the chocolate nut mixture. The ice cream will rest against the chocolate lining.
-
Repeat this process with all the remaining ice cream cones and vanilla ice cream, inverting each into its prepared paper cup. You should have 12 fully assembled ice cream drumsticks ready for their chilly transformation.
-
Carefully place all the assembled ice cream drumsticks into your freezer. Ensure they are positioned cone side up. Freeze for 3 to 4 hours, or until the ice cream is completely firm. This extended freezing time is crucial for achieving the perfect texture and structure.
-
To serve, simply peel off the paper cup from each frozen cone. The chocolate lining should have hardened, creating a delightful shell around the ice cream.
Expert Tips & Tricks
- Ice Cream Softening: For easier scooping and to ensure the ice cream packs well into the cone, let the vanilla ice cream sit at room temperature for about 5-10 minutes before scooping. Be careful not to let it get too soft.
- Perfect Chocolate Coating: Achieving a smooth, luscious chocolate coating is key. If your microwave isn’t consistent, a double boiler method on the stovetop can also be used to melt the chocolate chips and shortening.
- Nut Choice: While peanuts are the classic, feel free to experiment with other finely chopped nuts like almonds or pecans for a slightly different flavor profile. Just ensure they are finely chopped so they are evenly distributed within the chocolate.
- Cone Choice: Sugar cones provide that distinct crunch and sweetness. Waffle cones can also be used, but they are more delicate.
- Freezer Space: Make sure you have enough flat space in your freezer to accommodate all 12 ice cream drumsticks upright without them tipping over during the freezing process.
Serving & Storage Suggestions
These homemade ice cream drumsticks are best served immediately after unmolding. The beauty of them is that they are a complete, self-contained dessert. You can present them on a platter, perhaps with a light dusting of cocoa powder or a few extra chopped nuts scattered around for a touch of elegance.
Should you find yourself with any leftovers (which is unlikely!), they can be stored back in the freezer. Wrap each drumstick individually in plastic wrap or place them in an airtight container. They will keep well in the freezer for up to 1-2 weeks, though the cone may lose some of its initial crispness over time. To enjoy a stored drumstick, allow it to sit at room temperature for just a minute or two before eating.
Nutritional Information
Here’s an estimated nutritional breakdown per serving (per drumstick). Please note that these values can vary based on the specific brands of ingredients used.
| Nutrient | Amount per Serving | % Daily Value |
|---|---|---|
| Calories | 285.1 kcal | – |
| Calories from Fat | 156 kcal | – |
| Total Fat | 17.4 g | 26% |
| Saturated Fat | 6.8 g | 34% |
| Cholesterol | 19.4 mg | 6% |
| Sodium | 138.2 mg | 5% |
| Total Carbohydrate | 30.6 g | 10% |
| Dietary Fiber | 2.3 g | 9% |
| Sugars | 20.1 g | 80% |
| Protein | 4.9 g | 9% |
(Note: Daily values are based on a 2,000 calorie diet.)
Variations & Substitutions
- Chocolate Lover’s Dream: Use dark chocolate chips for a more intense chocolate flavor, or milk chocolate chips for a sweeter experience. You can also add a teaspoon of instant coffee granules to the melting chocolate for a mocha twist.
- Nut-Free Option: If you need to avoid nuts, simply omit them from the recipe. The chocolate shell will still be delicious. For added texture, consider finely crushed pretzel pieces.
- Different Ice Cream Flavors: While vanilla is classic, feel free to use your favorite ice cream flavor! Chocolate, strawberry, or even a swirl ice cream would be delightful.
- Spiced Chocolate: Add a pinch of cinnamon or a tiny whisper of cayenne pepper to the melting chocolate for a subtle, warming kick.
FAQs (Frequently Asked Questions)
Q: Can I use different types of cones?
A: Yes, while sugar cones are traditional, waffle cones can also be used, but they are more delicate.
Q: How long does the chocolate coating need to set?
A: The chocolate coating sets as it freezes. The key is to ensure adequate freezing time for the entire drumstick.
Q: What if my chocolate seizes up while melting?
A: Chocolate can seize if it comes into contact with even a tiny amount of moisture. If this happens, try stirring in a teaspoon of vegetable oil or an additional teaspoon of shortening to help smooth it out.
Q: Can I make these vegan?
A: To make these vegan, you would need to use vegan vanilla ice cream, vegan chocolate chips, and a plant-based shortening, ensuring all components are dairy-free.
Q: Why do I need to put them cone-side up in the freezer?
A: Freezing them cone-side up helps the ice cream maintain its shape and prevents it from sliding out of the cone as it freezes solid.
Final Thoughts
There’s a unique satisfaction that comes from recreating a childhood favorite with your own hands. These homemade Ice Cream Drumsticks are more than just a dessert; they’re a portable piece of joy, a sweet reminder of carefree days, and a testament to the simple pleasures that endure. I encourage you to gather your ingredients, embrace the process, and share these delightful treats with loved ones. Whether it’s a backyard barbecue or a quiet afternoon treat, these copycat drumsticks are sure to bring smiles and happy memories. Enjoy every crunchy, creamy, chocolatey bite!