
Kittencal’s Sub/Sandwich Buns: Crafting the Perfect Foundation for Your Favorite Fillings
There’s a certain magic that happens when dough transforms, rising from humble beginnings into something truly special. I remember the first time I encountered Kittencal’s Sub/Sandwich Buns. It was a rainy Saturday, and the aroma of baking bread, warm and comforting, filled my small kitchen. These weren’t just any buns; they had a chew, a slight crispness on the outside, and a tenderness within that made them the ideal vessel for everything from thinly sliced roast beef with sharp cheddar to a vibrant vegetarian medley. The dough itself, as the recipe rightly notes, is an absolute joy to work with – pliable, responsive, and forgiving, a true testament to the baker’s art.
Recipe Overview
- Prep Time: 15 minutes
- Cook Time: 22-25 minutes
- Total Time: Approximately 3 hours 25 minutes (including rising time)
- Servings: 6 large buns
- Yields: 6 large buns
- Dietary Type: Vegetarian
Ingredients
This recipe yields wonderfully soft and slightly chewy buns, perfect for any sandwich creation. The use of milk and shortening contributes to their rich texture and tender crumb.
- ¾ cup warm water
- 1 teaspoon sugar
- 2 tablespoons dry yeast (using 2 tablespoons is recommended, though 1¾ tablespoons will also work)
- ¼ cup Crisco shortening, melted
- 1 cup full-fat milk
- 1½ teaspoons salt (you can reduce this to 1 teaspoon if preferred)
- 3 tablespoons sugar
- 4 cups all-purpose flour (plus more as needed for dusting and kneading)
Optional addition:
- 1 teaspoon malt powder (this is optional but is said to improve flavor and texture, working in harmony with the yeast)
Equipment Needed
- Heavy-duty stand mixer with a kneader attachment (or a large mixing bowl and strong arms for hand-kneading)
- Measuring cups and spoons
- Microwave or stovetop for warming liquids and melting shortening
- Large mixing bowl (for dough rising)
- Clean tea towel or plastic wrap
- Baking sheet
- Cornmeal or cooking spray (for preparing the baking sheet)
- Oven
- Wire cooling rack
- Pastry brush (optional, for egg wash)
Instructions
Crafting these sub buns is a rewarding process, and the patience required for the rising times is amply rewarded with the final product.
- Begin by preparing your stand mixer. Fit it with a kneader attachment. Into the mixer bowl, place approximately 3½ cups of all-purpose flour.
- Melt the Crisco shortening in the microwave until it is in a liquid state. Add this melted shortening to the bowl containing the flour.
- In a measuring cup, combine 1 cup of full-fat milk with 4 tablespoons of sugar and the 1½ teaspoons of salt. Heat this mixture until it is quite warm (but not boiling) in the microwave, stirring to ensure the sugar and salt dissolve completely.
- Pour the warm milk mixture into the bowl with the melted shortening and flour. Cover the bowl with a clean towel to help keep the ingredients warm, which is beneficial for the yeast activity.
- In a separate small bowl or cup, proof the yeast. Combine the ¾ cup of warm water with 1 teaspoon of sugar. Let this mixture stand for about 8 to 10 minutes, or until it becomes visibly foamy. This indicates that the yeast is active and ready to work.
- Once the yeast has been proofed, carefully pour it into the mixer bowl with the other ingredients. Begin kneading the dough on a low speed for about 3 to 4 minutes. As the dough begins to come together, gradually add more flour as needed. The goal is to achieve a soft, semi-sticky dough. Continue kneading for an additional 8 minutes, or until the dough is smooth and elastic.
- Transfer the kneaded dough onto a very lightly floured counter or board. Cover it with a clean tea towel and let it rest for 5 to 10 minutes. This brief resting period makes the dough more manageable for shaping.
- Prepare a large mixing bowl by greasing it. Place the rested dough into the greased bowl, turning it to coat. Cover the bowl tightly with a towel or plastic wrap and allow it to rise in a warm place for about 50 to 60 minutes. Due to the generous amount of yeast used, this dough typically rises more quickly than standard bread doughs.
- Once the dough has doubled in size, gently punch it down to release the trapped air.
- Divide the dough into pieces. The recipe suggests cutting it into 6 pieces for large buns. Shape each piece into a large ball.
- Allow the dough balls to rest for about 4 minutes. This short pause will make shaping them into their final form much easier.
- Shape the dough balls into your desired length for the sub buns. Aim for a uniform shape to ensure even baking.
- Prepare your baking sheet. Sprinkle a large cookie/baking sheet with cornmeal or lightly grease it with cooking spray. This prevents the buns from sticking.
- Carefully place the shaped dough pieces onto the prepared baking sheet. Gently reshape them if necessary to ensure they have consistent lengths.
- Cover the baking sheet with a towel or plastic wrap and allow the shaped buns to rise again for about 25 minutes, or until they have doubled in size.
- While the buns are undergoing their second rise, preheat your oven to 375 degrees Fahrenheit (190 degrees Celsius).
- Once the buns have risen and the oven is preheated, it’s time to bake. Place the baking sheet in the oven and bake for approximately 22 to 25 minutes. The buns are ready when they are a dark golden brown color.
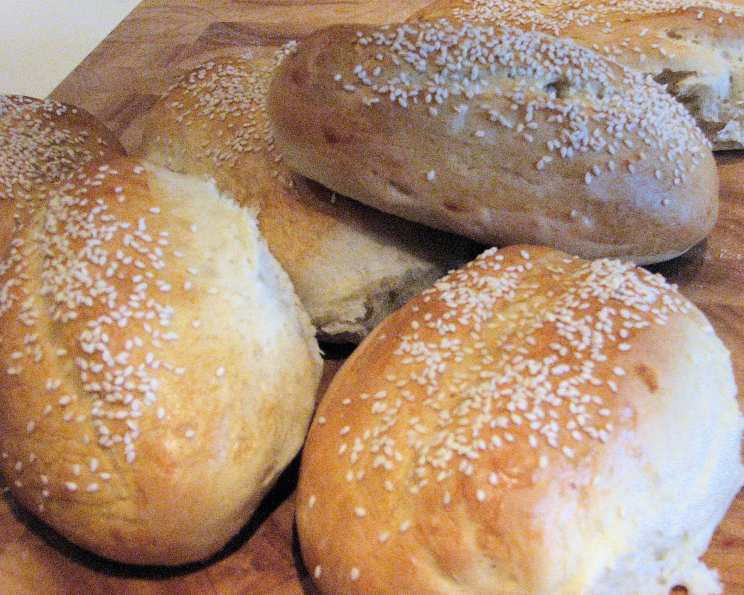
- Optional step for enhanced appearance: If desired, after the second rising and just before baking, you can create an egg wash. Beat one egg white with 1 teaspoon of cold water. Brush this mixture lightly over the tops of the buns. For an added touch, sprinkle sesame seeds over the egg wash.
Expert Tips & Tricks
- Yeast Activation: Don’t skip the yeast proofing step! It’s your assurance that the yeast is alive and ready to make your buns light and airy. If it doesn’t foam, your yeast might be old, and you’ll need to start over with fresh yeast.
- Dough Consistency: The “soft semi-sticky” description is key. Resist the urge to add too much extra flour during kneading. A slightly sticky dough, when properly kneaded, will result in a wonderfully tender crumb. The dough will become less sticky as it develops gluten.
- Warm Rising Environment: Find the warmest spot in your kitchen for the dough to rise. An oven with just the pilot light on (or turned off after being heated briefly) can be an excellent, consistent environment.
- Shaping for Uniformity: When shaping your buns, try to make them as uniform in length and thickness as possible. This ensures that all buns bake at the same rate, preventing some from being overdone while others are undercooked.
- Cornmeal Magic: Sprinkling the baking sheet with cornmeal not only prevents sticking but also adds a subtle rustic texture and flavor to the bottom crust of the buns.
Serving & Storage Suggestions
These sub buns are best enjoyed fresh, still slightly warm from the oven, their aroma a testament to your baking prowess. Slice them horizontally and fill them generously with your favorite deli meats, cheeses, fresh vegetables, or spreads.
For storage, allow the baked buns to cool completely on a wire rack. Once cooled, they can be stored in a paper bag or bread box at room temperature for 1 to 2 days. For longer storage, wrap them tightly in plastic wrap and then in aluminum foil, or place them in a freezer-safe bag. They will keep well in the freezer for up to 3 months.
To reheat frozen buns, remove them from their packaging and bake at 350°F (175°C) for 10-15 minutes, or until heated through and the crust is refreshed. You can also lightly toast them in a toaster oven or on a stovetop.
Nutritional Information
| Nutrient | Amount per Serving | % Daily Value |
|---|---|---|
| Calories | 443.7 kcal | N/A |
| Calories from Fat | 11 g | 16% |
| Saturated Fat | 3.1 g | 15% |
| Cholesterol | 4.1 mg | 1% |
| Sodium | 603.5 mg | 25% |
| Total Carbohydrate | 74.2 g | 24% |
| Dietary Fiber | 3.3 g | 13% |
| Sugars | 9.3 g | 37% |
| Protein | 11.5 g | 23% |
Note: Nutritional information is an estimate and can vary based on specific ingredients used and portion sizes.
Variations & Substitutions
- Whole Wheat Twist: For a slightly nuttier flavor and added fiber, substitute up to 1 cup of the all-purpose flour with whole wheat flour. You may need to adjust the liquid slightly as whole wheat flour can absorb more moisture.
- Herbal Infusion: Incorporate dried herbs such as rosemary, thyme, or Italian seasoning directly into the dry ingredients for a savory bread.
- Seed Topping: Beyond sesame seeds, consider poppy seeds, caraway seeds, or a mix of everything bagel seasoning for a more complex flavor profile and visual appeal.
- Sweet Swirl: For a subtly sweet bun, you can increase the sugar in the dough to 5 tablespoons and reduce the salt to 1 teaspoon.
FAQs
Q: Why is my dough not rising properly?
A: This can be due to inactive yeast, water that was too hot or too cold, or a cool rising environment. Ensure your yeast is fresh and proofed correctly, and place the dough in a consistently warm spot.
Q: Can I use bread flour instead of all-purpose flour?
A: Yes, bread flour can be used and will result in a chewier texture due to its higher gluten content. You might need to adjust the flour quantity slightly.
Q: How can I make these buns vegan?
A: The current recipe uses milk and shortening. You can substitute the milk with a plant-based milk like almond or soy milk and use a vegan butter alternative or coconut oil instead of Crisco shortening.
Q: My buns are browning too quickly on the outside but aren’t cooked through. What should I do?
A: If your oven tends to run hot, you can tent the buns loosely with aluminum foil during the last 5-10 minutes of baking to prevent excessive browning while allowing the inside to cook fully.
Q: Can I freeze the dough before the first rise?
A: Yes, this dough freezes well after the first rise. Punch it down, shape it into a ball, wrap it tightly, and freeze. Thaw it in the refrigerator overnight, then let it come to room temperature and proceed with the recipe.
Final Thoughts
The beauty of Kittencal’s Sub/Sandwich Buns lies in their versatility. They are more than just a carrier for fillings; they are a cornerstone of a great meal, a testament to the simple pleasure of homemade bread. Whether you’re assembling a hearty grinder, a delicate banh mi, or a classic club sandwich, these buns provide the perfect, tender, and slightly chewy foundation. So, gather your ingredients, embrace the process, and savor the aroma that will soon fill your home. You might find yourself reaching for this recipe time and time again, creating your own delicious memories, one sandwich at a time. They pair wonderfully with a crisp, cold salad or a hearty bowl of soup for a complete and satisfying meal.