
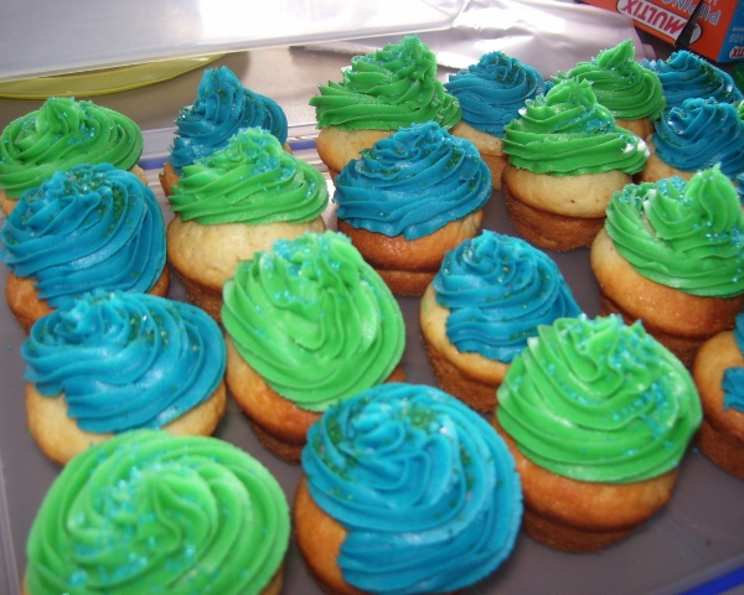
The Cloud-Like Delight: Yogurt Vanilla Cupcakes with Luscious Chocolate Frosting
There are certain recipes that, when you first taste them, transport you back to a specific moment, a feeling, a cherished memory. For me, these Yogurt Vanilla Cupcakes with Chocolate Frosting are precisely that. I remember my grandmother, a woman whose kitchen was a perpetual haven of warmth and delicious aromas, baking these for my birthday when I was a child. The scent of vanilla and baking cake would fill the entire house, a promise of the pure joy that was about to unfold. What always struck me was how incredibly tender and moist they were, a testament to the magic of yogurt in baking, and that rich, velvety chocolate frosting was the perfect, decadent crowning glory.
Recipe Overview
- Prep Time: 25 minutes
- Cook Time: 20-25 minutes
- Total Time: 45-50 minutes
- Servings: 12-14 cupcakes
- Yield: 12-14 cupcakes
- Dietary Type: Contains Dairy, Gluten, Eggs
Ingredients
For the Chocolate Frosting:
- 1/3 cup sugar
- 1/4 cup unsweetened cocoa powder
- 1/3 cup skim milk
- 1 teaspoon vanilla extract
- 1/3 cup chocolate chips (semi-sweet or milk chocolate work beautifully)
For the Yogurt Vanilla Cupcakes:
- 2 1/2 cups all-purpose flour
- 1 teaspoon baking powder
- 1/2 teaspoon baking soda
- 1/2 teaspoon salt
- 4 tablespoons unsalted butter, softened
- 1 cup granulated sugar
- 2 large eggs
- 1 teaspoon vanilla extract
- 1 cup nonfat yogurt (plain is best, Greek yogurt will yield a slightly denser cake but is also delicious)
Equipment Needed
To create these delightful treats, you’ll want to have on hand:
- A medium saucepan for the frosting.
- A whisk and a stirring utensil for the frosting.
- A medium bowl for dry ingredients.
- A large bowl for wet ingredients and combining the batter.
- An electric mixer (handheld or stand mixer) is highly recommended for creaming butter and sugar.
- Measuring cups and spoons.
- A muffin tin.
- Cupcake liners (or you can grease and flour the muffin tin directly).
- A cooling rack.
- A toothpick or cake tester to check for doneness.
Instructions
Let’s begin with the frosting, as it needs time to cool to the perfect consistency for spreading.
- In a medium saucepan, combine the sugar and unsweetened cocoa powder. Stir them together thoroughly to ensure there are no lumps of cocoa.
- Add half of the skim milk to the saucepan, stirring constantly until the mixture is smoothly blended.
- Pour in the rest of the skim milk, continuing to stir until everything is well incorporated.
- Place the saucepan over medium heat. Bring the mixture to a gentle boil, stirring continuously to prevent scorching.
- Once it begins to boil, lower the heat and let it simmer for 3 minutes, still stirring. This simmering process helps thicken the frosting and meld the flavors.
- Remove the saucepan from the heat. Allow it to cool for 3 minutes.
- Add the vanilla extract and the chocolate chips to the warm frosting. Stir gently until the chocolate chips are completely dissolved and the frosting is smooth and glossy.
- Let the frosting cool at room temperature. If you’re not using it immediately, you can cover it and refrigerate it for future use. If refrigerated, it will need to come back to room temperature and be stirred to achieve a spreadable consistency.
Now, for the star of the show, the Yogurt Vanilla Cupcakes:
- Begin by preheating your oven to 350 degrees Fahrenheit (175 degrees Celsius). Line your muffin tin with cupcake liners or prepare to grease and flour the cups.
- In a medium bowl, whisk together the flour, baking powder, baking soda, and salt. Set this dry mixture aside.
- In a large bowl, cream together the softened butter and granulated sugar using your electric mixer until the mixture is light, fluffy, and well blended. This usually takes a few minutes.
- Add the eggs to the butter and sugar mixture, one at a time, beating well after each addition. This ensures they are fully incorporated.
- Stir in the vanilla extract.
- Now, you will gradually add the dry ingredients and the yogurt to the butter/sugar/egg mixture. Alternate adding portions of the flour mixture and the yogurt, beginning and ending with the flour mixture. Mix on low speed or by hand just until each addition is incorporated. Be careful not to overmix the batter, as this can lead to tough cupcakes.
- Fill your prepared muffin molds about 2/3 full with the batter. This allows room for the cupcakes to rise without overflowing.
- Bake for approximately 20 minutes, or until a toothpick inserted into the center of a cupcake passes the clean toothpick test. This means the toothpick comes out free of wet batter. Ovens can vary, so keep an eye on them towards the end of the baking time.
- Once baked, remove the cupcakes from the muffin tin immediately and place them on a cooling rack to cool completely before frosting.
Once the cupcakes are entirely cool, it’s time for the final, joyous step: frosting!
- To frost, take one cooled cupcake. Hold it upside-down directly over your bowl of cooled chocolate frosting.
- Gently dunk the top of the cupcake into the frosting, and with a slight twist as you pull it out, you’ll achieve a beautiful, rustic swirl of frosting. Repeat with all your cupcakes.
Expert Tips & Tricks
- Room Temperature is Key: Ensure your butter, eggs, and yogurt are all at room temperature before you begin. This allows them to emulsify properly, creating a smoother batter and a more tender cupcake. Cold ingredients can lead to a greasy texture or a curdled batter.
- Don’t Overmix: I can’t stress this enough! Once you add the flour, mix only until the ingredients are just combined. Overmixing develops the gluten too much, resulting in tough, dense cupcakes instead of the light, airy texture we’re aiming for.
- Yogurt Choices: While nonfat plain yogurt is specified, you can experiment. Greek yogurt will yield a richer, denser cake, which some people prefer. Full-fat yogurt will also contribute to a richer texture. Just ensure it’s plain and unsweetened.
- Frosting Consistency: If your chocolate frosting seems too thick after cooling, you can whisk in a tiny bit more milk, a teaspoon at a time, until it reaches a spreadable consistency. If it’s too thin, gently reheat it over very low heat and stir in a tablespoon of powdered sugar at a time until it thickens slightly.
- Make-Ahead Frosting: The chocolate frosting can be made up to 3 days in advance and stored in an airtight container in the refrigerator. Let it come to room temperature and give it a good stir before using.
Serving & Storage Suggestions
These Yogurt Vanilla Cupcakes are best served at room temperature, allowing their full flavor and tender texture to shine. They make a delightful accompaniment to a cup of coffee or a tall glass of cold milk. For an extra touch, a sprinkle of sea salt flakes on top of the chocolate frosting can be a sophisticated counterpoint to the sweetness.
Leftovers can be stored in an airtight container. At room temperature, they will remain fresh for 2-3 days. If the weather is particularly warm or humid, it’s best to store them in the refrigerator for up to 5 days. When refrigerating, allow them to come back to room temperature before serving for optimal texture. These cupcakes also freeze beautifully; wrap them tightly in plastic wrap and then in foil, and they can be stored in the freezer for up to 2 months. Thaw overnight in the refrigerator.
Nutritional Information
Here is an estimated nutritional breakdown per cupcake, assuming 14 servings:
| Nutrient | Amount per Serving | % Daily Value |
|---|---|---|
| Calories | 270 kcal | 14% |
| Total Fat | 7 g | 9% |
| Saturated Fat | 4 g | 20% |
| Cholesterol | 42 mg | 14% |
| Sodium | 247 mg | 11% |
| Total Carbohydrate | 48 g | 17% |
| Dietary Fiber | 2 g | 7% |
| Sugars | 27 g | 54% |
| Protein | 6 g | 12% |
Nutritional values are estimates and may vary based on specific ingredients used.
Variations & Substitutions
- Citrus Zest: For a brighter vanilla flavor, add the zest of one lemon or orange to the cupcake batter along with the vanilla extract.
- Chocolate Chip Swirl: Fold in an additional 1/2 cup of chocolate chips into the batter for extra bursts of chocolate.
- Coffee Kick: Replace 1/4 cup of the skim milk in the frosting with strong brewed coffee for a mocha-inspired frosting.
- Nutty Crunch: For the frosting, consider adding a tablespoon of instant espresso powder to deepen the chocolate flavor.
FAQs (Frequently Asked Questions)
Q: Why are my cupcakes dry?
A: Dry cupcakes are often a result of overmixing the batter or baking them for too long. Be sure to mix only until the ingredients are just combined and keep a close eye on them in the oven, removing them as soon as a toothpick comes out clean.
Q: Can I use Greek yogurt instead of nonfat yogurt?
A: Yes, you absolutely can! Greek yogurt will result in a slightly denser and richer cupcake due to its higher fat and protein content, which can be a wonderful variation.
Q: My frosting is too thick. What can I do?
A: Gently reheat the frosting over very low heat and stir in a teaspoon of milk at a time until it reaches a smooth, spreadable consistency. Be careful not to overheat it.
Q: How can I achieve a smoother frosting for a more polished look?
A: For a smoother finish, you can use an offset spatula to carefully spread the frosting. Alternatively, you can beat the frosting with an electric mixer for a minute or two to incorporate more air, making it lighter and easier to spread smoothly.
Q: Can I make these cupcakes gluten-free?
A: To make these gluten-free, you would need to experiment with a gluten-free all-purpose flour blend that contains a binder like xanthan gum. The texture might vary slightly from the original recipe.
Final Thoughts
These Yogurt Vanilla Cupcakes with Chocolate Frosting are more than just a dessert; they’re a comforting embrace, a sweet memory in every bite. They strike that perfect balance – moist, tender cake that’s not overly sweet, crowned with a rich, deeply chocolatey frosting that’s surprisingly easy to master. Whether you’re baking for a special occasion or just because, I encourage you to bring this simple yet extraordinary recipe into your kitchen. Share them with loved ones, savor each mouthful, and perhaps, create a new cherished memory of your own. I’d love to hear how they turn out for you!