
The Food Processor Wonder: James Beard’s Home-Style Bread, Reimagined
There are certain breads that just feel like coming home – the kind with a comforting aroma that fills the kitchen and a crust that crackles just so when you slice into it. When I first encountered the idea of adapting James Beard’s home-style bread recipe to the efficiency of a food processor, it felt like unlocking a secret shortcut to that very feeling. I remember one chilly autumn afternoon, the kind where the wind whispers secrets through the bare branches, I decided to put this method to the test. The whirring of the food processor was a modern counterpoint to the rustic promise of the dough, and within what felt like a remarkably short time, a golden loaf emerged, echoing the timeless charm of Beard’s original.
Recipe Overview
- Prep Time: 15 minutes
- Cook Time: 30 minutes
- Total Time: 45 minutes
- Servings: 12
- Yield: 1 loaf
- Dietary Type: Vegetarian
Ingredients
This recipe is wonderfully straightforward, relying on pantry staples to create a truly satisfying loaf.
- 1 tablespoon active dry yeast
- 1 cup warm milk (around 105-115°F or 40-46°C)
- 1 tablespoon honey
- 20 grams butter, melted (about 1.5 tablespoons)
- 3/4 teaspoon salt
- 3 cups all-purpose flour, plus more for dusting
Equipment Needed
While a food processor is the star here, a few other essentials will ensure success:
- Food processor (with a dough blade if you have one, otherwise the standard blade will work)
- Measuring cups and spoons
- Small bowl (for proofing yeast)
- Clean kitchen towel
- Baking sheet or loaf pan
- Cooling rack
Instructions
The beauty of this recipe lies in its speed and simplicity, thanks to the magic of the food processor.
- Begin by proofing the yeast. In the bowl of your food processor, combine the warm milk, honey, and active dry yeast. Let this mixture sit for about 5-10 minutes. You’ll know the yeast is active when it becomes foamy and bubbly on the surface. If it doesn’t foam, your yeast may be old or the milk wasn’t the right temperature, and you’ll need to start again with fresh yeast.
- While the yeast is proofing, mix together the dry ingredients. In a separate small bowl, whisk together the salt and flour.
- Once the yeast mixture is foamy, add the melted butter to the food processor bowl.
- Now, incorporate the flour mixture. Add 1 cup of the flour and salt mixture to the food processor. Pulse a few times to begin combining.
- Gradually add the remaining flour mixture, 1 cup at a time, pulsing after each addition. Continue processing until all the flour is incorporated and a shaggy dough begins to form. You might need to stop the processor and scrape down the sides of the bowl once or twice to ensure everything is evenly mixed.
- Knead the dough in the food processor. Once all the flour is incorporated, continue to mix the dough using the food processor for another 3 minutes. This process mimics kneading, developing the gluten structure that gives bread its characteristic chew and rise. The dough should start to pull away from the sides of the bowl and become smoother and more elastic.
- Shape the dough. Transfer the dough to a lightly floured surface. Gently shape it into a round or oblong loaf, depending on how you plan to bake it.
- Let the dough rise. Place the shaped dough onto a lightly greased baking sheet or into a greased loaf pan. Cover the dough loosely with a clean kitchen towel and let it rise in a warm place for about 1 to 1.5 hours, or until it has doubled in size. The exact time will depend on the warmth of your kitchen.
- Preheat your oven. About 20 minutes before the dough is finished rising, preheat your oven to 375°F (190°C).
- Bake the bread. Once the dough has risen, place the baking sheet or loaf pan in the preheated oven. Bake for approximately 30 minutes, or until the crust is a deep golden brown and the internal temperature of the bread reaches about 200-210°F (93-99°C) when tested with an instant-read thermometer. You can also tap the bottom of the loaf; it should sound hollow.
- Cool the bread. Carefully remove the bread from the oven and transfer it to a wire cooling rack. Allow it to cool completely before slicing. This is crucial for the texture and crumb to set properly.
Expert Tips & Tricks
Mastering even simple breads has its nuances, and a few chef-level insights can elevate this food processor loaf from good to spectacular.
- Flour Power: The amount of flour can vary slightly depending on humidity. If the dough feels too sticky after the initial mixing, add a tablespoon of flour at a time during the 3-minute food processor kneading. Conversely, if it seems too dry and isn’t coming together, a tiny splash of milk can help.
- Yeast Vitality: Always check the expiry date on your yeast. A simple test involves dissolving it in warm water with a pinch of sugar. If it bubbles within 5-10 minutes, it’s active and ready to go.
- The ‘Warm Place’: For a perfect rise, find a cozy spot for your dough. This could be in a slightly warmed oven (turned off, of course!), near a sunny window, or even on top of a gently running appliance like a dishwasher.
- Crust Control: For a chewier crust, you can create steam in your oven. Place a shallow pan of water on the bottom rack as the oven preheats. Remove it just before baking. For a softer crust, you can lightly brush the top with melted butter or milk right after it comes out of the oven.
Serving & Storage Suggestions
This home-style bread is incredibly versatile, making it a perfect companion to so many meals.
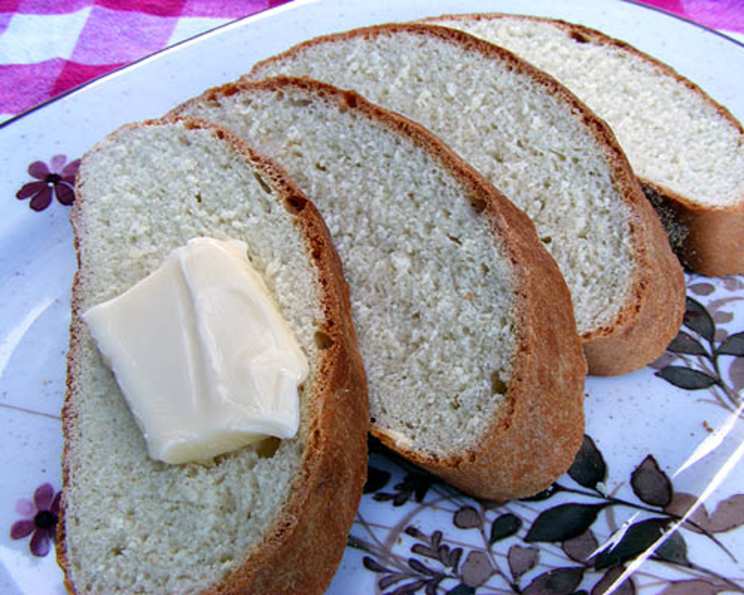
Serve slices warm, perhaps with a generous smear of good quality butter or your favorite jam. It’s also fantastic for toast, croutons, or as the foundation for hearty sandwiches.
Leftovers can be stored at room temperature, wrapped tightly in plastic wrap or placed in an airtight container, for 2-3 days. For longer storage, slice the cooled loaf and freeze it in a freezer-safe bag. It will keep well for up to 3 months. To reheat, you can simply toast individual slices or gently warm a whole loaf in a low oven.
Nutritional Information
Here’s an approximate breakdown of the nutritional content per serving, based on 12 servings:
| Nutrient | Amount per Serving | % Daily Value |
|---|---|---|
| Calories | 147 | 7% |
| Total Fat | 2.4g | 3% |
| Saturated Fat | 1.4g | 6% |
| Cholesterol | 6.4mg | 2% |
| Sodium | 166mg | 6% |
| Total Carbohydrate | 26.6g | 8% |
| Dietary Fiber | 1.1g | 4% |
| Sugars | 1.5g | 6% |
| Protein | 4.3g | 8% |
Note: Nutritional values are estimates and can vary based on specific ingredients and brands used.
Variations & Substitutions
While this recipe is wonderful as is, it’s also a fantastic canvas for creativity.
- Whole Wheat Twist: Substitute 1 cup of the all-purpose flour with whole wheat flour for a nuttier flavor and increased fiber. You might need to add a touch more liquid.
- Herbaceous Delight: Add 1-2 tablespoons of dried herbs like rosemary, thyme, or Italian seasoning to the flour mixture for an aromatic bread.
- Seed Inclusion: Mix in 1/4 cup of seeds such as poppy seeds, sesame seeds, or sunflower seeds into the dough during the final minute of processing for added texture and flavor.
- Dairy-Free Option: Replace the warm milk with unsweetened plant-based milk (like almond or soy) and use a dairy-free butter substitute.
FAQs
Q: Can I use instant yeast instead of active dry yeast?
A: Yes, you can use instant yeast. If you do, you can skip the proofing step and add it directly to the dry ingredients with the flour, salt, and sugar.
Q: My dough seems too sticky. What should I do?
A: Add flour gradually, one tablespoon at a time, to the food processor while it’s running until the dough starts to pull away from the sides of the bowl.
Q: How do I know when the bread is fully baked?
A: The crust should be a deep golden brown. A simple test is to tap the bottom of the loaf; it should sound hollow. For precision, use an instant-read thermometer, aiming for an internal temperature of 200-210°F (93-99°C).
Q: Can I bake this bread in a bread machine?
A: This recipe is specifically designed for a food processor. While some bread machines might adapt, the results may vary significantly. It’s best to follow the instructions for the appliance.
Q: Why does the bread need to cool completely before slicing?
A: Cooling allows the internal structure of the bread to set. Slicing too soon can result in a gummy texture and a collapsed crumb.
Final Thoughts
There’s a unique satisfaction in creating a loaf of bread from scratch, and this food processor method makes that journey incredibly accessible. It’s a testament to how thoughtful adaptation can bring classic recipes into our modern kitchens with ease. I encourage you to try this recipe, to experience the simple joy of a homemade loaf, and perhaps pair it with a robust soup or a fine cheese. Let the aroma fill your home and savor the taste of accomplishment. I’d love to hear about your baking adventures with this delicious bread!