
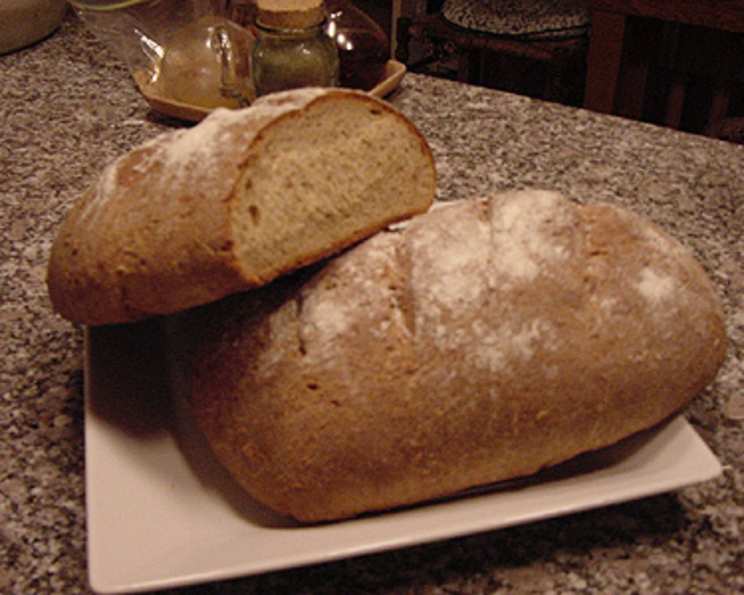
The Hearth’s Embrace: A Century of Honey Whole Wheat Bread
There are some recipes that transcend mere sustenance; they become woven into the very fabric of our lives, carrying with them the scent of memory and the warmth of home. This particular whole wheat bread, a cherished adaptation from a cookbook I’ve practically worn thin over the years, is one such treasure. It’s a bread that has graced my table through countless family gatherings, quiet mornings, and even frantic baking sessions when a small army of loaves was needed in a single day. Its enduring appeal lies in its incredible moistness, a testament to the magic of honey, and its remarkable ability to rise, time and time again, filling the kitchen with an aroma that is simply unparalleled.
Recipe Overview
- Prep Time: Approximately 30 minutes (plus 1 hour for cracked wheat softening, if using)
- Cook Time: 30-35 minutes per batch of loaves
- Total Time: Approximately 2 hours 30 minutes (including rising times)
- Servings: Makes 3 loaves
- Yield: 3 loaves
- Dietary Type: Vegetarian
Ingredients
This recipe is a celebration of simple, wholesome ingredients, brought together to create something truly special.
- 1 cup warm water (110-115 degrees Fahrenheit)
- 2 (1/4 ounce) packages fast-rising active dry yeast
- 1 cup milk, scalded and cooled to 110 degrees Fahrenheit
- 1/3 cup honey
- 1/4 cup oil (vegetable or canola oil work well)
- 2 teaspoons salt
- 2 large eggs
- 5 1/2 to 6 cups stone ground whole wheat flour
- Optional: 1/2 cup cracked wheat, softened in 1 cup hot water for 1 hour
Equipment Needed
To bring this magnificent bread to life, you’ll want to have a few key pieces of equipment at the ready:
- Electric Mixer (with a dough hook, if available)
- Large Mixing Bowls
- Measuring Cups and Spoons
- Plastic Wrap or Warm Towels
- Loaf Pans (approximately 8″ x 4″)
- Wire Cooling Rack
- Small Bowl (for melted butter)
- Pastry Brush
Instructions
Crafting this bread is a rewarding journey, a dance of simple steps that culminate in a perfect loaf.
- In the generous bowl of your electric mixer, gently dissolve the fast-rising yeast in the warm water. Allow it to sit for a few moments until it becomes foamy, a sure sign that your yeast is alive and eager to work.
- Next, add the scalded and cooled milk, honey, oil, salt, and eggs to the mixer bowl. Mix everything until it’s beautifully blended, a golden, fragrant liquid.
- Now, it’s time to introduce the heart of our bread. Add 2 1/2 cups of the stone ground whole wheat flour to the wet ingredients. Beat this mixture for a good 3 to 4 minutes. This initial beating develops the gluten and creates a wonderful “sponge” that will form the base of our light and airy loaf.
- Cover the mixer bowl snugly with plastic wrap or a clean, warm towel. Find a warm place for it to rest and rise, undisturbed, until it has doubled in bulk. This usually takes about 30 minutes, a magical transformation happening right before your eyes.
- Once the sponge has risen, mix in the remaining flour, reserving about 1/2 cup for the kneading process. At this stage, if you’re opting for the delightful texture of cracked wheat, add your pre-softened cracked wheat mixture to the dough. The dough might seem a touch stickier than what you’re accustomed to, and that’s perfectly alright. As long as your fingers don’t adhere stubbornly to the dough, you’ve achieved the right flour balance.
- Turn the dough out onto a lightly floured board or countertop. If you’re using an electric mixer, now is the perfect time to attach the dough hook. Knead the dough with vigor and care for 8 to 10 minutes. You’re aiming for a dough that is wonderfully elastic and smooth to the touch, a sign that the gluten is well-developed and ready to give you a beautiful rise.
- Grease a large bowl generously with butter. Place the kneaded dough into the buttered bowl, turning it once to ensure it’s coated. Cover the bowl again and let it rise in a warm place until it has doubled in bulk. This second rise is crucial for developing flavor and texture.
- Once the dough has risen again, it’s time for the “punch down.” Gently punch down the dough to release the accumulated air. On a lightly floured board or countertop, divide the dough into three equal portions. Shape each portion into a loaf and place them into your buttered loaf pans, which should be approximately 8″ x 4″ in size.
- Cover the loaf pans loosely and allow the dough to rise for a third time, until it has doubled in bulk. This final rise before baking is what guarantees that impressive height and light crumb.
- Preheat your oven to 375 degrees Fahrenheit. Bake the loaves for 30 to 35 minutes. The bread is ready when its crust emits a delightful hollow sound when tapped – your culinary intuition at work!
- Once baked to golden perfection, remove the loaves from their pans immediately. For an irresistible sheen and a softer crust, brush the tops with melted butter. If you prefer a delightfully soft crust, cover the warm loaves with a hot, damp towel for a few minutes; this will steam the crust and make it wonderfully tender.
Expert Tips & Tricks
With a little extra attention, you can elevate this already magnificent bread to even greater heights.
- The Magic of Warmth: Yeast is a living thing, and a warm environment is its happy place. Ensure your “warm place” for rising is not too hot (which can kill the yeast) or too cold (which will slow it down considerably). A slightly warm oven (turned off, of course) or a spot near a sunny window can work wonders.
- Flour Power: Stone ground whole wheat flour can vary in its absorption. Start with the lower end of the flour quantity and add more as needed during kneading. You’re looking for a dough that is slightly tacky but not overly sticky.
- Cracked Wheat Symphony: If you choose to add cracked wheat, remember to soak it thoroughly. This not only softens it for a more pleasant texture but also ensures it doesn’t leach moisture from the dough as it bakes.
- Scalding the Milk: While it might seem like an extra step, scalding the milk (heating it until just before boiling) denatures the proteins, which can lead to a more tender crumb in your finished loaf. Ensure it’s cooled back to the correct temperature before adding yeast to avoid killing it.
- The Tap Test: Don’t be shy with the tap test! It’s the most reliable way to gauge doneness for most baked breads. If it sounds hollow, it’s cooked through.
Serving & Storage Suggestions
This Honey Whole Wheat/Cracked Wheat Bread is a chameleon, at home in any setting. Served warm, fresh from the oven, it needs little more than a generous slathering of butter. It’s the perfect accompaniment to a hearty soup, a vibrant salad, or even as the foundation for an open-faced sandwich piled high with your favorite toppings.
For storing, allow the bread to cool completely before slicing. At room temperature, well-wrapped in plastic wrap or a bread bag, it will keep for about 3-4 days. Its honey content acts as a natural preservative, extending its freshness. If you anticipate not finishing it within that timeframe, freezing is an excellent option. Wrap individual slices or a whole loaf tightly in plastic wrap and then in foil or a freezer bag to prevent freezer burn. It can be stored in the freezer for up to 3 months. To reheat, simply toast slices from frozen or thaw a whole loaf at room temperature and then briefly warm it in the oven.
Nutritional Information
This table provides an estimated nutritional breakdown per serving, acknowledging that exact values can vary based on specific ingredients used.
| Nutrient | Amount per Serving | % Daily Value |
|---|---|---|
| Calories | 423 kcal | |
| Calories from Fat | 224 | |
| Total Fat | 24.9 g | 38% |
| Saturated Fat | 5.3 g | 26% |
| Cholesterol | 152.4 mg | 50% |
| Sodium | 1645 mg | 68% |
| Total Carbohydrate | 43.9 g | 14% |
| Dietary Fiber | 1.2 g | 5% |
| Sugars | 31.2 g | 124% |
| Protein | 10 g | 20% |
Variations & Substitutions
While this recipe is perfection in its purest form, it also offers a wonderful canvas for creativity.
- A Touch of Whiteness: If you prefer a slightly lighter crumb, you can substitute about 1 cup of the whole wheat flour with 1 cup of white bread flour. This will yield a loaf that is still hearty but with a slightly softer texture.
- Sweet Roll Magic: For an incredibly decadent treat, increase the honey by an additional 1/4 cup and reduce the flour slightly. Shape the dough into small rolls and bake them until golden. These make for divine dinner rolls or the perfect base for cinnamon rolls.
- Seeded Sensation: Incorporate a handful of your favorite seeds – sunflower, flax, or poppy seeds – into the dough during the final kneading stage for added texture and nutty flavor.
FAQs
Q: Why is the milk scalded and then cooled?
A: Scalding the milk denatures certain proteins that can interfere with gluten development, leading to a more tender crumb. Cooling it to 110°F is crucial to ensure the yeast is activated and not killed by excessive heat.
Q: My dough seems very sticky. Is that normal?
A: Yes, especially when incorporating optional cracked wheat, the dough can be stickier than you might expect. As long as your fingers don’t stick firmly to it, it likely has the correct amount of flour.
Q: How can I get a higher rise on my loaves?
A: Ensuring a warm environment for all three rises is key. Also, properly developing the gluten through kneading is essential, as is not overcrowding your loaf pans.
Q: Can I use regular active dry yeast instead of fast-rising?
A: Yes, but you will need to adjust the process. Proof the regular yeast in the warm water with a pinch of sugar for about 5-10 minutes until foamy, and expect longer rising times.
Q: What is the best way to store this bread to keep it fresh?
A: Once completely cooled, wrap the bread tightly in plastic wrap or place it in an airtight bread bag. For longer storage, freezing is highly recommended.
Final Thoughts
There’s a profound satisfaction in pulling a loaf of this Honey Whole Wheat/Cracked Wheat Bread from the oven, its aroma a comforting embrace that promises deliciousness. It’s a testament to the beauty of simple ingredients transformed by time, patience, and a touch of honeyed sweetness. I encourage you to experience the joy of baking this bread yourself. Whether you share it with loved ones or savor a quiet moment with a slice, I’m confident it will become a cherished addition to your own culinary repertoire. Pair it with a robust homemade jam or a creamy butter for a simple yet sublime pleasure. Happy baking!