
Quicker Sourdough Bread: Rustic Charm, Expedited
There’s a primal satisfaction that comes from tearing into a loaf of homemade sourdough. It’s the crackle of the crust, the airy, tangy crumb, the sheer artistry of transforming flour, water, and wild yeast into something so profoundly delicious. For years, my sourdough journey involved a dedicated, almost ritualistic approach, a patient waiting game measured in hours of fermentation and proofing. I’d find myself meticulously refreshing my starter the day before, then embarking on a six-hour preparatory dance before the dough even saw the oven. But life, as it often does, calls for flexibility. This recipe, born from necessity and a desire for that same sourdough magic without the extended timeline, has become my go-to for those moments when a craving strikes but time is less abundant. It’s about harnessing the power of a well-fed starter and a slightly adjusted process to deliver that beloved rustic loaf, ready in a fraction of the time, yet no less glorious.
Recipe Overview
- Prep Time: Approximately 30 minutes active time, plus overnight starter development
- Cook Time: 22 minutes
- Total Time: Approximately 2 hours 45 minutes active and passive rise time, plus baking
- Servings: 20 rolls
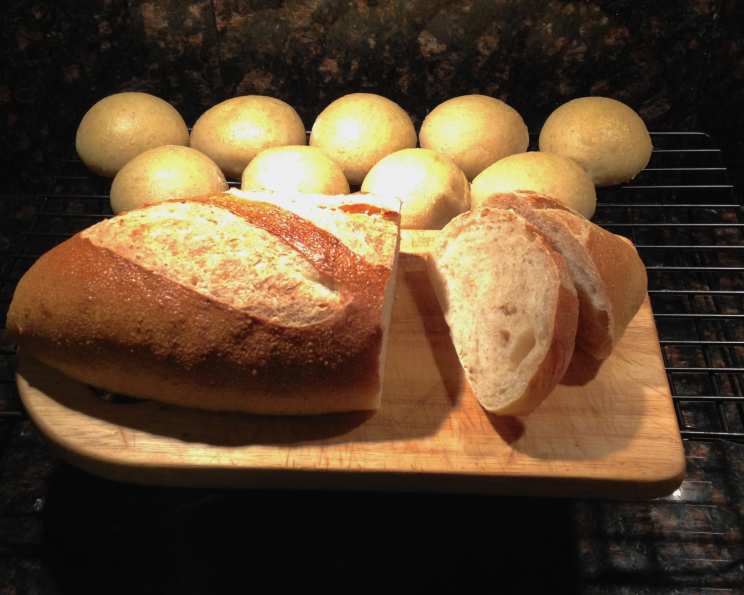
- Yield: 2 loaves (1.2 lbs each) or 20 rolls (51g each)
- Dietary Type: Vegan
Ingredients
This recipe yields two beautiful loaves, perfect for sharing (or not!). The key is a happy, active sourdough starter.
For the Starter Sponge:
- 1/3 cup sourdough starter (approximately 3 oz or 85g of active, liquid starter)
- 2 1/4 cups all-purpose flour (10.1 oz or 286g, unbleached is preferred for its protein content)
- 9 ounces (255g) water
For the Dough:
- 2 1/2 cups all-purpose flour (11.3 oz or 320g, unbleached)
- 4 ounces (113g) water
- 2 teaspoons table salt
Equipment Needed
- Large mixing bowl(s)
- Oiled plastic wrap or a tightly fitting lid for bowls
- Straight-sided container (clear ones are ideal for monitoring rise)
- Bench scraper (optional, but helpful)
- Parchment paper
- Sharp knife or razor blade (for scoring)
- Oven
- Cast iron skillet or other oven-safe pan (for steam)
- Wire cooling rack
Instructions
The beauty of this quicker approach lies in its intelligent use of time. While the starter develops overnight, your active involvement is minimal.
-
Prepare the Starter Sponge: The day before you plan to bake, or early in the morning if you have about 10 hours, combine the sourdough starter, 2 1/4 cups all-purpose flour, and 9 ounces of water in a large bowl. Mix until just combined – it will be a shaggy, rough mass. Cover the bowl with oiled plastic wrap or a lid and let it rise at a warm room temperature (around 75°F or 24°C) until it has doubled in volume. This usually takes about 10 hours.
-
Mix the Dough: Once your starter sponge is bubbly and has doubled, it’s time to make the dough. Add the 2 1/2 cups all-purpose flour and 4 ounces of water to the bowl with the risen starter sponge. Mix with your hands or a sturdy spoon until no dry flour remains. The dough will be sticky and unformed. Cover the bowl and let it rest for 20 minutes. This autolyse period allows the flour to hydrate fully, which makes kneading easier and develops gluten.
-
Incorporate the Salt and Knead: After the 20-minute rest, sprinkle the 2 teaspoons of table salt over the surface of the dough. Now, knead the dough for 4 to 5 minutes on a lightly floured surface with floured hands. The goal here is to distribute the salt evenly and begin developing the gluten structure. The dough will feel a bit sticky at first, but as you knead, it should start to become more cohesive.
-
Stretch and Fold: This technique is crucial for building strength and elasticity in the dough without intensive kneading. Lightly oil a clean, straight-sided container. Oil your hands as well. Gently stretch the dough on an oiled counter into a rough rectangle. Imagine folding a letter: fold the top third down, then the bottom third up. Then, fold the left third over, and the right third over, bringing the sides in. This creates a rough cubic package. Place this folded dough into the oiled, straight-sided container and cover it. Clear containers are ideal as they allow you to visually track the dough’s rise.
-
Continue Stretching and Folding: Repeat the stretch and fold process every 30 minutes for one or two more times. With each set of folds, you’ll notice the dough becoming smoother, silkier, and more elastic. The dough should feel taut and well-structured after these folds.
-
First Rise: Allow the dough to continue rising in its container, covered, at room temperature. It should reach about 2 hours from the time you started the initial dough mix. You’re looking for the dough to be nearly doubled in size.
-
Shape the Loaves (or Rolls): Once the dough has nearly doubled, gently tip it out onto a very lightly floured counter. Be careful not to deflate it too much. Divide the dough into 2 equal pieces for loaves, or into 20 equal pieces if making rolls (approximately 51g each). Gently form each piece into a ball or torpedo shape, depending on your desired final loaf form.
-
Proofing: Place your shaped dough pieces into floured or oiled bowls or well-floured proofing baskets (also known as bannetons), ensuring the seams are facing up. Cover each piece with oiled plastic wrap. You have two options for proofing:
- Room Temperature Proof: Let them proof at room temperature for about 45 minutes before baking.
- Overnight Refrigeration: For a more developed flavor and a more flexible baking schedule, refrigerate them overnight. These refrigerated loaves will be ready to bake straight from the fridge the next morning.
-
Preheat the Oven and Prepare Steam: About 30 minutes before you plan to bake, preheat your oven to 425°F (220°C). Place a steam pan (a cast iron skillet or an old baking sheet works well) on the bottom rack of your oven.
-
Prepare for Baking: When the loaves have proofed (either at room temperature to about 1.5 times their original volume, or straight from the refrigerator), turn out the loaves (seams down) onto a piece of parchment paper (not oiled). The parchment paper will make transferring the loaves easier. Score the top of each loaf with a sharp knife or razor blade. This allows the bread to expand in a controlled way during baking.
-
Bake with Steam: Carefully slide the parchment paper with the scored loaves onto a baking sheet or directly into the preheated oven. Add 1 cup of hot water to the preheated steam pan in the oven to create steam. Bake for 12 minutes with steam.
-
Finish Baking: After 12 minutes, carefully rotate the loaves if needed for even browning, and remove the steam pan from the oven. Continue to bake for 10 more minutes without steam. The bread is done when it has a deep golden-brown crust and an internal temperature of 205°F (96°C), which you can check with an instant-read thermometer.
-
Cool: Once baked, immediately transfer the loaves to a wire cooling rack to cool completely. This is essential for the crust to crisp up and for the internal crumb structure to set. Resist the urge to cut into it while it’s still hot!
Expert Tips & Tricks
- Starter Health is Paramount: The success of any sourdough recipe, especially a quicker one, hinges on a robust and active starter. Feed your starter regularly and ensure it’s bubbly and triples in volume within 4-8 hours of feeding before you begin.
- Room Temperature Matters: The ambient temperature of your kitchen will significantly affect rise times. If your kitchen is cooler than 75°F (24°C), your dough will take longer to rise. Conversely, a warmer kitchen will speed things up.
- Understanding Dough Hydration: The amount of water in the dough affects its handling. This recipe has a moderate hydration. If you’re new to sourdough, start with this recipe. As you gain experience, you can experiment with slightly higher hydration levels, which can yield an airier crumb but are trickier to handle.
- Steam is Your Friend: Don’t skip the steam! The initial steam bath in the oven allows the crust to remain pliable for longer, enabling the bread to achieve its maximum oven spring. The steam also contributes to a beautiful, glossy crust.
- Scoring Secrets: A sharp scoring tool is crucial. Score with confidence and at a slight angle. A clean, decisive score will open up beautifully. If you don’t have a razor blade, a very sharp knife or even a clean pair of scissors can work in a pinch.
- Overnight Proofing Advantage: While this is a “quicker” recipe, the overnight refrigeration proofing option adds another layer of complexity to the flavor profile. The slow fermentation in the cold further develops those desirable tangy notes and makes the dough easier to handle in the morning.
Serving & Storage Suggestions
This Quicker Sourdough Bread is magnificent served warm, just as it is, with a generous smear of good quality butter. It’s equally at home alongside a hearty soup, a fresh salad, or as the base for a gourmet sandwich. The rustic crust and airy interior make it a versatile star.
- At Room Temperature: Once completely cooled, store the bread at room temperature in a paper bag or a bread box for up to 2-3 days. A paper bag allows the crust to retain some of its crispness. Avoid plastic bags, which can make the crust soft and gummy.
- Reheating: To refresh a day-old loaf, spritz it lightly with water and warm it in a 350°F (175°C) oven for 5-10 minutes, or until the crust is re-crisped.
- Freezing: For longer storage, slice the cooled bread and freeze it in an airtight container or freezer bag for up to 3 months. Thaw at room temperature or reheat directly from frozen in a toaster or oven.
Nutritional Information
While a precise nutritional breakdown can vary based on specific flour used and starter activity, here’s an approximate estimate per roll (assuming 20 rolls from the recipe):
| Nutrient | Amount per Serving | % Daily Value |
|---|---|---|
| Calories | 108.1 kcal | |
| Calories from Fat | ||
| Total Fat | 0.3 g | 0% |
| Saturated Fat | 0.1 g | 0% |
| Cholesterol | 0 mg | 0% |
| Sodium | 233.7 mg | 9% |
| Total Carbohydrate | 22.6 g | 7% |
| Dietary Fiber | 0.8 g | 3% |
| Sugars | 0.1 g | 0% |
| Protein | 3.1 g | 6% |
Note: Nutritional values are estimates and can vary.
Variations & Substitutions
While this recipe is designed for classic sourdough flavor, feel free to experiment:
- Whole Wheat Twist: Substitute up to 1 cup of the all-purpose flour with whole wheat flour for a nuttier flavor and increased fiber. You may need to adjust water slightly as whole wheat flour absorbs more liquid.
- Seeded Sensation: Incorporate 1/4 to 1/2 cup of your favorite seeds (like sesame, poppy, flax, or sunflower seeds) into the dough during the final stretch and fold.
- Herbal Infusion: Mix in finely chopped fresh herbs like rosemary, thyme, or chives during the last few minutes of kneading for an aromatic bread.
- Rye Depth: Replace up to 1/2 cup of the all-purpose flour with rye flour for a deeper, more complex flavor profile.
FAQs
Q: My starter didn’t double in 10 hours. What should I do?
A: Room temperature and starter activity are key. If your kitchen is cooler or your starter is less active, it might take longer. Ensure your starter is fed and active, and try placing it in a slightly warmer spot, like near a (not too hot) oven or on a seedling mat.
Q: The dough is too sticky to handle. How can I manage it?
A: A little stickiness is normal for sourdough. Keep your hands and work surface lightly floured, but avoid adding too much extra flour to the dough itself, as this can make the bread dense. Oiling your hands for the stretch and folds can also help.
Q: Can I use bread flour instead of all-purpose flour?
A: Yes, you can! Bread flour has a higher protein content, which will result in a stronger gluten network and potentially a chewier crumb and better oven spring. You might need to adjust the water slightly.
Q: My loaves didn’t rise much in the oven. What went wrong?
A: This could be due to a few factors: insufficient proofing, an inactive starter, or inadequate steam. Ensure your dough has nearly doubled before baking and that you’re using enough steam in the oven.
Q: How can I achieve a really dark, crispy crust?
A: A well-preheated oven, sufficient steam during the initial baking phase, and then removing the steam pan to allow the crust to dry out and crisp up are crucial. Ensure your oven is at the correct temperature throughout the baking process.
Final Thoughts
There’s an undeniable magic in the air when the aroma of freshly baked sourdough begins to fill your home. This quicker recipe demystifies the process, making that artisanal loaf accessible even on a busy weeknight. It’s a testament to the adaptability of sourdough, proving that delicious, deeply satisfying bread doesn’t always require days of waiting. So, embrace the convenience, enjoy the simplified steps, and most importantly, savor every bite of this crusty, tangy delight. It pairs wonderfully with a glass of red wine, a generous slab of cheese, or simply your favorite spread. May your crusts be crisp and your crumb airy!