
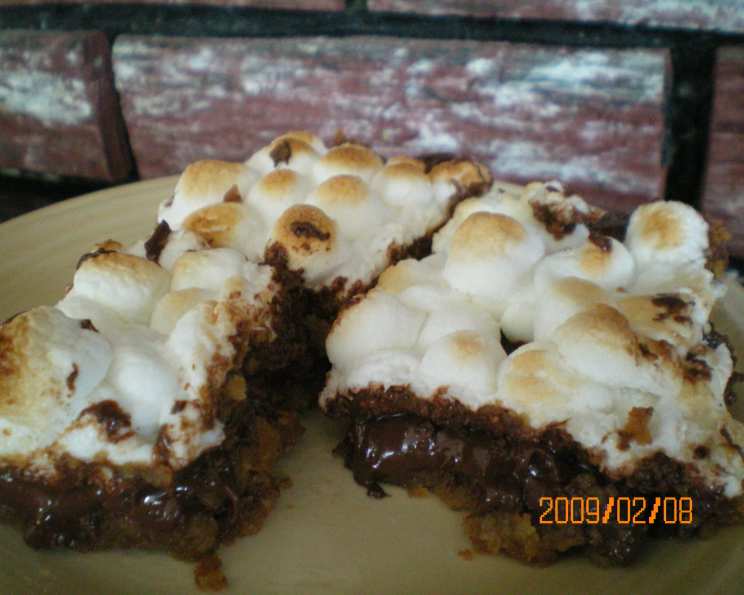
Warm Toasted Marshmallow S’more Bars (Cookie Mix)
There’s something primal and deeply satisfying about the combination of toasted marshmallow, melted chocolate, and crisp graham cracker. It takes me back to childhood campfires, the sticky sweet aroma filling the night air as we’d huddle around the flames, fingers carefully navigating molten sugar. These s’more bars capture that magic, but elevate it into a sophisticated treat that’s astonishingly easy to whip up in your own kitchen. They’re a testament to how simple, nostalgic flavors can be transformed into something truly special, perfect for sharing (or not!).
Recipe Overview
- Prep Time: 20 minutes
- Cook Time: 20-23 minutes (plus broiling time)
- Total Time: Approximately 45 minutes (plus cooling)
- Servings: 24 bars
- Yield: 24 bars
- Dietary Type: Dessert
Ingredients
Here’s what you’ll need to bring this delightful treat to life:
- 1 (17.5 ounce) package Betty Crocker Sugar Cookie Mix
- 1 cup graham cracker crumbs (about 7-8 full graham crackers, finely crushed)
- 1 cup butter, melted (or 1 cup margarine, melted)
- 3 cups milk chocolate chips (approximately 18 ounces)
- 4 ½ cups miniature marshmallows
Equipment Needed
You won’t need a lot of fancy gadgets for these bars, just the essentials:
- Large mixing bowl
- Measuring cups and spoons
- 13×9-inch baking pan (ungreased)
- Rubber spatula or offset spatula
- Oven
- Cooling rack
Instructions
Get ready to create some pure dessert bliss! Follow these steps carefully for perfect s’more bars every time.
- Begin by preheating your oven to 375°F (190°C). It’s crucial to have your oven at the correct temperature before your dough goes in.
- In a large mixing bowl, combine the entire package of Betty Crocker Sugar Cookie Mix with the graham cracker crumbs. Whisk them together gently to ensure they are evenly distributed.
- Pour the melted butter (or margarine) into the dry ingredients. Stir with a spoon or your hands until a soft dough forms. You want it to be cohesive and easy to press, but not overly sticky.
- Press the dough evenly into the bottom of an ungreased 13×9-inch baking pan. Make sure to get it into the corners and create a relatively smooth surface. This will be the base for your s’more masterpiece.
- Bake the crust for 18 to 20 minutes, or until it appears set and lightly golden around the edges. Don’t overbake it; we want it tender, not crispy.
- As soon as the crust comes out of the oven, immediately sprinkle the 3 cups of milk chocolate chips evenly over the hot crust. The residual heat from the crust will begin the melting process.
- Let the pan stand for 3 to 5 minutes. This allows the chocolate chips to soften and begin to melt.
- Using a rubber spatula or an offset spatula, spread the melted chocolate evenly across the entire surface of the cookie crust. You should have a smooth, luscious layer of chocolate.
- Now, it’s time for the magic to happen! Set your oven control to broil. Make sure your oven rack is positioned with the marshmallows being 4 to 5 inches from the heat source.
- Sprinkle the 4 ½ cups of miniature marshmallows generously over the melted chocolate layer. Try to get an even coating for the best effect.
- Broil the marshmallows for 20 to 30 seconds, watching them very closely. Marshmallows brown incredibly quickly under the broiler, and you want them perfectly toasted, not burnt. They will turn golden brown in just moments.
- Once the marshmallows are beautifully toasted, carefully remove the pan from the oven.
- Let the bars cool in the pan for 10 minutes. This is an important step to allow the chocolate and marshmallow layers to set slightly before cutting.
- To cut into bars, slice the entire pan into 6 rows by 4 rows. This will give you 24 individual bars.
- Serve warm. The true delight of these bars is in their gooey, melty texture, which is best experienced when they are still warm from the oven.
- Store any remaining bars tightly covered. This will help maintain their freshness.
Expert Tips & Tricks
Elevating these already fantastic bars is all about a few chef-approved secrets:
- Graham Cracker Perfection: For the best graham cracker crumbs, pulse them in a food processor until they are fine and consistent. Alternatively, you can place them in a zip-top bag and crush them with a rolling pin.
- Butter vs. Margarine: While margarine can be used, real butter will always lend a richer flavor to the cookie crust.
- Broiler Watch: I cannot stress this enough: do not walk away from the broiler. Marshmallows go from perfectly toasted to burnt in the blink of an eye. Have everything ready and be present.
- Chocolate Variety: Feel free to swap the milk chocolate chips for semi-sweet or even dark chocolate chips for a less sweet, more complex flavor profile. You could also add some chopped nuts to the chocolate layer before broiling if you like a bit of crunch.
- Crispier Crust Alternative: If you prefer a slightly firmer crust, you can bake it for an extra 2-3 minutes. Just be mindful not to dry it out too much.
Serving & Storage Suggestions
These bars are at their absolute peak when served warm, with the marshmallows still delightfully gooey and the chocolate just beginning to melt. They are perfect on their own, but a small scoop of vanilla bean ice cream alongside them is pure decadence.
For storage, ensure the bars are completely cooled before covering them tightly with plastic wrap or transferring them to an airtight container. They will keep well at room temperature for 2-3 days. If you need them to last longer, you can refrigerate them for up to a week. To reheat, you can gently warm them in a low oven (around 250°F or 120°C) for a few minutes until just warmed through, or microwave them in short bursts, being careful not to overheat the marshmallows. They also freeze beautifully for up to 2-3 months. Thaw overnight in the refrigerator before warming.
Nutritional Information
(Please note: This is an estimated nutritional breakdown and can vary based on specific ingredient brands and preparation methods.)
| Nutrient | Amount per Serving | % Daily Value |
|---|---|---|
| Calories | 285 kcal | 14% |
| Total Fat | 14 g | 18% |
| Saturated Fat | 8 g | 40% |
| Cholesterol | 30 mg | 10% |
| Sodium | 110 mg | 5% |
| Total Carbohydrate | 38 g | 14% |
| Dietary Fiber | 1 g | 4% |
| Sugars | 28 g | 56% |
| Protein | 3 g | 6% |
Percent Daily Values are based on a 2,000 calorie diet.
Variations & Substitutions
While this recipe is a classic for a reason, here are a few ways to switch things up:
- Chocolate Lover’s Dream: Use a mix of milk, semi-sweet, and dark chocolate chips for a more complex chocolate experience. You could even add some white chocolate chips for visual appeal.
- Nutty Crunch: Fold in ½ cup of chopped toasted pecans or walnuts into the chocolate layer before spreading it over the crust.
- Peanut Butter Swirl: Swirl a few tablespoons of creamy peanut butter into the melted chocolate layer before spreading.
- Flourless/Gluten-Free: While this recipe relies on a cookie mix, for a truly gluten-free version, you would need to start with a gluten-free sugar cookie mix and gluten-free graham cracker crumbs.
FAQs
Q: Can I use regular-sized marshmallows instead of miniature marshmallows?
A: Yes, you can use regular-sized marshmallows, but you’ll need to cut them in half horizontally to get better coverage and prevent them from burning too quickly.
Q: My marshmallows burned quickly under the broiler. What did I do wrong?
A: Marshmallows brown very fast! Ensure your oven rack is positioned correctly (4-5 inches from the heat) and stay by the oven, watching them constantly. They can go from golden to black in mere seconds.
Q: How long do these bars need to cool before cutting?
A: It’s recommended to let them cool for at least 10 minutes after broiling before cutting. This allows the layers to set slightly, making them easier to slice cleanly. For fully firm bars, allow them to cool completely.
Q: Can I make the cookie crust ahead of time?
A: You can prepare and bake the cookie crust a day in advance. Let it cool completely, then cover it tightly. Add the chocolate chips and marshmallows just before you plan to broil and serve.
Q: What’s the best way to cut these bars cleanly?
A: For the cleanest cuts, use a sharp knife. For extra clean slices, you can dip your knife in hot water and wipe it dry between cuts, especially when the bars are warm.
Final Thoughts
These Warm Toasted Marshmallow S’more Bars are more than just a dessert; they’re a delightful trip down memory lane, packed into a perfectly portable bar. The ease of using a cookie mix makes them an accessible treat for any occasion, from a casual weeknight indulgence to a crowd-pleasing potluck contribution. I encourage you to gather your ingredients, crank up the oven, and bring a little campfire magic into your kitchen. I’d love to hear how yours turn out, and whether you discover any new favorite variations! Enjoy every gooey, chocolatey, toasted bite.