
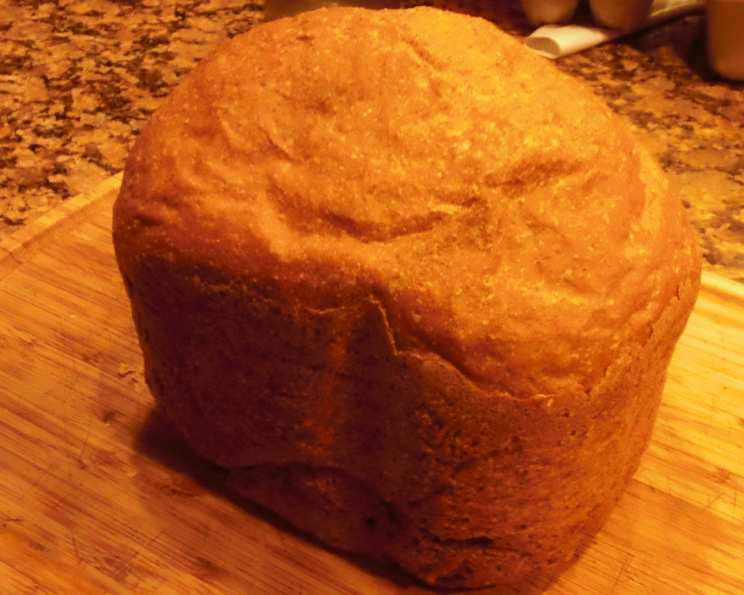
The Rustic Charm of 100% White Whole Wheat Bread Machine Loaf
There’s a particular aroma that signals comfort and home, a scent that can transport me back to my grandmother’s kitchen. It’s the smell of freshly baked bread, and for me, it’s inextricably linked to the wholesome, slightly nutty fragrance of whole wheat. Growing up, store-bought white bread was the norm, but my grandmother, always one to embrace healthier, more traditional methods, experimented with whole wheat. Her attempts were… rustic. Delicious, yes, but sometimes dense and crumbly. It wasn’t until the advent of the bread machine, and particularly this recipe for 100% white whole wheat, that I truly experienced the magic of perfectly executed whole grain bread with minimal fuss. This recipe bridges that gap, offering the nutrition and satisfying chew of whole wheat without the intimidation factor, all at the touch of a button.
Recipe Overview
- Prep Time: 15 minutes
- Cook Time: Approximately 3 to 4 hours (depending on bread machine cycle)
- Total Time: 4 hours 5 minutes
- Servings: 12
- Yield: 1 loaf
- Dietary Type: Vegetarian
Ingredients
This recipe is beautifully straightforward, relying on a few key ingredients to deliver a wonderfully textured and flavorful loaf.
- 3 cups white whole wheat flour
- 1 tablespoon vital wheat gluten (this is crucial for achieving a lighter, more tender crumb in whole wheat bread)
- 1/4 cup wheat germ (adds a lovely nutty depth and extra nutrients)
- 1/4 cup flax seed (optional, but I highly recommend it for added texture and omega-3s; you can also use millet, sesame, or sunflower seeds, or a combination)
- 1 1/2 teaspoons salt
- 2 tablespoons olive oil
- 1/4 cup honey (for a touch of sweetness and to aid in browning)
- 1 1/4 cups cold water
- 1 1/2 teaspoons dry yeast
Equipment Needed
The beauty of a bread machine recipe lies in its simplicity, but you will, of course, need your trusty bread machine. Ensure it’s clean and ready to go!
- Bread Machine
Instructions
Follow these steps precisely, and you’ll be rewarded with a magnificent loaf of homemade whole wheat bread.
- Begin by carefully adding all the dry ingredients to your bread machine pan. This includes the white whole wheat flour, vital wheat gluten, wheat germ, flax seed (if using), and salt. Do NOT add the dry yeast at this stage.
- Next, slowly pour the cold water into the bread machine pan. It’s important to pour it over the other dry ingredients.
- Following the water, add the honey and olive oil.
- Now, locate the yeast dispenser on your bread machine. Fill this dispenser with the dry yeast.
- Program your bread machine for the “Whole Wheat” bread setting. This setting is specifically designed to accommodate the characteristics of whole wheat flour, typically involving longer kneading times and sometimes a rest period to allow the flour to fully hydrate.
- Press “Start” or set the timer if you prefer to have your bread ready at a specific time.
- The directions provided are based on the functionality of the Panasonic SD-YD250 Bread Bakery. If your bread machine does not have a dedicated yeast dispenser, please consult your machine’s manual for the specific instructions on when to add the dry yeast. Typically, it’s added last, after all other ingredients are in the pan.
- The program will now take over, handling the kneading, rising, and baking processes. The entire cycle will take approximately 3 to 4 hours, depending on your machine’s settings.
- While the machine is programmed for whole wheat, if you prefer a softer crust, you can opt to set your machine to the “Basic White Bread” setting. This often results in a lighter exterior.
- Keep in mind that actual baking times and results can vary depending on your specific bread machine and ambient room temperature.
Expert Tips & Tricks
To elevate your bread-making experience, consider these little touches:
- Flour Matters: Always use fresh white whole wheat flour. Older flour can lead to a less desirable rise. Similarly, ensure your dry yeast is active. A simple test is to dissolve a teaspoon in a little warm water with a pinch of sugar; if it foams within 5-10 minutes, it’s good to go.
- Seed Variations: As mentioned, feel free to experiment with different seeds. Millet adds a subtle crunch, sesame seeds impart a toasty aroma, and sunflower seeds offer a buttery note. You can add them all together or pick your favorites. If your machine has a seed dispenser, add them there to be released at the appropriate time. If not, add them with the other dry ingredients.
- Sweetness Adjustment: The honey adds a gentle sweetness. If you prefer a less sweet loaf, you can reduce the amount slightly, but be mindful that honey also contributes to moisture and crust development.
- Hydration Check: While this recipe is formulated for optimal results, if you live in a very humid climate, you might find you need a tiny bit less water, and in a very dry climate, you might need a splash more. However, resist the urge to over-adjust on your first try; the bread machine handles this quite well.
Serving & Storage Suggestions
Once the baking cycle is complete, carefully remove the bread pan from the machine. Invert the pan onto a wire cooling rack and gently shake to release the loaf. Allow the bread to cool completely before slicing. This is crucial for the texture to set properly.
This 100% white whole wheat bread is wonderfully versatile. It’s perfect for toast, sandwiches, or simply enjoyed with a smear of butter.
- Room Temperature: Store cooled bread in a bread box or a paper bag at room temperature for 2-3 days. For longer storage, wrap it tightly in plastic wrap or a reusable bread bag.
- Refrigeration: Refrigerating bread can prolong its shelf life for up to a week, but it can also make the crust a little less crisp.
- Freezing: For long-term storage, slice the bread and wrap individual portions or the entire loaf tightly in plastic wrap, then in aluminum foil or a freezer bag. It will keep for up to 3 months. Thaw at room temperature or toast directly from frozen.
Nutritional Information
This information is an estimation and can vary based on specific ingredients used.
| Nutrient | Amount per Serving | % Daily Value |
|---|---|---|
| Calories | 153.6 kcal | N/A |
| Total Fat | 3.3 g | 5% |
| Saturated Fat | 0.5 g | 2% |
| Cholesterol | 0 mg | 0% |
| Sodium | 292.9 mg | 12% |
| Total Carbohydrate | 28.9 g | 9% |
| Dietary Fiber | 3.7 g | 14% |
| Sugars | 5.9 g | 23% |
| Protein | 4.7 g | 9% |
| Calories from Fat | 29 g | N/A |
Variations & Substitutions
While this recipe shines in its simplicity, here are a few ideas to tailor it to your liking:
- Seed Boost: As mentioned, swap the flax seeds for other seeds like poppy seeds, chia seeds, or even a blend of sunflower and pumpkin seeds.
- Honey Alternatives: If you prefer, you can use maple syrup or agave nectar as a sweetener, though the flavor profile will change slightly.
- Herbal Infusion: For a savory twist, consider adding a teaspoon or two of dried herbs like rosemary or thyme along with the dry ingredients.
FAQs
Q: Why is vital wheat gluten important in this recipe?
A: Vital wheat gluten is a protein found in wheat flour. Adding it to whole wheat bread helps to improve the elasticity and structure of the dough, resulting in a lighter, more tender loaf.
Q: Can I use regular whole wheat flour instead of white whole wheat flour?
A: You can, but the texture and color will be denser and darker. White whole wheat flour has a milder flavor and a lighter hue, making it ideal for those who enjoy whole grains but prefer a less robust taste.
Q: My bread machine doesn’t have a “Whole Wheat” setting. What should I use?
A: If your machine lacks a specific whole wheat setting, try the “Basic” or “White” setting. As noted, you might get a softer crust this way. Be aware that the kneading and rising times might be slightly different, so keep an eye on your dough.
Q: Is it okay to use less water? My dough looks too wet.
A: It’s generally best to stick to the recipe’s water measurement. Whole wheat flour absorbs more liquid than white flour. The dough should be relatively soft, but not overly sticky to the point where it clings excessively to the sides of the pan after the initial kneading.
Q: How can I get a crispier crust with my bread machine?
A: Using the “Basic White” setting, as mentioned, can lead to a softer crust. For a crispier crust on the “Whole Wheat” setting, ensure your machine is in a well-ventilated area and avoid covering it immediately after baking. Some machines also have crust color settings; select a darker option.
There’s a profound satisfaction in pulling a beautifully risen, golden-brown loaf of bread from your bread machine, especially when you know it’s packed with wholesome goodness. This 100% white whole wheat recipe is a testament to that, offering an effortless path to delicious, homemade bread. I encourage you to try it, experiment with the seeds, and savor every slice. It pairs wonderfully with a hearty bowl of soup or a fresh green salad. Happy baking!