
5 Minute Thai Shrimp Satay: A Weeknight Wonder
There are moments in a chef’s life when a dish transcends mere sustenance and becomes a beacon of culinary inspiration, especially when it appears on your table with minimal effort. I recall one sweltering summer evening, my pantry looking decidedly bare, and an unexpected craving for something bright, zesty, and quintessentially Southeast Asian hitting me with full force. With only a handful of staples and the clock ticking towards dinnertime, I stumbled upon this gem of a recipe. The way the vibrant sauce clung to the perfectly cooked shrimp, the subtle hint of chili, and the sheer speed at which it came together – it was a revelation, a testament to how incredible, authentic flavors can be achieved in mere minutes.
Recipe Overview
- Prep Time: 9 minutes
- Cook Time: 5 minutes
- Total Time: 14 minutes
- Servings: 4
- Yield: Appetizer/Light Meal
- Dietary Type: Dairy-Free (with substitution considerations)
Ingredients
This recipe champions simplicity, letting a few key ingredients shine. The magic happens when these elements are combined to create a marinade that’s both tangy and subtly sweet, perfectly complementing the delicate flavor of the shrimp.
- 1 lb shrimp, peeled and de-veined
- 1/4 cup low-fat peanut butter
- 1/3 cup low-fat Catalina dressing (or 1/3 cup low-fat Russian dressing as an alternative)
- 1 tablespoon water
- 1 tablespoon reduced sodium soy sauce
- Dried chili powder (optional, for a touch of heat)
Equipment Needed
The beauty of this dish lies in its minimal equipment requirements, making it perfect for those times when you want to cook with minimal fuss.
- Mixing bowl
- Whisk or fork
- Skewers (if using wooden, ensure they are soaked)
- Grill or broiler
Instructions
The method for this Thai Shrimp Satay is as straightforward as it is speedy. The key is in the quick marination and the even quicker cooking time, ensuring the shrimp remain succulent and tender.
- Prepare the Skewers: If you are opting for wooden skewers, an important step for safety and to prevent them from burning is to soak them in water for at least 1 hour before you plan to cook. This allows them to absorb moisture, making them more resilient to the heat of the grill or broiler. Once soaked, you can thread the peeled and de-veined shrimp onto the skewers, leaving a small space between each shrimp to ensure even cooking.
- Craft the Marinade: In a medium-sized mixing bowl, combine the 1/4 cup of low-fat peanut butter with the 1/3 cup of low-fat Catalina dressing (or the low-fat Russian dressing if you’ve chosen that alternative). Whisk these ingredients together vigorously until you achieve a smooth, homogenous mixture. The goal is to eliminate any lumps and create a creamy base for your sauce.
- Enhance the Flavor: To the peanut butter and dressing mixture, add the 1 tablespoon of water and the 1 tablespoon of reduced sodium soy sauce. Whisk again until everything is well combined. This step introduces the necessary liquid to thin the marinade slightly, making it easier to coat the shrimp, and the soy sauce adds a crucial savory depth. If you desire a bit of a kick, now is the time to stir in a pinch of dried chili powder. Adjust the amount to your personal preference for heat.
- Marinate the Shrimp: Take about half of the prepared sauce and generously brush it over the shrimp threaded onto your skewers. Ensure each shrimp is well-coated, allowing the flavors to begin their work. Reserve the remaining sauce for serving.
- Cook to Perfection: You have two excellent options for cooking:
- Grilling: Preheat your grill to medium-high heat. Place the marinated shrimp skewers on the grill.
- Broiling: If you’re using your oven, preheat the broiler to high and position an oven rack about 4-6 inches from the heat source. Place the shrimp skewers on a baking sheet lined with foil or parchment paper for easier cleanup.
Grill or broil the shrimp for approximately 3 to 5 minutes. Keep a close eye on them, as shrimp cook very quickly. They are done when they turn opaque and develop a slight pink hue, indicating they are cooked through and have reached their peak of tenderness. Overcooking will result in tough, rubbery shrimp.
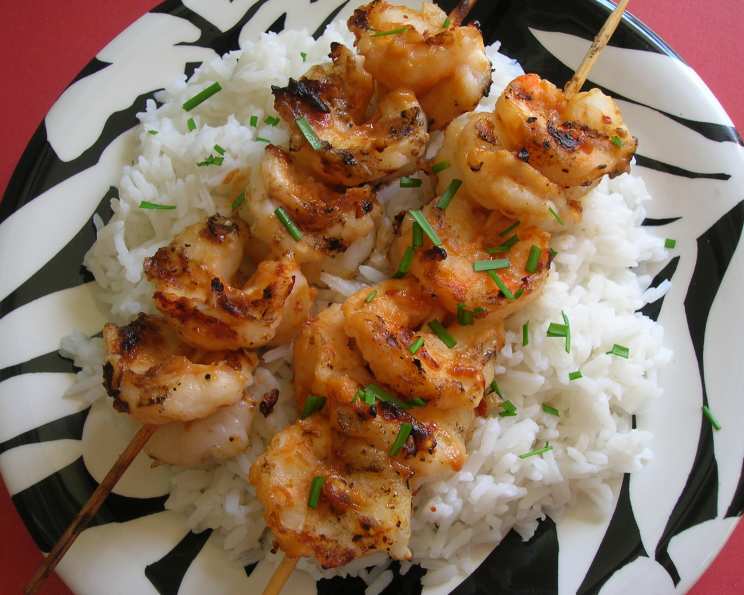
- Serve and Enjoy: Arrange the cooked shrimp satay attractively on a platter. Serve immediately with the remaining sauce for dipping. The contrast between the warm, flavorful shrimp and the cool, tangy dipping sauce is simply divine.
Expert Tips & Tricks
To elevate your 5 Minute Thai Shrimp Satay from simply delicious to truly memorable, consider these professional insights:
- Shrimp Quality Matters: For the best results, opt for high-quality, large shrimp. Freshly peeled and deveined shrimp will offer a superior texture and flavor compared to pre-packaged, pre-cooked varieties. If using frozen, ensure they are thoroughly thawed and patted dry before skewering.
- Don’t Skip the Soak: For wooden skewers, the soaking is non-negotiable. A neglected soak is a recipe for burnt skewers, which can impart an unpleasant flavor to your delicate shrimp.
- Watch the Heat: Shrimp cook in a flash. Using medium-high heat on the grill or a hot broiler ensures a quick cook that locks in moisture. Too low a heat will result in steamed rather than grilled or broiled shrimp, and too high can burn the outside before the inside is cooked.
- Sauce Consistency: If your peanut butter is particularly thick, or your dressings vary in consistency, you might need to adjust the water slightly to achieve a brushable, yet not watery, marinade. Aim for a consistency that easily coats the shrimp without dripping excessively.
- Flavor Boost: For an even more authentic Thai-inspired flavor, consider adding a tiny pinch of finely minced fresh ginger or garlic to the sauce mixture. These additions will still keep the prep time incredibly low but will add another layer of aromatic complexity.
Serving & Storage Suggestions
This satay is a versatile dish that shines as an appetizer or a light main course.
- Serving: For an appetizer, serve 2-3 skewers per person. As a light meal, you might pair them with a simple side salad, jasmine rice, or a refreshing cucumber salad. Garnish with chopped peanuts, fresh cilantro, or a lime wedge for an extra flourish.
- Storage: This dish is best enjoyed immediately after cooking. However, if you have any leftovers, allow them to cool completely. Store them in an airtight container in the refrigerator for up to 2 days. The dipping sauce can also be stored separately in the refrigerator for the same duration. Reheat gently by quickly warming them in a skillet over low heat or in a toaster oven to avoid overcooking.
Nutritional Information
Here’s an approximate breakdown of the nutritional content for this delightful dish. Please note that these values can vary based on the specific brands and fat content of the ingredients used.
| Nutrient | Amount per Serving | % Daily Value |
|---|---|---|
| Calories | 123 kcal | |
| Calories from Fat | 17 g | |
| Total Fat | 2 g | 3% |
| Saturated Fat | 0.4 g | 1% |
| Cholesterol | 172.8 mg | 57% |
| Sodium | 318.3 mg | 13% |
| Total Carbohydrate | 1.4 g | 0% |
| Dietary Fiber | 0 g | 0% |
| Sugars | 0.1 g | 0% |
| Protein | 23.3 g | 46% |
Note: The provided nutritional information for “Calories from Fat” and “Calories from Fat % Daily Value” in the original data was combined. It has been presented here to reflect the likely intended breakdown.
Variations & Substitutions
While this recipe is delightfully straightforward, there’s always room for a touch of personal flair.
- Dressing Alternatives: If you don’t have Catalina or Russian dressing on hand, a mild, creamy salad dressing like a French dressing or even a light Thousand Island dressing could work in a pinch, though they will impart a slightly different flavor profile.
- Spicy Kick: For those who love heat, feel free to amp up the chili powder or even add a small amount of finely minced fresh red chili (like Thai bird’s eye chili) to the marinade.
- Nut Butter Swap: While peanut butter is traditional, almond butter or cashew butter can be used for a slightly different nutty nuance, though they may alter the final flavor profile significantly.
- Vegetarian Option: For a vegetarian version, firm tofu or large chunks of vegetables like bell peppers and zucchini could be skewered and marinated similarly. Adjust cooking times accordingly.
FAQs (Frequently Asked Questions)
Q: Why do I need to soak wooden skewers?
A: Soaking wooden skewers prevents them from burning on the grill or under the broiler, ensuring they hold together and don’t impart a burnt flavor to your food.
Q: Can I make the sauce ahead of time?
A: Yes, you can prepare the dipping sauce ahead of time and store it in an airtight container in the refrigerator for up to 2 days.
Q: My shrimp are small, can I still make this recipe?
A: Absolutely! Smaller shrimp will cook even faster, so keep a very close eye on them to avoid overcooking. You might only need 2-3 minutes per side.
Q: What if I don’t have a grill or broiler?
A: You can also pan-fry the shrimp in a hot, lightly oiled skillet. Cook in batches for about 2-3 minutes per side until opaque.
Q: Is this recipe truly Thai?
A: While inspired by Thai flavors, this recipe is a quick and accessible adaptation for Western kitchens. Traditional Thai satay often involves more complex spice pastes and coconut milk marinades.
Final Thoughts
This 5 Minute Thai Shrimp Satay is a testament to the fact that exceptional flavor doesn’t always require hours in the kitchen. It’s a dish that delivers on speed, taste, and sheer satisfaction, making it a go-to for busy weeknights, impromptu gatherings, or when that craving for something bright and bold strikes. I encourage you to try it, experiment with the optional chili, and perhaps serve it alongside a crisp, cool glass of Sauvignon Blanc or a refreshing Thai iced tea. May your culinary adventures be as swift and delightful as this satay!