
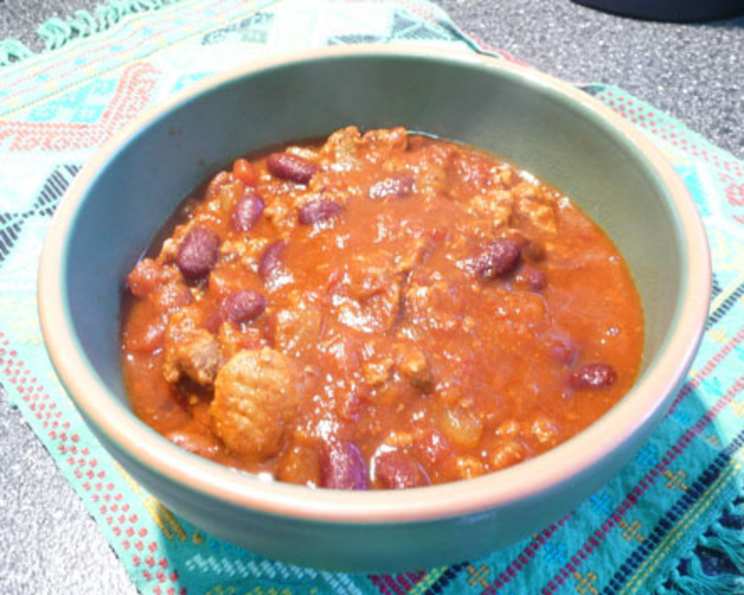
The Soulful Simmer: My Go-To Flavorful Chili
There are certain dishes that, for me, are more than just food; they’re a time machine, a warm embrace on a chilly evening, a cornerstone of cherished memories. My grandmother’s chili was one of those dishes. I can vividly recall the aroma wafting from her old cast-iron Dutch oven, a symphony of spices that promised something deeply satisfying. It wasn’t fancy, but it was packed with a quiet complexity, the kind that speaks of slow cooking and a whole lot of love. Every spoonful was a reminder of family gatherings, laughter echoing in her kitchen, and the simple joy of sharing a hearty meal. This recipe, while my own adaptation, carries that same spirit, a testament to the enduring power of a truly flavorful chili.
Recipe Snapshot
- Prep Time: 20 minutes
- Cook Time: 8-10 hours (low) or 4-5 hours (high)
- Total Time: 8 hours 20 minutes – 10 hours 20 minutes
- Servings: 10-12
- Yield: 1 large pot
- Dietary Type: Adaptable (traditionally meat-based, easily made vegetarian/vegan)
The Heart of the Dish: Ingredients
This chili builds its robust flavor through a careful layering of spices and a foundational mix of hearty ingredients. The magic truly happens as these elements meld together over hours of slow cooking.
- 1 ½ lbs ground beef
- ¼ cup chopped onion
- 1 celery rib, chopped
- 1 (29 ounce) can stewed tomatoes
- 2 (15 ½ ounce) cans red kidney beans, undrained
- 2 (16 ounce) cans chili beans, undrained
- ½ cup ketchup
- 1 ½ teaspoons lemon juice
- 2 teaspoons vinegar
- 1 ½ teaspoons brown sugar
- 1 teaspoon salt
- 1 teaspoon Worcestershire sauce
- ½ teaspoon garlic powder
- ½ teaspoon mustard powder
- 1 tablespoon chili powder
- 2 (6 ounce) cans tomato paste
Essential Tools for the Simmer
While this recipe is remarkably straightforward, a few key pieces of equipment will ensure success.
- A large skillet for browning the meat.
- A slow cooker (this is where the magic of low and slow cooking happens).
- A good stirring spoon or spatula.
The Art of the Simmer: Instructions
The beauty of this chili lies in its simplicity and the transformative power of slow cooking. It’s a dish that rewards patience, allowing flavors to deepen and meld into something truly special.
- Begin by browning the ground beef, chopped onion, and chopped celery in a skillet over medium-high heat. You’ll want to break up the ground beef as it cooks, ensuring it’s evenly browned. Once the beef is no longer pink and the vegetables have softened, drain off any excess fat from the skillet. This is a crucial step for a less greasy, more refined chili.
- Transfer the browned ground beef, onion, and celery mixture from the skillet into your slow cooker.
- Now, it’s time to add the remaining ingredients to the slow cooker. Add the undrained red kidney beans, the undrained chili beans, the ketchup, the lemon juice, the vinegar, the brown sugar, the salt, the Worcestershire sauce, the garlic powder, the mustard powder, and the chili powder.
- Finally, add the two cans of tomato paste. Ensure all ingredients are now in the slow cooker.
- Mix everything well to ensure all the spices and ingredients are evenly distributed throughout the mixture. This initial mix is important for consistent flavor development.
- Place the lid on the slow cooker. You have two cooking options, both yielding delicious results:
- Cook on LOW for 8-10 hours. This is the ultimate “set it and forget it” method, perfect for a day when you’re out and about. The low, slow heat allows the flavors to penetrate deeply and the ingredients to become incredibly tender.
- Cook on HIGH for 4-5 hours. This is a great option if you have less time but still want the benefits of slow cooking. The flavors will still develop beautifully, just at a slightly quicker pace.
Regardless of the setting you choose, the chili will be ready when it’s heated through and the flavors have had ample time to meld and deepen.
Chef’s Corner: Expert Tips & Tricks
To elevate your chili from good to unforgettable, consider these seasoned insights:
- The Bean Choice: While kidney and chili beans are classic, don’t hesitate to experiment. Black beans, pinto beans, or even cannellini beans can add delightful textural and flavor variations. Always use them undrained, as the liquid they come in contains valuable flavor and starches that help thicken the chili.
- Spice Level Adjustment: The 1 tablespoon of chili powder provides a pleasant warmth. For those who crave more heat, consider adding a pinch of cayenne pepper, a dash of hot sauce, or even some finely diced jalapeños along with the vegetables in step 1. Remember, you can always add more heat, but you can’t easily take it away.
- Browning is Key: Don’t rush the browning of the beef, onions, and celery. This initial step develops a depth of flavor (Maillard reaction) that forms the savory foundation of the entire dish. Ensure the pan is hot enough to get a nice sear on the ingredients.
- The Power of Acidity and Sweetness: The subtle addition of lemon juice, vinegar, and brown sugar might seem unusual in a chili, but they are critical. The acidity cuts through the richness of the meat and tomato, while the brown sugar balances the savory and acidic notes, creating a more complex and harmonious flavor profile.
Serving Suggestions and Storing Leftovers
This chili is a champion on its own, but it truly shines when presented with a few thoughtful accompaniments.
- Serving: Ladle generous portions into bowls. Classic toppings include shredded cheddar cheese, a dollop of sour cream or plain Greek yogurt, chopped fresh cilantro, sliced green onions, or even a sprinkle of crushed tortilla chips for added crunch. Warm, crusty cornbread is an absolutely perfect partner, soaking up every last delicious drop.
- Storage: Leftover chili is often even better the next day as the flavors continue to meld. Store it in an airtight container in the refrigerator for up to 3-4 days.
- Freezing: This chili freezes beautifully. Allow it to cool completely, then portion it into freezer-safe containers or heavy-duty freezer bags. It will keep well in the freezer for 2-3 months.
- Reheating: To reheat, gently warm the chili on the stovetop over medium-low heat, stirring occasionally, until heated through. You can also reheat individual portions in the microwave. If the chili has become too thick after refrigeration or freezing, you can loosen it with a splash of water, broth, or even a little extra ketchup.
Nutritional Snapshot (Estimated Per Serving)
This data is an estimation and can vary based on specific ingredients used.
| Nutrient | Amount per Serving | % Daily Value |
|---|---|---|
| Calories | 464.8 kcal | |
| Calories from Fat | 104 kcal | |
| Total Fat | 11.6 g | 17% |
| Saturated Fat | 4.3 g | 21% |
| Cholesterol | 46.3 mg | 15% |
| Sodium | 1118.2 mg | 46% |
| Total Carbohydrate | 62.2 g | 20% |
| Dietary Fiber | 14.1 g | 56% |
| Sugars | 11.7 g | 46% |
| Protein | 31.2 g | 62% |
Variations & Substitutions
While this recipe is a beloved classic, there’s always room for personalization:
- Vegetarian/Vegan Option: For a meat-free version, substitute the ground beef with plant-based crumbles or an equal amount of extra beans and finely chopped vegetables like bell peppers and zucchini. Ensure your Worcestershire sauce is vegan-friendly if aiming for a fully vegan chili.
- Spicier Kick: As mentioned, increase the chili powder or add other chilies like chipotle peppers in adobo sauce for a smoky heat.
- Sweetness Balance: If you prefer a slightly sweeter chili, a touch more brown sugar can be added. Conversely, for a tangier profile, a little extra lemon juice or vinegar can be introduced.
Frequently Asked Questions
Q: Can I make this chili without a slow cooker?
A: Absolutely! You can simmer this chili on the stovetop in a large, heavy-bottomed pot. After browning the meat and vegetables and adding all other ingredients, bring it to a gentle simmer, then reduce the heat to low, cover, and cook for at least 1.5 to 2 hours, stirring occasionally, until the flavors have melded and the chili has thickened.
Q: What can I do if my chili is too thin?
A: If your chili is thinner than you’d like, you can thicken it by removing the lid and letting it simmer gently for an additional 30-60 minutes to allow some of the liquid to evaporate. You can also create a slurry by mixing 1-2 tablespoons of cornstarch or flour with an equal amount of cold water, then stirring this mixture into the simmering chili until it thickens.
Q: Is it necessary to use both kidney beans and chili beans?
A: While this recipe calls for both, you can certainly use two cans of your preferred type of bean (like kidney, pinto, or black beans) if you have a preference or have them on hand. The variety adds textural interest, but the core flavor will still be present.
Q: How long does the chili last in the refrigerator?
A: Properly stored in an airtight container, this chili will keep well in the refrigerator for 3 to 4 days.
Q: Can I add other vegetables to the chili?
A: Yes, feel free to add other vegetables! Diced bell peppers (any color), corn, or even chopped sweet potatoes can be added when you brown the initial vegetables for extra flavor and texture.
A Final Thought
This flavorful chili is more than just a recipe; it’s an invitation to gather, to share, and to savor the moments that matter. Whether you’re serving it on a blustery evening or at a lively game day gathering, its rich aroma and comforting taste are sure to be a hit. Don’t be afraid to make it your own by adjusting the spice levels or adding your favorite toppings. I encourage you to try this recipe, let its warmth fill your kitchen, and perhaps, create some delicious new memories of your own. Enjoy every comforting spoonful!