
Kittencal’s Asian-Glazed Baked Chicken: A Symphony of Sweet, Savory, and Spice
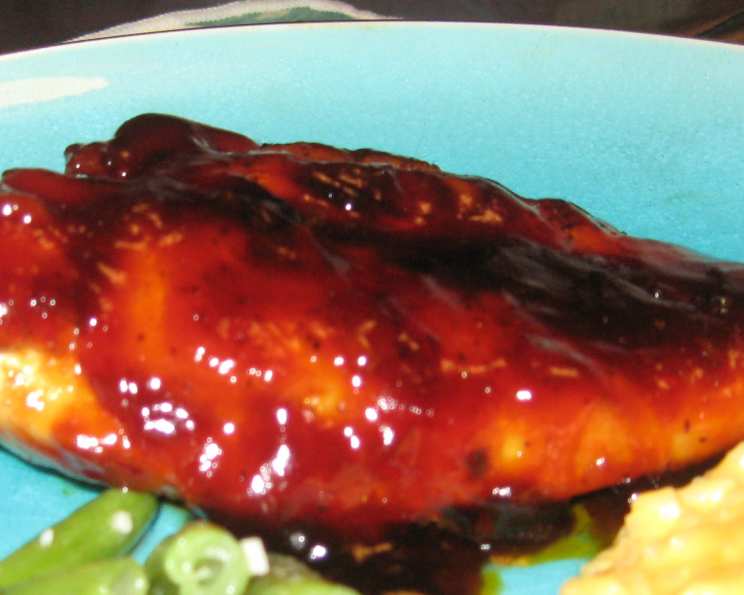
There are some dishes that just transport you. For me, Kittencal’s Asian-Glazed Baked Chicken is one of them. I remember the first time I made it, the aroma wafting from my kitchen was intoxicating – a complex blend of sweet honey, salty soy, and a hint of fiery chili. It was a rainy Tuesday evening, the kind that usually calls for takeout, but the promise of this vibrant glaze pulled me to the stove. As I watched the chicken pieces shimmer under the glaze in the oven, I knew this was going to be a new staple, a recipe I could rely on to bring a taste of the exotic right into my home, even on the busiest weeknights.
Recipe Overview
- Prep Time: 20 minutes
- Cook Time: 45 minutes
- Total Time: 1 hour 5 minutes
- Servings: 4-6
- Yield: 1 baked chicken dish
- Dietary Type: Contains Soy
Ingredients
For this culinary adventure, you’ll need the following to create that irresistible Asian-inspired glaze and perfectly cooked chicken:
For the Chicken:
- 1 whole chicken, weighing approximately 3 to 3 1/2 pounds, cut into serving pieces
- Black pepper, optional, for seasoning the chicken
For the Glaze:
- 3-4 tablespoons vegetable oil
- 1 medium onion, finely chopped
- 4-6 garlic cloves, finely chopped
- 1/4 – 1/2 teaspoon crushed red pepper flakes, adjusted to your preferred heat level
- 3/4 cup low sodium soy sauce (it’s crucial to use low-sodium to control the saltiness)
- 2 tablespoons cornstarch (for an even thicker glaze, you can add an extra teaspoon)
- 1 teaspoon ginger powder
- 1/2 – 1 teaspoon sesame oil, optional, but highly recommended for an extra layer of aroma
- 1/2 cup honey
- 1/2 cup light brown sugar, packed
- 1/4 cup ketchup
- 1/4 cup Heinz Chili Sauce
Equipment Needed
To bring this recipe to life, you’ll want to have these essential kitchen tools ready:
- A 13 x 9-inch baking dish
- A small saucepan
- A skillet
- A whisk
- Measuring cups and spoons
- Paper towels
- A mixing bowl
Instructions
Let’s embark on the journey of creating this flavor-packed chicken. Precision and a little patience will yield delicious results.
-
Prepare the Oven and Baking Dish: Begin by preheating your oven to 400 degrees Fahrenheit (200 degrees Celsius). Lightly grease a 13 x 9-inch baking dish. This step ensures the chicken won’t stick, making for easier serving and cleanup.
-
Prepare the Chicken Pieces: Take your cut chicken pieces and, using your hands, gently squeeze out as much excess water as possible. This is a crucial step for achieving better browning and crispier skin. Afterward, dry the chicken thoroughly using paper towels. If you desire, you can lightly season the chicken with black pepper at this stage. Avoid salting the chicken before browning, as the glaze will provide plenty of salinity.
-
Craft the Flavorful Glaze: In a mixing bowl, combine the soy sauce with the cornstarch, ginger powder, and sesame oil (if you’re using it). Whisk vigorously until the mixture is completely smooth and free of lumps. Then, add in the honey, light brown sugar, ketchup, and Heinz Chili Sauce. Whisk again until all ingredients are well combined. It’s at this point that you should taste the sauce. If you prefer a slightly sweeter glaze, now is the time to add a bit more honey or brown sugar to suit your preference.
-
Sauté the Aromatics: Place a small saucepan over medium-high heat and add your vegetable oil. Once the oil is shimmering, add the chopped onion and sauté for about 3 minutes, or until the onion begins to soften slightly. Next, add the chopped garlic and crushed red pepper flakes. Cook for another 2 minutes, stirring constantly, until fragrant. Be careful not to burn the garlic.
-
Thicken the Glaze: Pour the prepared soy sauce mixture into the saucepan with the sautéed aromatics. Bring the mixture to a simmer, mixing constantly. Continue to cook until the sauce bubbles and thickens. It should become a fairly thick consistency. Once thickened, remove the saucepan from the heat and set the glaze aside.
-
Brown the Chicken: Heat a small amount of oil in a skillet over medium-high heat. Carefully add the chicken pieces to the hot skillet, working in batches if necessary to avoid overcrowding the pan, which can lead to steaming rather than browning. Brown the chicken on both sides. Once browned, remove the chicken from the skillet and transfer it to the prepared baking dish.
-
Coat and Bake: Pour the thickened glaze evenly over the chicken pieces in the baking dish. Using your hands (carefully, as the chicken is hot) or tongs, turn the chicken pieces to ensure they are well coated in the sauce. Arrange the chicken so that the skin side is facing up for optimal crisping.
-
Baking Time: Place the baking dish, uncovered, into the preheated oven. Bake for approximately 45 minutes, or until the chicken is completely cooked through. About halfway through the cooking time, baste the chicken with the pan glaze. This will reapply the flavorful sauce and help keep the chicken moist. You can check for doneness by ensuring the juices run clear when pierced with a fork or by using a meat thermometer, which should register 165 degrees Fahrenheit (74 degrees Celsius) in the thickest part of the meat.
-
Serve: Once the chicken is cooked to perfection, remove it from the oven. Serve immediately with cooked rice. The rice is the perfect vessel to soak up any extra delicious glaze.
Expert Tips & Tricks
- For a Crispier Skin: Ensure you pat the chicken very dry before cooking. Moisture is the enemy of crispiness.
- Glaze Consistency: If you find your glaze isn’t thickening enough, you can always create a slurry with a bit more cornstarch and water and whisk it into the simmering sauce.
- Make-Ahead Glaze: The glaze can be made ahead of time and stored in the refrigerator. Reheat it gently before pouring over the chicken.
- Oven Variations: Ovens can vary significantly. Keep an eye on the chicken, especially during the last 15 minutes of baking, and adjust the time as needed. If the glaze starts to brown too quickly, you can loosely tent the dish with foil.
- Spice Level Adjustment: The crushed red pepper flakes are your primary heat control. Start with the lower amount if you’re unsure about your spice tolerance, and you can always add more to individual servings.
Serving & Storage Suggestions
This Asian-Glazed Baked Chicken is a showstopper on its own, but it pairs beautifully with steamed rice, which is perfect for soaking up every last drop of that luscious glaze. For a complete meal, consider serving it alongside a fresh, crisp green salad or some steamed or stir-fried vegetables like broccoli, bok choy, or snap peas.
Leftovers are a treasure! Store any remaining chicken in an airtight container in the refrigerator for up to 3 days. When ready to reheat, gently warm the chicken in a covered dish in a low oven (around 300°F / 150°C) or in a skillet over low heat, adding a splash of water or a bit of extra glaze if needed to prevent drying. While freezing is possible, the texture of the chicken may be slightly altered upon thawing.
Nutritional Information
Here’s an estimated breakdown of the nutritional content per serving. Please note that these are approximate values and can vary based on specific ingredients and portion sizes.
| Nutrient | Amount per Serving | % Daily Value |
|---|---|---|
| Calories | 888.2 kcal | |
| Calories from Fat | 407 kcal | |
| Total Fat | 45.2 g | 69% |
| Saturated Fat | 11.3 g | 56% |
| Cholesterol | 160.4 mg | 53% |
| Sodium | 2149.9 mg | 89% |
| Total Carbohydrate | 80.7 g | 26% |
| Dietary Fiber | 2.2 g | 8% |
| Sugars | 68.7 g | 274% |
| Protein | 41.5 g | 83% |
Variations & Substitutions
While this recipe shines in its original form, there’s always room for creativity in the kitchen!
- Gluten-Free Option: For a gluten-free version, swap the low sodium soy sauce for a gluten-free tamari. Ensure all other ingredients are also certified gluten-free.
- A Touch of Citrus: A tablespoon or two of orange juice or a bit of orange zest added to the glaze can provide a bright, zesty counterpoint to the richness.
- Vegetable Medley: You can roast vegetables like broccoli florets, bell pepper chunks, or sweet potato cubes alongside the chicken in the last 20-25 minutes of baking. Toss them with a little oil and seasoning before adding them to the dish.
- Different Cuts: While a whole chicken cut into pieces is traditional, this glaze is also fantastic on chicken thighs or drumsticks. Adjust baking time accordingly to ensure they are cooked through.
FAQs (Frequently Asked Questions)
Q: My glaze seems too thin. How can I thicken it?
A: If your glaze isn’t reaching the desired thick consistency after simmering, you can create a slurry by whisking 1 teaspoon of cornstarch with 1 tablespoon of water until smooth. Stir this slurry into the simmering glaze and cook for another minute or two until it thickens.
Q: Can I use a different type of oil for sautéing?
A: Yes, you can substitute vegetable oil with other neutral oils like canola oil or grapeseed oil. Olive oil could also be used, but its flavor might subtly alter the final profile of the glaze.
Q: I don’t have Heinz Chili Sauce. What can I use instead?
A: While Heinz Chili Sauce adds a unique tang and slight sweetness, you can substitute it with an equal amount of ketchup mixed with a pinch of cayenne pepper or a dash of your favorite hot sauce to mimic its flavor profile.
Q: Is it necessary to brown the chicken before baking?
A: Browning the chicken first is highly recommended. It adds a layer of flavor and color through the Maillard reaction, and it helps to render some of the fat, contributing to a more enjoyable texture. However, if you are in a hurry, you can omit this step and bake the chicken directly.
Q: How can I make this dish spicier?
A: To increase the heat, you can add more crushed red pepper flakes to the glaze. You could also incorporate a minced fresh chili pepper (like a jalapeño or serrano) along with the garlic and onion when sautéing the aromatics.
Final Thoughts
Kittencal’s Asian-Glazed Baked Chicken is more than just a recipe; it’s an invitation to a world of vibrant flavors. The balance of sweet, savory, and a gentle kick of spice creates a truly harmonious dish that is both comforting and exciting. I encourage you to try it, to experience that incredible aroma filling your home, and to savor each succulent bite. Don’t hesitate to adjust the sweetness or spice to your personal preference, making this recipe truly your own. Serve it with a steaming bowl of rice, and perhaps a crisp, cool beverage to complement the flavors, and prepare for accolades from your dinner guests. I’d love to hear about your experience!