
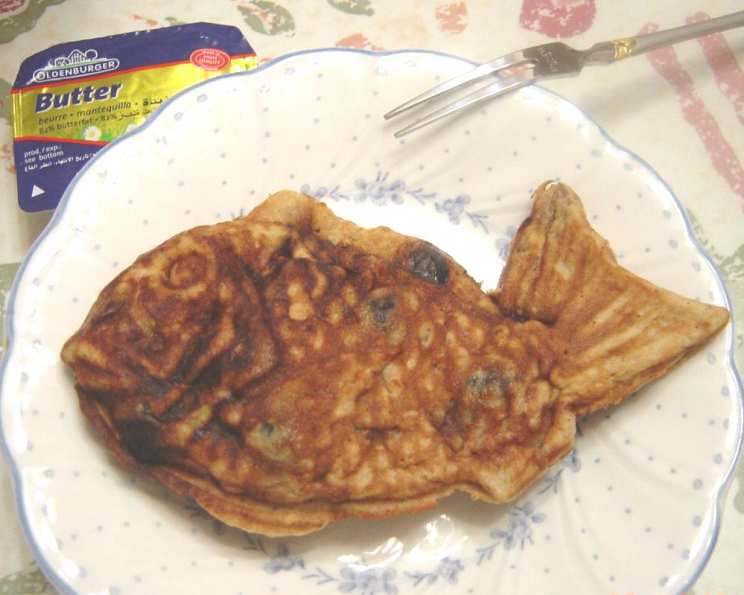
Taiyaki: A Whimsical Japanese Fish-Shaped Pancake
There’s a particular kind of magic that happens when a familiar comfort food takes on an unexpected, delightful form. For me, that magic is captured perfectly in Taiyaki. I remember my first encounter with these charming fish-shaped cakes on a chilly afternoon in Tokyo, the aroma of sweet batter and warm filling wafting from a tiny street vendor’s cart. Each bite was a perfect harmony of crispy exterior and a warm, yielding interior, a simple pleasure that instantly transported me. It’s that childlike wonder, coupled with the sophisticated flavors of a well-made pancake, that makes Taiyaki an enduring favorite, a treat that never fails to bring a smile.
Recipe Overview
- Prep Time: 20 minutes
- Cook Time: (Depends on Taiyaki iron, typically 3-5 minutes per fish)
- Total Time: Approximately 20 minutes (plus cooking time per fish)
- Servings: 1
- Yields: 2-3 fish pancakes
- Dietary Type: Can be adapted
Ingredients
This recipe uses a basic pancake batter that’s incredibly versatile. You can easily adapt it with your favorite additions.
Basic Fish Batter
- 4 tablespoons all-purpose flour (half of it can be whole wheat flour)
- 1/2 teaspoon baking powder
- 3/4 teaspoon sugar (or brown sugar)
- 1 dash salt
- 1 egg, beaten
- 1/4 cup milk
- 2 teaspoons butter, melted (or 2 teaspoons oil)
- 1 dash vanilla
Apple Raisin Variation (Optional Addition)
- 1/4 cup chopped nuts
- 1/4 cup raisins
- 1/2 apple, in small dices
- 1 teaspoon ground cinnamon
- 1/2 teaspoon ground nutmeg
Equipment Needed
- Taiyaki pan or fish-shaped pancake molds
- Mixing bowls
- Whisk
- Measuring cups and spoons
- Spatula or basting brush (for greasing the pan)
- Cooling rack
Instructions
The beauty of Taiyaki lies in its simplicity, especially when you have the right tool. The process is straightforward, leading to a delightful outcome.
- Prepare the Dry Ingredients: In a medium-sized mixing bowl, whisk together the all-purpose flour (or your chosen blend of flours), baking powder, sugar, and salt. Ensure these are well combined to distribute the leavening agent evenly.
- Incorporate Wet Ingredients: In a separate, smaller bowl, lightly beat the egg. Then, add the milk, melted butter (or oil), and vanilla extract to the beaten egg. Whisk these wet ingredients until they are just combined.
- Combine Wet and Dry: Pour the wet ingredient mixture into the dry ingredients. Whisk gently until a smooth batter forms. Be careful not to overmix; a few small lumps are perfectly acceptable and can actually contribute to a lighter texture.
- Prepare the Taiyaki Pan: If you are using a stove-top Taiyaki pan, place it over medium-low heat. Generously grease both sides of the molds with melted butter or oil. This step is crucial for preventing the batter from sticking and ensuring your Taiyaki release easily with a beautiful, golden crust.
- Add the Batter: Once the pan is heated and greased, carefully ladle approximately 1 to 2 tablespoons of batter into the bottom half of each fish mold. You want enough batter to coat the mold but not so much that it will overflow when the top is closed.
- Add the Filling (Optional): If you’re incorporating the Apple Raisin Variation, this is the time to add your mixture. Sprinkle the chopped nuts, raisins, diced apple, cinnamon, and nutmeg over the batter in the bottom mold.
- Close and Cook: Carefully place the top half of the Taiyaki pan over the batter and filling. If you are using a double-sided, hinged pan, close it securely. If using individual molds, you’ll likely be cooking one side at a time.
- Cooking Time: Cook for approximately 3 to 5 minutes per side, or until the Taiyaki is golden brown and cooked through. The exact time will depend on the heat of your stove and the specific Taiyaki pan you are using. Check periodically by lifting the lid to ensure they are not burning. Adjust the heat as needed; lower heat for longer cooking can help ensure the inside is fully cooked without burning the exterior.
- Demolding: Once cooked, carefully remove the Taiyaki from the pan using a spatula or tongs. They should release with ease if the pan was properly greased.
- Cooling: Place the cooked Taiyaki on a cooling rack to allow them to cool slightly. This also helps to prevent them from becoming soggy.
Expert Tips & Tricks
Achieving the perfect Taiyaki is all about a few key techniques.
- Batter Consistency: The batter should be similar to a standard pancake batter – thick enough to coat the back of a spoon but still pourable. If it’s too thick, add a splash more milk; if too thin, a little more flour.
- Pan Temperature is Key: A medium-low heat is your best friend here. Too high, and the outside will burn before the inside cooks. Too low, and you’ll get pale, potentially doughy Taiyaki. It takes a little practice to find that sweet spot on your stove.
- Don’t Overfill: Resist the urge to pack the molds with batter. Overfilling leads to messy overflows that are difficult to clean and can result in unevenly cooked cakes.
- Grease Generously: I can’t stress this enough! A well-greased Taiyaki pan is the secret to perfect release and beautiful browning. Use a pastry brush to get into all the nooks and crannies.
- Filling Distribution: When adding fillings like the apple raisin mixture, try to distribute them evenly within the mold. This ensures that each bite offers a delightful burst of flavor and texture.
- For a Crispier Exterior: If you prefer an extra crispy finish, you can lightly brush the cooked Taiyaki with a little more melted butter immediately after they come out of the pan.
Serving & Storage Suggestions
Taiyaki are best enjoyed fresh and warm, straight from the pan. They make a delightful breakfast, snack, or even a light dessert.
-
Serving: Serve them plain, dusted with a little powdered sugar, or with your favorite accompaniments. Classic pairings include:
- A dollop of butter and a drizzle of syrup or honey.
- Jam or fruit preserves.
- A rich chocolate sauce.
- A light dusting of powdered sugar.
- For a savory twist (though this recipe is geared sweet), imagine them with a bit of pesto sauce!
-
Storage: While they are undoubtedly at their peak when fresh, any leftover Taiyaki can be stored.
- Room Temperature: Store in an airtight container for up to 1-2 days. The exterior may soften slightly.
- Refrigeration: For longer storage, place in an airtight container in the refrigerator for up to 3-4 days.
- Freezing: Taiyaki freeze exceptionally well. Wrap them individually in plastic wrap, then place them in a freezer-safe bag or container. They will keep for up to 2-3 months.
-
Reheating:
- To reheat refrigerated Taiyaki, a toaster oven or a regular oven set to 300°F (150°C) for 5-10 minutes will help restore some crispness.
- Frozen Taiyaki can be reheated directly from frozen in a toaster oven or oven at the same temperature for a slightly longer duration, about 10-15 minutes, until warmed through and slightly crisped.
Nutritional Information
Please note: This nutritional information is an estimate and will vary based on specific ingredients and portion sizes used.
| Nutrient | Amount per Serving | % Daily Value |
|---|---|---|
| Calories | 662.4 kcal | |
| Calories from Fat | ||
| Total Fat | 33.5 g | 51% |
| Saturated Fat | 10.5 g | 52% |
| Cholesterol | 240.2 mg | 80% |
| Sodium | 725.6 mg | 30% |
| Total Carbohydrate | 79.1 g | 26% |
| Dietary Fiber | 8.4 g | 33% |
| Sugars | 34.2 g | 136% |
| Protein | 18.8 g | 37% |
(Note: The original data contained some formatting inconsistencies, which have been standardized here for clarity and accuracy.)
Variations & Substitutions
The basic Taiyaki batter is a blank canvas for creativity.
- Flour Blend: As mentioned, you can substitute half of the all-purpose flour with whole wheat flour for added fiber and a nuttier flavor. For gluten-free options, a good quality gluten-free all-purpose flour blend can be used, though you might need to adjust the liquid slightly to achieve the right batter consistency.
- Sweetener: Experiment with maple syrup, agave nectar, or even a fruit puree like mashed banana as sweeteners in place of sugar.
- Dairy-Free/Vegan:
- Replace milk with your favorite non-dairy milk such as almond, soy, oat, or coconut milk.
- Replace butter with melted coconut oil or other neutral-flavored vegetable oils.
- For a vegan egg substitute, you can use a flax egg (1 tablespoon ground flaxseed mixed with 3 tablespoons water, left to sit for 5-10 minutes) or a commercial egg replacer.
- Filling Ideas:
- Red Bean Paste (Anko): The most traditional filling for Taiyaki, available at most Asian markets.
- Custard: A simple homemade or store-bought pastry cream.
- Chocolate Chips: A simple and universally loved addition.
- Cream Cheese Filling: Mix cream cheese with a little sugar and vanilla.
- Savory Fillings: While not typical for this sweet batter, you could experiment with a slightly less sweet batter and add savory elements like cheese, finely chopped cooked vegetables, or even a bit of curry powder.
FAQs
Q: Do I absolutely need a special Taiyaki pan?
A: While a dedicated Taiyaki pan offers the iconic fish shape, you can achieve a similar pancake in waffle makers or even traditional pancake molds if they are available.
Q: My Taiyaki are sticking to the pan, what am I doing wrong?
A: The most common culprits are insufficient greasing or the pan not being hot enough. Ensure you generously grease the pan each time and cook over medium-low heat.
Q: How do I make my Taiyaki crispy?
A: Cook them slightly longer until a deep golden brown. A light brush of butter immediately after cooking can also enhance crispness.
Q: Can I make the batter ahead of time?
A: Yes, pancake batter can typically be made a few hours in advance and stored in the refrigerator. Give it a quick stir before using.
Q: What’s the best way to store leftovers?
A: For optimal texture, store in an airtight container at room temperature for a day or two, or freeze for longer preservation. Reheating in a toaster oven is best for restoring crispness.
Final Thoughts
Taiyaki are more than just a sweet treat; they are a delightful experience. Whether you’re recreating a nostalgic childhood memory or discovering this Japanese delight for the first time, the process of making them is as rewarding as the eating. The simple joy of watching the batter transform into a charming fish, the anticipation as it cooks, and the first warm, satisfying bite – it’s a culinary adventure that’s accessible to everyone. So gather your ingredients, fire up your Taiyaki pan, and let the whimsical world of fish-shaped pancakes enchant your kitchen. They pair wonderfully with a cup of green tea or a warm mug of milk. Enjoy the sweet simplicity!