
It’s Raining Cat and Dog Balls! (Treats)
There’s a special kind of joy that comes from creating something truly unique for our furry companions. For me, it’s a memory deeply etched in my kitchen, a whirlwind of flour-dusted countertops and the excited chirps of my own little quartet of feline overlords. I remember one particularly grey afternoon, the kind where the sky seems to weep, and I felt an overwhelming urge to bake. Not for myself, but for my beloved cats. I’d been experimenting with a few different ground beef recipes, and on a whim, decided to combine elements of a couple of my favorites, aiming for something truly special for my discerning kitties. Sweet Pea, my boldest tabby, famously bypassed the neatly portioned pieces I’d prepared and went straight for the perfectly formed little spheres I’d made. The image of her, ears perked, enthusiastically attacking these “balls” is forever imprinted in my mind, a testament to the delicious power of homemade treats.
This recipe is a celebration of that moment – a way to spoil your pets with wholesome, homemade goodness that they’ll absolutely adore. These “balls” are surprisingly simple to whip up, using just a handful of ingredients that you might already have on hand. They’re a fantastic way to use up small amounts of ground beef and offer a delightful alternative to store-bought treats, giving you complete control over what goes into your pet’s diet. Plus, watching your pets’ enthusiastic reaction to these little flavor bombs is truly a reward in itself.
Recipe Snapshot
- Prep Time: 10 minutes
- Cook Time: 10-15 minutes
- Total Time: 20-25 minutes
- Servings: Variable (depending on ball size)
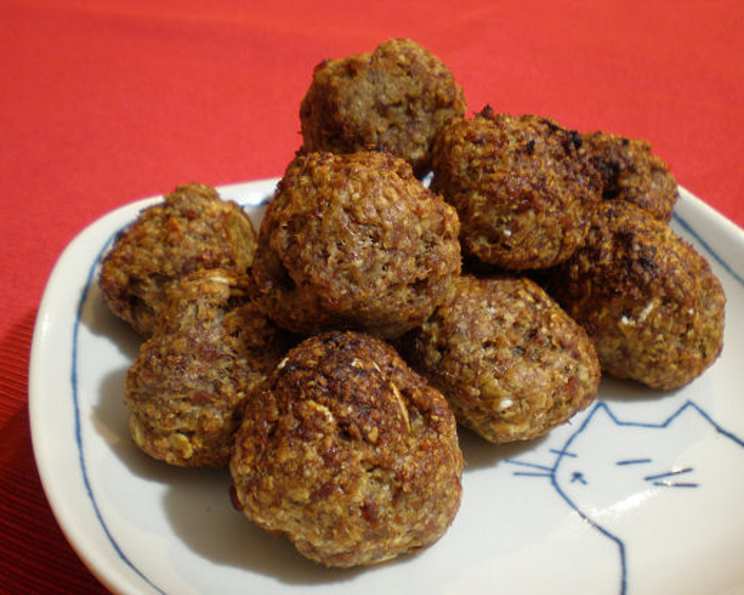
- Yield: Approximately 12 1-inch balls
- Dietary Type: Carnivore-focused
Ingredients
The beauty of these treats lies in their simplicity. You’ll need just four core ingredients, easily sourced from your pantry and refrigerator:
- 1/2 cup dry milk or 1/2 cup powdered milk
- 1/2 cup wheat germ
- 1 teaspoon honey
- 1/4 lb lean ground beef
Notes on Ingredients:
- Dry Milk/Powdered Milk: This acts as a binder and adds a touch of richness. If you don’t have dry milk, powdered milk is a perfect substitute. Ensure it’s plain and unsweetened.
- Wheat Germ: A nutritious addition, wheat germ provides fiber and essential nutrients.
- Honey: A natural sweetener that can also have some mild antibacterial properties. Use a good quality honey.
- Lean Ground Beef: Opt for lean ground beef to keep these treats from being overly greasy. Ensure it’s fresh and of good quality.
Equipment Needed
You won’t need much for this quick and easy recipe:
- A medium mixing bowl for combining ingredients.
- A baking sheet or silicone baking mat for baking.
- A greased cookie sheet if not using a silicone mat.
- An oven preheated to the correct temperature.
- A cooling rack for letting the treats cool completely.
Instructions
Crafting these delightful pet treats is an absolute breeze. Follow these straightforward steps for a batch of happy, tail-wagging (or purring!) recipients.
-
Combine Dry Ingredients: In your medium mixing bowl, add the dry milk (or powdered milk) and the wheat germ. Whisk them together thoroughly to ensure they are evenly distributed. This ensures a consistent texture in the final treats.
-
Incorporate Wet Ingredients and Beef: Now, add the honey and the lean ground beef to the bowl with the dry ingredients.
-
Mix Until Combined: Using your hands or a sturdy spoon, mix all the ingredients together until they are well combined. You want a cohesive mixture that holds together when squeezed. It might be a little sticky, which is perfectly normal.
-
Form the Balls: Take small portions of the mixture and form them into 3/4-inch to 1-inch balls. Aim for a consistent size for even cooking. If the mixture feels too sticky, you can lightly dampen your hands with water.
-
Prepare for Baking: Arrange the formed balls on a greased cookie sheet or a silicone baking mat. Ensure there’s a little space between each ball to allow for even heat circulation.
-
Preheat Oven: Preheat your oven to 350°F (175°C). This is a moderate temperature that will cook the treats through without burning them.
-
Bake the Treats: Bake the balls in the preheated oven for 10-15 minutes. Keep a close eye on them, as they can cook rather quickly. The goal is for them to be cooked through, meaning the beef is no longer pink and the exterior is firm.
-
Check for Doneness: To check if they are cooked through, you can carefully remove one from the oven and cut it in half. The inside should be fully cooked.
-
Cool Completely: Once baked, remove the baking sheet from the oven and transfer the cooked balls to a cooling rack. It is crucial to cool them completely before serving. This allows them to firm up further and makes them easier to handle.
-
Serve or Store: Once fully cooled, your homemade pet treats are ready to be served!
Expert Tips & Tricks
- Consistency is Key: When forming the balls, try to make them as uniform in size as possible. This ensures they all cook evenly, preventing some from being undercooked while others are overdone.
- Don’t Overbake: Because these are small treats, they can go from perfectly cooked to slightly dry very quickly. Start checking them at the 10-minute mark. It’s better to slightly underbake and have a softer interior than to overbake and create hard, crumbly treats.
- Grease Wisely: If you’re not using a silicone mat, ensure your cookie sheet is adequately greased. A light spray of cooking oil or a thin layer of butter will prevent sticking.
- Cooling is Crucial: Resist the urge to serve these warm! Letting them cool completely not only prevents a burnt tongue for your pet but also allows the internal structure to set properly, giving them the best texture.
Serving & Storage Suggestions
These “Cat and Dog Ball” treats are best served as an occasional indulgence or a special training reward.
- Serving: For smaller pets or those with delicate mouths, it’s recommended to break up larger pieces into more manageable bites. Observe your pet’s reaction to ensure they can chew and swallow them comfortably.
- Storage: Once completely cooled, store these treats in an airtight container. They can be kept at room temperature for up to 2 days. For longer storage, refrigerate them for up to a week. They also freeze beautifully for up to 2-3 months. Simply thaw them at room temperature or in the refrigerator before serving.
Nutritional Information
While precise nutritional information can vary based on the exact lean percentage of the ground beef and the specific brands of milk and wheat germ used, here’s an estimated breakdown per 1-inch ball:
| Nutrient | Amount per Serving | % Daily Value |
|---|---|---|
| Calories | Approximately 45-55 | Varies |
| Total Fat | Approximately 2-3g | Varies |
| Saturated Fat | Approximately 0.5-1g | Varies |
| Cholesterol | Approximately 5-10mg | Varies |
| Sodium | Approximately 10-20mg | Varies |
| Total Carbohydrate | Approximately 3-4g | Varies |
| Dietary Fiber | Approximately 0.5g | Varies |
| Sugars | Approximately 1-2g | Varies |
| Protein | Approximately 3-4g | Varies |
Note: These values are estimates and are intended for general guidance only.
Variations & Substitutions
While this recipe is wonderfully simple as is, here are a few ideas to tailor it even further:
- Different Meats: If your pet has dietary restrictions or preferences, you can experiment with other cooked ground meats like turkey or chicken. Ensure they are lean and cooked thoroughly.
- Grain-Free Option: For pets requiring a grain-free diet, you could experiment with substituting the wheat germ with a finely ground nut flour like almond flour or coconut flour (use with caution and consult your vet for suitability).
- Savory Boost: A tiny pinch of pet-safe herbs like parsley or a sprinkle of dried, unsalted chicken or beef broth powder (ensure no onion or garlic) can add an extra layer of flavor. Always introduce new ingredients gradually and observe your pet for any adverse reactions.
FAQs
Q: Can I make these treats for my dog as well as my cat?
A: Yes, absolutely! These treats are generally suitable for both cats and dogs, provided they don’t have any specific dietary sensitivities to the ingredients.
Q: My mixture is too sticky to form balls. What should I do?
A: Lightly dampen your hands with water before forming the balls. You can also try chilling the mixture in the refrigerator for 15-20 minutes to make it easier to handle.
Q: How long do these treats typically last?
A: At room temperature, they’ll last about 2 days. In the refrigerator, they can be kept for up to a week. For longer storage, freezing is your best option.
Q: Can I use a different type of sweetener?
A: While honey is recommended for its properties and flavor, a very small amount of maple syrup could be a substitute, but always use sparingly and ensure it’s pure maple syrup without additives.
Q: Is it okay to add other ingredients?
A: It’s best to stick to the core recipe when starting out, especially for pets with sensitive stomachs. If you wish to add other ingredients, introduce them one at a time in very small quantities and monitor your pet for any reactions. Always consult your veterinarian before making significant changes to your pet’s diet.
Final Thoughts
There’s a profound satisfaction in creating homemade treats that your pets will genuinely love. This recipe, “It’s Raining Cat and Dog Balls!”, is a testament to that simple pleasure. It’s a quick, easy, and incredibly rewarding way to show your furry family members a little extra love. The joy on their faces, the enthusiastic wags, and the contented purrs are truly priceless. So, gather your ingredients, embrace the simplicity, and get ready to witness a delightful downpour of affection. I encourage you to try this recipe and share your pet’s joyful reactions – I’d love to hear about your own “raining balls” moments!