
The Honest Hearth: Crafting a Glorious Whole-Wheat Pie Crust
There are certain scents that, for me, unlock a floodgate of memories. The gentle, nutty aroma of toasting whole wheat flour, especially when it’s mingling with the subtle sweetness of melting coconut oil, transports me back to my grandmother’s kitchen. I remember being a small child, perched on a stool, watching her nimble fingers work magic with simple ingredients, transforming them into something truly extraordinary. It was in those moments that I learned the profound truth that baking, at its heart, is an act of love, and a truly exceptional pie crust is the canvas upon which that love is beautifully displayed.
Recipe Overview
- Prep Time: 15 minutes
- Cook Time: 0 minutes (for the crust itself)
- Total Time: 15 minutes (active prep)
- Servings: 1 8 or 9-inch pie crust
- Yield: 1 8 or 9-inch pie crust
- Dietary Type: Vegan (depending on filling)
Ingredients
- 2 cups whole wheat flour (I wholeheartedly recommend King Arthur brand; its texture is simply superior and makes a noticeable difference in the final crust.)
- 1/4 teaspoon salt
- 2/3 cup coconut oil
Equipment Needed
- Medium mixing bowl (for the hand method)
- Food processor (optional, for a quicker method)
- Measuring cups and spoons
- Fork (for the hand method)
- Rolling pin
- Floured surface
- Pie plate
Instructions
The journey to a truly memorable whole-wheat pie crust, much like any great culinary endeavor, hinges on technique and a touch of patience. The beauty of this recipe lies in its simplicity, allowing the quality of your ingredients and the precision of your actions to shine through. We’ll explore two equally effective methods: the classic “by hand” approach, which connects you intimately with the dough, and the swift efficiency of a food processor.
Standard Method (By Hand)
- Begin by combining the whole wheat flour and salt in a medium mixing bowl. Use a table fork to stir them together thoroughly. This is your moment to taste the flour mixture for salt. If your palate fancies a touch more salinity, now is the opportune time to add it.
- Next, create a small well in the center of your flour mixture and add the coconut oil. Crucially, before you do anything else, take the cup you used to measure the coconut oil and fill it about halfway with ice. Then, add water until it is almost full. You want the water to be as ice cold as possible, giving it ample time to chill while you proceed.
- Still using your fork, begin to cut the coconut oil into the flour mixture. The goal here is to break down the coconut oil into almost microscopic pieces, ensuring they are very small and well-integrated into the flour. This is key to achieving flakiness.
- Once the coconut oil is finely incorporated, pour just a couple of tablespoons of your ice-cold water into the flour mixture. Working quickly and lightly with the same fork, gently mix the water into only the section of the dough that the water initially touched.
- Add a couple more tablespoons of water (you can estimate this by eye) into another section of the flour mixture in the bowl and quickly mix it in. You may find yourself needing to add more water to your ice cup to maintain its chill.
- At this stage, the dough might just begin to show signs of holding together, which is precisely what you want. Continue to incorporate small bits of water until the dough just starts to hold together fairly well when you press it with your hands. Avoid overworking the dough; we are aiming for a cohesive mass, not a smooth, elastic dough.
Food Processor Method
- If you’re opting for the speed and convenience of a food processor, place the whole wheat flour and salt into the processor bowl, fitted with the blades. Pulse them together to combine thoroughly.
- Unplug the food processor for safety, and then taste the flour mixture for salt. Adjust if necessary.
- Now, add in the coconut oil. Prepare your ice-cold water by filling the measuring cup you used for the coconut oil with ice and then topping it with water until almost full, just as in the hand method.
- While the water is chilling, pulse the coconut oil into the flour mixture until you can no longer see any distinct chunks of oil.
- With the processor running, gradually add the ice-cold water, one tablespoon at a time, pulsing after each addition. Continue this process until the mixture just begins to hold together. At this point, it’s ready to be shaped.
Shaping the Crust (Common to Both Methods)
- Regardless of whether you used your hands or a food processor, it’s time to turn the dough out onto a lightly floured surface. Keep your ice-cold water nearby, as it will be your ally in this next step.
- Begin to roll out the dough, aiming for a roughly round shape. Be prepared – it might crumble a bit, and that’s perfectly normal! The remaining cold water is your “glue” to coax these pieces back together.
- Continue flouring your surface and rolling pin as needed to prevent sticking. Roll the dough until it’s the desired thickness and size for your pie plate. You don’t want to over-roll the dough, as excessive handling will lead to toughness. However, ensure it’s wide enough to overhang the sides of your pie plate by about an inch once it’s in place.
- Gently fold the dough around your rolling pin. This technique makes it easier to transfer the dough to your pie plate without tearing.
- Carefully press the dough into the bottom and up the sides of the pie plate. Now, shape the edge of your crust as you desire. A classic technique is to roll the edge under and then pinch it to create a sealed, decorative edge. Remember, a perfectly pristine, store-bought look isn’t the goal here; the charm of a homemade crust lies in its beautiful imperfections.
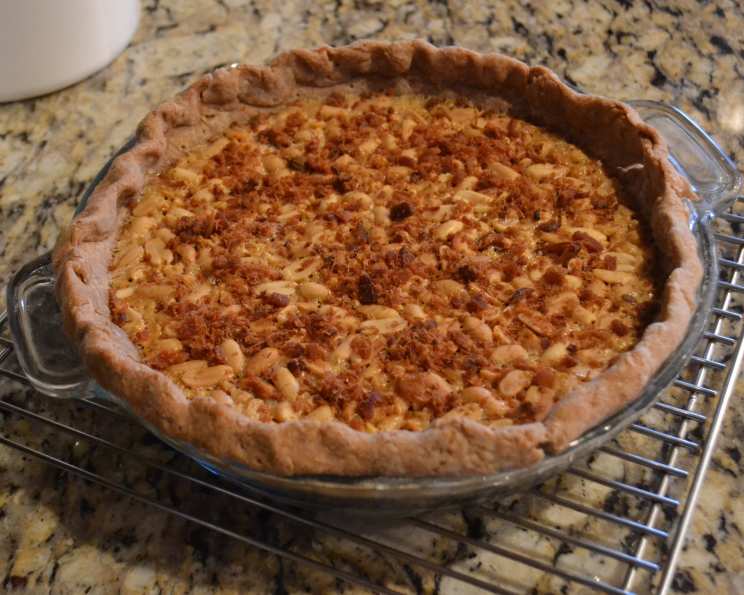
- Your whole-wheat pie crust is now ready to embrace its filling. Proceed with your chosen pie, quiche, or pot pie recipe.
Baking Leftover Crust
- If you happen to have any leftover pie crust dough, don’t let it go to waste! Roll it out again and cut it into short strips – the shape doesn’t matter.
- Sprinkle these strips generously with cane sugar and cinnamon.
- Bake them in an oven preheated to 375°F (190°C) for 8-10 minutes, or until they are a lovely light brown. These make delightful little treats!
- For the adventurous little chefs: If you have small children around, this is a fantastic opportunity to let them have their own fun. Dust off a cutting board and rolling pin, provide some cookie cutters, and let them create their own “pie crust cookies.” There’s nothing in this dough that’s harmful if nibbled, and you’ll likely have a delightful time baking their creations for a special treat. My own children absolutely loved this process, and the anticipation of enjoying their own baked goods was always a highlight!
Expert Tips & Tricks
- Keep Everything Cold: The secret to a flaky crust is maintaining cold ingredients, especially the fat. If your kitchen is warm, don’t hesitate to pop your flour and salt mixture back in the fridge for a few minutes if it starts to feel warm.
- Don’t Fear Crumbles: Whole wheat flour can sometimes be drier and more prone to crumbling than all-purpose flour. Embrace it! The ice water is your best friend here, acting as a binder. Just add it a little at a time until the dough comes together.
- The ‘Patchwork’ Technique: When rolling out, if your dough cracks or tears, don’t despair. Simply patch it together with a little extra cold water and continue rolling. This is the essence of a rustic, homemade crust.
- Chill Before Baking: While not explicitly stated for the raw crust in this recipe, for optimal flakiness and to help the crust hold its shape, chilling the formed crust in the pie plate for at least 30 minutes in the refrigerator before filling and baking can be highly beneficial.
Serving & Storage Suggestions
This whole-wheat pie crust is wonderfully versatile and serves as the perfect foundation for both sweet dessert pies and savory quiches or pot pies. Once baked with your chosen filling, serve it warm for an optimal flavor and texture experience.
Leftover baked pie can be stored, covered tightly, in the refrigerator for up to 3-4 days. Reheat slices gently in a low oven (around 300°F/150°C) to revive crispness. Unbaked pie crust dough can be wrapped tightly in plastic wrap and refrigerated for up to 2 days, or frozen for up to 1 month. Thaw overnight in the refrigerator before using.
Nutritional Information
| Nutrient | Amount per Serving (approx. of crust only) | % Daily Value |
|---|---|---|
| Calories | 2069.4 kcal | — |
| Calories from Fat | 1362 kcal | — |
| Total Fat | 151.4 g | 232% |
| Saturated Fat | 126.8 g | 634% |
| Cholesterol | 0 mg | 0% |
| Sodium | 586.2 mg | 24% |
| Total Carbohydrate | 172.7 g | 57% |
| Dietary Fiber | 25.7 g | 102% |
| Sugars | 1 g | 3% |
| Protein | 31.7 g | 63% |
Note: Nutritional information is an estimate and will vary based on specific ingredients used and final preparation.
Variations & Substitutions
While this recipe is crafted to highlight the robust flavor and texture of whole wheat, here are a few ideas for variations:
- For a Richer Flavor: Substitute a portion of the coconut oil with chilled, unsalted butter. This will introduce a dairy flavor and a different kind of flakiness.
- Herbaceous Savory Crust: For savory applications like quiche or pot pie, incorporate dried herbs such as rosemary, thyme, or sage directly into the dry ingredients. You could also add a pinch of garlic powder.
- Gluten-Free Adaptation: While not tested within this specific recipe, a gluten-free whole-grain blend could potentially be used, though it may require adjustments to the liquid content.
FAQs
Q: Why is my whole-wheat pie crust so crumbly?
A: Whole wheat flour absorbs more moisture than all-purpose flour, and the fat in the crust is solid at room temperature. Ensuring your coconut oil is cold and adding ice water gradually until the dough just comes together is key to preventing excessive crumbling.
Q: Can I use butter instead of coconut oil?
A: Yes, you can substitute chilled, unsalted butter for the coconut oil. However, the texture and flakiness will be different, and butter contains dairy.
Q: How do I prevent my crust from shrinking when baking?
A: Properly chilling the dough before baking and blind-baking (pre-baking the crust without filling) with pie weights can help prevent shrinkage. Ensure you don’t overwork the dough, as this can also contribute to shrinking.
Q: What is the purpose of the ice water?
A: The ice water is crucial for keeping the coconut oil (or other fat) cold and solid. When the crust bakes, the cold fat melts, creating steam that separates the layers of dough, resulting in a flaky texture.
Q: Can I make this crust ahead of time?
A: Yes, you can prepare the dough, wrap it tightly, and refrigerate it for up to 2 days or freeze it for up to a month. Allow it to thaw in the refrigerator before rolling.
A Taste of Home
There’s a comforting familiarity in a pie crust made from scratch, especially one that embraces the wholesome goodness of whole wheat. It’s a testament to the fact that healthy eating doesn’t mean sacrificing flavor or texture. This recipe invites you to reconnect with the joy of baking, to engage with your ingredients, and to create something truly special. Whether it’s gracing a bubbling fruit pie or forming the savory base for a hearty quiche, this whole-wheat pie crust is sure to become a cherished part of your culinary repertoire. So, gather your ingredients, embrace the process, and let the aromas of your kitchen fill your home with warmth and delicious anticipation.