
The Glorious, Unapologetic Comfort of White Trash Banana Split Pie
There are certain dishes that, from the very first bite, transport you back to a specific time and place. For me, that place is often a sticky-floored kitchen, the air thick with the scent of summer and something sweet baking. While its moniker might raise a few eyebrows in more genteel circles, this “White Trash Banana Split Pie”—a name I’ve come to embrace with fondness—is less about judgment and more about pure, unadulterated joy. It’s the kind of dessert that doesn’t care about perfect presentation; it cares about delivering a knockout punch of flavor and comfort, a promise of simple pleasures that never fails. It’s the dessert that says, “Hey, relax, let’s just enjoy this.”
This pie is a testament to the beauty of accessibility and unpretentious deliciousness. It’s the kind of recipe that might have been scribbled on the back of a grocery list, passed down through generations without ever gracing a fancy cookbook. And that, my friends, is its magic. It’s a reminder that the most memorable meals are often the ones made with love and readily available ingredients, designed to bring smiles without fuss.
Recipe Snapshot
- Prep Time: 15 minutes
- Cook Time: 30 minutes (for the crust, if using a homemade one that requires baking, otherwise no cook time for the filling)
- Total Time: 1 hour 30 minutes (including chilling time)
- Servings: 4-6
- Yield: 1 pie
- Dietary Type: Dessert (easily adaptable)
The Humble Hall of Ingredients
The beauty of this pie lies in its straightforward, pantry-friendly components. You likely have most of these on hand, ready to be transformed into something truly special.
-
For the Crust:
- 1 pre-made graham cracker crust (you can use a 9-inch store-bought pie tin or a 13×9 inch pan if you’re making a more spread-out version, though the traditional pie tin is what most people envision).
-
For the Luscious Filling:
- 1 pound powdered sugar (also known as confectioners’ sugar or icing sugar)
- 1 large egg
- 1 teaspoon vanilla extract
- 8 ounces cream cheese, softened to room temperature
- 3 bananas, ripe but still firm
- 1 (15-ounce) can pineapple chunks, drained
- 1 (8-ounce) container whipped topping, thawed if frozen (such as Cool Whip or a homemade stabilized whipped cream)
Essential Tools of the Trade
While this pie is wonderfully forgiving, a few key items will make the process smoother:
- A sturdy electric mixer (handheld or stand mixer) is essential for achieving a smooth, lump-free cream cheese mixture.
- A spatula for scraping bowls and spreading the filling.
- A knife for slicing the bananas.
- A measuring cup and spoons.
- A colander or sieve for draining the pineapple.
- A refrigerator to allow the pie to set.
Crafting the Dreamy Delight: Step-by-Step
The construction of this pie is as simple as it is satisfying. Follow these steps, and you’ll be well on your way to dessert nirvana.
-
The Creamy Foundation: In the bowl of your electric mixer, combine the powdered sugar, egg, vanilla extract, and the softened cream cheese. Begin mixing on a low speed to prevent the sugar from flying everywhere, then increase the speed to medium-high. Beat until the mixture is smooth, light, and creamy, with no visible lumps of cream cheese. This should take about 3-5 minutes.
-
The First Layer of Bliss: Spread half of this luscious cream cheese mixture evenly into the bottom of your pre-made graham cracker crust. Ensure it forms a consistent layer.
-
Banana Bedrock: Take your bananas and, if you desire, cut them lengthwise. Arrange these banana halves in a single layer over the cream cheese mixture in the pie crust. Don’t worry if they overlap a bit; this is a rustic dessert, after all. If you’re a true banana aficionado, feel free to add more!
-
Pineapple Pizazz: Drain the pineapple chunks thoroughly. A good draining is key to prevent a watery pie. Scatter the drained pineapple chunks evenly over the layer of bananas.
-
The Second Creamy Embrace: Carefully spoon the remaining half of the cream cheese mixture over the pineapple and banana layers. Gently spread it to cover the fruit and create a uniform top layer.
-
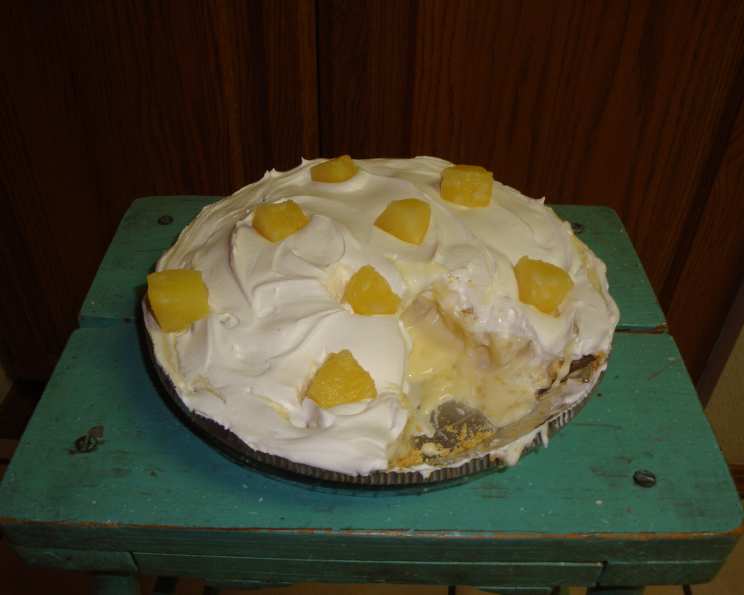
Cloud of Sweetness: Unfold or spoon the thawed whipped topping over the entire pie. Spread it gently to cover the top surface completely, creating a pristine white canvas. Some folks like to create swirls or peaks with the whipped topping for a more decorative touch, but a smooth, even layer is perfectly traditional.
-
The Chill Factor: This is where patience pays off. Cover the pie, either with plastic wrap or its original pie tin cover, and refrigerate for at least 1 hour. This chilling period is crucial for allowing the cream cheese filling to firm up and the flavors to meld together beautifully. Without this step, the pie will be too soft to slice cleanly.
Chef’s Secrets for a Superstar Pie
Even the simplest recipes can benefit from a little pro insight. Here are a few tips to elevate your White Trash Banana Split Pie game:
- Cream Cheese Consistency is Key: Ensure your cream cheese is truly softened. This means leaving it out at room temperature for at least an hour or two. Cold cream cheese will result in a lumpy filling, no matter how long you beat it.
- Drain, Drain, Drain! Don’t underestimate the importance of thoroughly draining both the pineapple and, if you opt for fresh bananas, patting them dry with a paper towel. Excess moisture can lead to a soggy crust and a less stable filling.
- The Power of Ripe Bananas: While you want them firm enough to slice, ripe bananas offer the best sweetness and flavor. Yellow bananas with a few brown spots are usually ideal.
- Crust Confidence: If you’re using a pre-made crust and are worried about it cracking, gently press the filling in and try to handle it as little as possible once assembled. For store-bought crusts, they are usually quite sturdy.
- Make-Ahead Marvel: This pie is an excellent candidate for making ahead. Prepare it up to a day in advance and keep it chilled in the refrigerator. The chilling time will only improve the flavor and texture.
Serving and Savouring
This pie is best served cold, directly from the refrigerator. When you’re ready to serve, gently lift the pie from its tin (if using a removable-bottom tin) or carefully slice it directly from the pie dish. A sharp knife will help create cleaner slices.
Storage: Leftovers can be stored, tightly covered, in the refrigerator for up to 3 days. Due to the fresh fruit and cream cheese, it’s not recommended for freezing. The whipped topping can sometimes weep or separate slightly upon thawing, so fresh is always best.
A Glimpse at the Numbers (Estimated Nutritional Information)
While this pie is a celebration of comfort and flavor rather than strict health consciousness, here’s a general idea of what you’re indulging in per serving, assuming 6 servings.
| Nutrient | Amount per Serving | % Daily Value |
|---|---|---|
| Calories | 1252.4 kcal | (Not Specified) |
| Calories from Fat | (Not Specified) | 36% |
| Total Fat | 49.7 g | 76% |
| Saturated Fat | 24.4 g | 121% |
| Cholesterol | 160.8 mg | 53% |
| Sodium | 608.1 mg | 25% |
| Total Carbohydrate | 198.1 g | 66% |
| Dietary Fiber | 4.1 g | 16% |
| Sugars | 165.3 g | 661% |
| Protein | 11.7 g | 23% |
Note: These values are estimates and can vary based on specific brands and ingredient choices.
Twists and Turns: Variations and Substitutions
While the classic recipe is a winner, feel free to play around with it!
- Crust Creations: For a slightly different flavor profile, try an Oreo cookie crust or a vanilla wafer crust. You can also make your own from scratch using crushed graham crackers, a little sugar, and melted butter.
- Fruit Fantasies: While bananas and pineapple are iconic, consider adding a layer of sliced strawberries or peaches in place of some of the banana for a seasonal twist.
- Citrus Zing: A tablespoon or two of lemon juice whisked into the cream cheese mixture can add a subtle brightness that cuts through the sweetness.
- Whipped Topping Alternatives: If you prefer a less processed option, make your own stabilized whipped cream by whipping heavy cream with a bit of powdered sugar and vanilla, and a touch of gelatin or cornstarch to help it hold its shape.
Your Burning Questions Answered: FAQs
Q: My cream cheese mixture is still a bit lumpy. What did I do wrong?
A: Ensure your cream cheese was fully softened to room temperature. If it’s still lumpy after mixing, you can try gently heating the mixture for a few seconds in the microwave (stirring constantly) or patiently continuing to beat it on medium-high speed.
Q: Can I bake this pie?
A: This pie is designed to be a no-bake dessert. The chilling process is what sets the filling. Baking would alter the texture significantly and is not part of the traditional method.
Q: What’s the best way to ensure clean slices?
A: The key is thorough chilling. A minimum of one hour is recommended, but two hours or even overnight will result in a firmer, easier-to-slice pie. Use a sharp knife and wipe it clean between slices for the neatest results.
Q: How much whipped topping do I need?
A: The recipe calls for an 8-ounce container. This is usually sufficient to create a good, even layer. If you like a very thick topping, you might consider having a little extra on hand.
Q: Why is it called “White Trash Banana Split Pie”?
A: The name is a playful, self-deprecating moniker often used for down-to-earth, unpretentious desserts that are incredibly delicious despite their humble origins or sometimes “messy” appearance. It celebrates accessibility and pure enjoyment over fancy presentation.
A Sweet Farewell
So there you have it—the wonderfully unpretentious, undeniably delicious White Trash Banana Split Pie. It’s a dessert that embodies the spirit of simple pleasures, proving that you don’t need a Michelin star to create something truly memorable. It’s the perfect antidote to a stressful day, a comforting presence at any gathering, and a testament to the fact that sometimes, the most glorious things in life are also the easiest. Whip one up, share it with loved ones, and let the sweet, creamy goodness transport you. I promise, it’s a journey worth taking, no matter what you call it.