
A Hug in a Pan: My Love Affair with Ricotta Cake
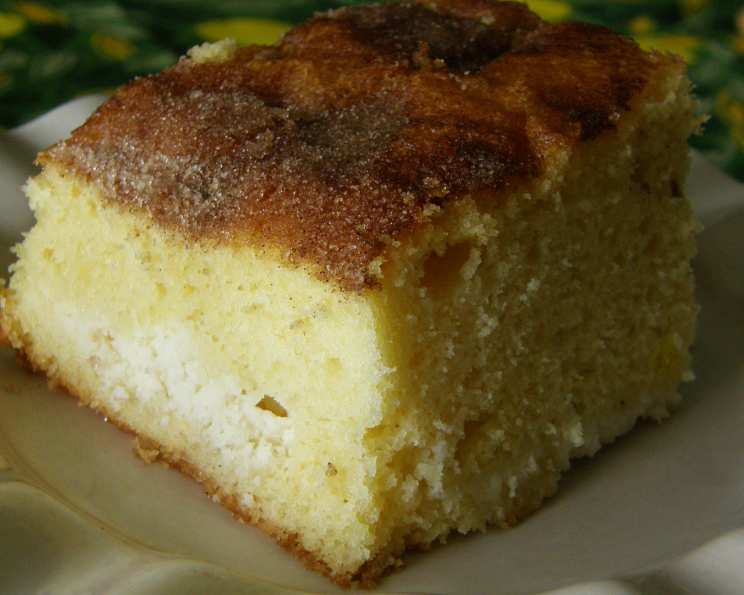
There are some desserts that just feel like a warm embrace, and for me, that’s always been a slice of ricotta cake. I first encountered it on a blustery autumn day in my grandmother’s kitchen, the air thick with the scent of cinnamon and something uniquely comforting. She’d pulled it from the oven, a golden-brown marvel with a surprisingly light, moist crumb and pockets of creamy, almost ethereal ricotta nestled within. It wasn’t overly sweet, nor was it fussy, but in its simplicity lay an undeniable magic. Each bite was a perfect balance – the subtle tang of the ricotta, the gentle sweetness of the cake, and that whisper of vanilla that always made me feel a little bit nostalgic. It’s the kind of cake that transcends special occasions; it’s for Tuesday afternoons, unexpected guests, or simply when you need a little bit of joy.
Recipe Overview
Here are the essential details for this delightful ricotta cake:
- Prep Time: 20 minutes
- Cook Time: 40-45 minutes
- Total Time: 1 hour 5 minutes
- Servings: 18-20
- Yield: 18-20 three inch by three inch squares
- Dietary Type: Contains Dairy, Eggs, Wheat
Ingredients
This ricotta cake is a testament to how a few humble ingredients can create something truly extraordinary. The beauty lies in its straightforward approach, letting the quality of the ricotta shine.
- 18 ounces yellow cake mix (ensure it does not contain pudding)
- 3 eggs (or the number specified by your cake mix package)
- 1/3 cup oil (or the amount specified by your cake mix package)
- 1 1/3 cups water (or the amount specified by your cake mix package)
- 1 (15-ounce) container ricotta cheese
- 1 teaspoon vanilla extract
- 3/4 cup granulated sugar
- Cinnamon sugar mixture (for topping)
Equipment Needed
You won’t need a professional brigade of tools for this cake, just a few essentials that most home bakers will have on hand:
- A 9×13 inch baking pan
- A large mixing bowl
- A hand mixer (or a whisk and some elbow grease)
- Measuring cups and spoons
- A spatula or spoon for dolloping the ricotta
- A toothpick or skewer for testing doneness
- An oven
- A wire cooling rack
Instructions
Crafting this ricotta cake is a wonderfully straightforward process, designed to deliver maximum flavor with minimal fuss. The magic happens when the creamy ricotta melds with the tender cake batter during baking.
- Preheat your oven to 350°F (175°C). This is the perfect temperature to ensure an even bake without burning.
- Prepare your baking pan: Grease your 9×13 inch pan thoroughly with butter or cooking spray, and then flour it. This essential step prevents the cake from sticking and ensures clean release after baking.
- Prepare the cake batter: In a large mixing bowl, combine the yellow cake mix, eggs, oil, and water according to the instructions on your cake mix package. Mix until well combined and smooth. The specific quantities for eggs, oil, and water may vary slightly depending on the brand of cake mix you are using, so always refer to the box for the most accurate proportions.
- Pour the batter into the prepared 9×13 inch pan, spreading it evenly.
- Prepare the ricotta mixture: In a separate bowl, combine the ricotta cheese, vanilla extract, and granulated sugar. Mix these ingredients together using a hand mixer until they are well blended and smooth. You want a creamy, cohesive mixture.
- Dollop the ricotta mixture: Using a spoon or small spatula, place spoonfuls of the ricotta mixture on top of the cake batter in the pan. Aim to distribute these dollops as close together and evenly as possible across the entire surface of the batter. Don’t worry about perfect uniformity; rustic charm is part of its appeal!
- Initial Bake: Bake in the preheated oven for 25 minutes.
- Add the topping: After the initial 25 minutes of baking, carefully remove the pan from the oven. Sprinkle the top generously with the cinnamon sugar mixture.
- Continue Baking: Return the pan to the oven and continue to bake for an additional 15 to 20 minutes. The cake is done when a toothpick inserted into the cake portion (avoiding the ricotta pockets) comes out clean. The ricotta will have softened and slightly melted, while the cake will be golden and cooked through. The ricotta layer will naturally settle towards the bottom during baking, and the cake will rise beautifully on top, creating a delightful textural contrast.
- Cooling: Once baked, remove the cake from the oven and place it on a wire cooling rack to cool completely before slicing and serving.
Expert Tips & Tricks
To elevate your ricotta cake experience from good to absolutely sublime, consider these professional insights:
- Ricotta Quality Matters: For the creamiest, most flavorful ricotta layer, use a good quality, whole-milk ricotta cheese. If you find your ricotta to be a bit watery, you can drain it in a fine-mesh sieve lined with cheesecloth for about 30 minutes before using it. This will result in a thicker, richer ricotta filling.
- Don’t Overmix the Batter: While you want the cake mix ingredients to be well combined, overmixing can develop the gluten too much, leading to a tougher cake. Mix just until no dry streaks of cake mix remain.
- Even Dolloping: When dolloping the ricotta, try to make them roughly the same size. This helps ensure consistent cooking of the ricotta pockets throughout the cake.
- Testing for Doneness: The toothpick test is crucial. Make sure to insert it into the cakey part, not a pocket of ricotta, as the ricotta will naturally be moist. If it comes out with wet batter, it needs more time. If it has moist crumbs, it’s perfect.
- Cinnamon Sugar Harmony: Don’t skimp on the cinnamon sugar topping! It adds a lovely sweetness and aroma that beautifully complements the ricotta and cake. You can adjust the ratio of cinnamon to sugar to your personal preference.
- Pan Preparation is Key: A well-greased and floured pan is your best friend in ensuring the cake releases cleanly. For extra insurance, you can also line the bottom of the pan with parchment paper.
Serving & Storage Suggestions
This ricotta cake is a versatile treat, perfect for any occasion.
- Serving: Serve slices of ricotta cake at room temperature for the best texture and flavor. It’s delicious on its own, but for an extra touch of indulgence, consider serving it with a dusting of powdered sugar, a dollop of whipped cream, or a few fresh berries. It also pairs wonderfully with a cup of coffee or a glass of milk.
- Storage: Leftover ricotta cake can be stored in an airtight container at room temperature for up to 2 days. For longer storage, refrigerate it for up to 4 days. The cake can also be frozen. Wrap individual slices or the entire cake tightly in plastic wrap, then in aluminum foil, and freeze for up to 2-3 months. Thaw at room temperature or in the refrigerator. Reheat gently in a low oven or microwave if desired.
Nutritional Information
This is an estimated nutritional breakdown per serving (based on 20 servings). Please note that actual values may vary depending on the specific ingredients and brands used.
| Nutrient | Amount per Serving | % Daily Value |
|---|---|---|
| Calories | 246 kcal | |
| Calories from Fat | ||
| Total Fat | 11.3 g | 17% |
| Saturated Fat | 3.3 g | 16% |
| Cholesterol | 44.1 mg | 14% |
| Sodium | 219.7 mg | 9% |
| Total Carbohydrate | 31.4 g | 10% |
| Dietary Fiber | 0.3 g | 1% |
| Sugars | 20.8 g | 83% |
| Protein | 5.1 g | 10% |
Variations & Substitutions
While this recipe is a classic for a reason, feel free to experiment and make it your own:
- Citrus Zest: Add the zest of one lemon or orange to the ricotta mixture for a bright, refreshing citrus note.
- Chocolate Lover’s Dream: Fold a handful of mini chocolate chips into the cake batter before pouring it into the pan. You could also sprinkle some extra chocolate chips over the ricotta dollops.
- Spice it Up: Beyond cinnamon, consider adding a pinch of nutmeg, cardamom, or even a touch of ginger to the ricotta mixture or the cinnamon sugar topping.
- Lemon Ricotta: For a more pronounced lemon flavor, add a teaspoon of lemon extract to the ricotta mixture along with the vanilla.
- Gluten-Free Option: While not tested in this specific recipe, you could experiment with a gluten-free yellow cake mix. Follow the package instructions carefully, as gluten-free mixes can sometimes require different liquid ratios.
FAQs
Q: Why is my ricotta cake soggy on the bottom?
A: This can happen if the pan wasn’t properly greased and floured, or if the cake was not baked long enough. Ensure a thorough greasing and flouring of the pan, and always use the toothpick test for doneness.
Q: Can I make ricotta cake with low-fat ricotta?
A: Yes, you can use low-fat ricotta, but the texture might be slightly less rich and creamy. For the best result, whole-milk ricotta is recommended.
Q: How do I prevent the ricotta from sinking too much?
A: Distributing the ricotta dollops evenly and not making them too large can help. The baking process naturally allows some settling, which contributes to the cake’s unique texture.
Q: Can I use a different flavor of cake mix?
A: You can certainly try other flavors like vanilla or butter, but the yellow cake mix provides a neutral base that allows the ricotta and cinnamon to shine.
Q: Is it okay to add fruit to the ricotta cake?
A: You could try adding a layer of thinly sliced fruit, like apples or pears, on top of the batter before dolloping the ricotta, but be mindful of moisture content as it could affect baking time and texture.
A Slice of Comfort
There’s a special kind of joy in baking and sharing a dessert like ricotta cake. It’s a recipe that’s both forgiving and rewarding, turning simple ingredients into something truly memorable. The contrast between the tender, moist cake and the creamy, slightly tangy ricotta is a culinary symphony in every bite. Whether you’re a seasoned baker or just starting your culinary journey, this ricotta cake is sure to become a cherished favorite. So, gather your ingredients, put on your favorite apron, and let the comforting aroma fill your kitchen. You might just discover your own sweet memories in every slice.