
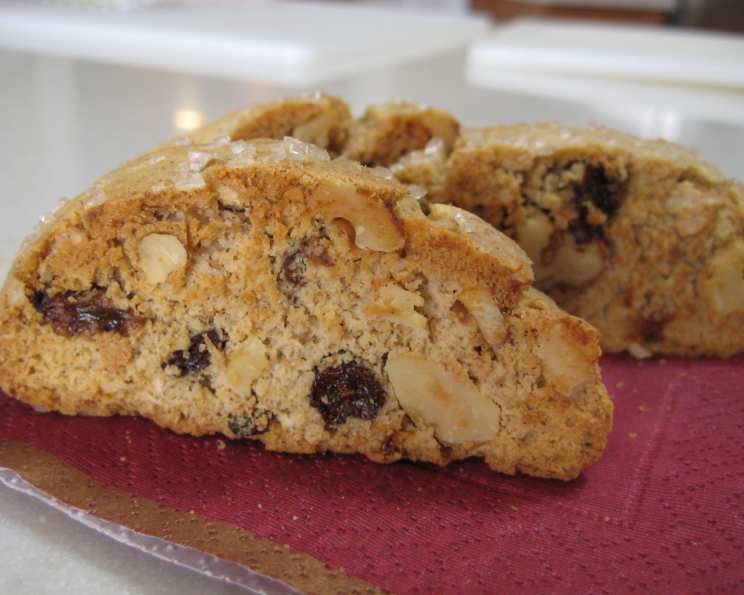
Raisin Walnut Biscotti: A Symphony of Crunch and Sweetness
There’s a particular kind of magic that happens when simple, honest ingredients come together to create something truly special. For me, Raisin Walnut Biscotti is one of those culinary treasures. I remember stumbling upon this recipe years ago in a small booklet from Diamond Walnuts and Sun-Maid Raisins. It wasn’t long before the comforting aroma of cinnamon and toasted nuts began to fill my kitchen, and the crisp, satisfying crunch of the finished biscotti became an instant favorite. It’s the kind of cookie that transports you – a perfect companion to a steaming cup of coffee or a sweet indulgence all on its own.
Recipe Overview
- Prep Time: 20 minutes
- Cook Time: 34-40 minutes
- Total Time: 54-60 minutes
- Servings: 30
- Yield: Approximately 30-35 biscotti
- Dietary Type: Vegetarian
Ingredients
To craft these delightful biscotti, you’ll need a handful of pantry staples:
- 1/4 cup butter or 1/4 cup margarine, softened
- 2/3 cup sugar
- 2 large eggs
- 1 teaspoon vanilla extract
- 2 cups all-purpose flour
- 2 teaspoons baking powder
- 1 teaspoon ground cinnamon
- 1 cup chopped walnuts
- 1 cup raisins
Equipment Needed
Gather these essential tools before you begin:
- Large mixing bowl
- Electric mixer (handheld or stand mixer) or a sturdy whisk and spatula
- Measuring cups and spoons
- Baking sheet
- Parchment paper (optional, for easier cleanup)
- Sharp knife
Instructions
Creating these biscotti is a straightforward process, yielding a wonderfully textured cookie that’s perfect for dipping.
- Preheat the Oven: Begin by preheating your oven to 350°F (175°C). This ensures the oven is at the optimal temperature for baking.
- Prepare the Baking Sheet: Lightly grease a large baking sheet. For a fuss-free cleanup, you can also line it with parchment paper.
- Cream the Wet Ingredients: In a large bowl, beat together the softened butter (or margarine) and sugar until the mixture is light and fluffy. This process incorporates air, which contributes to the cookie’s texture.
- Incorporate Eggs and Vanilla: Add the eggs, one at a time, beating well after each addition. Then, stir in the vanilla extract until thoroughly combined.
- Combine Dry Ingredients: In a separate, smaller bowl, whisk together the all-purpose flour, baking powder, and ground cinnamon. This ensures the leavening agent and spice are evenly distributed.
- Add Dry to Wet: Gradually add the dry ingredients to the wet ingredients, stirring until just combined. Be careful not to overmix, as this can lead to tough biscotti.
- Fold in Raisins and Walnuts: Gently stir in the chopped walnuts and raisins. Ensure they are evenly distributed throughout the dough.
- Divide and Shape the Dough: Divide the dough in half. Shape each half into a long, flattened loaf, approximately 1 1/2 inches thick. Aim for a uniform shape for even baking.
- Initial Bake: Place the shaped logs onto the prepared baking sheet. Flatten them slightly with your hand or the back of a spoon.
- First Baking Stage: Bake for 18 to 20 minutes, or until the loaves are firm to the touch and lightly golden.
- Cool and Slice: Carefully remove the baking sheet from the oven. Let the loaves cool on the sheet for a few minutes, then transfer them to a cutting board. Using a sharp knife, cut the loaves diagonally into 1/2 inch thick slices.
- Second Baking Stage (Drying): Arrange the slices, cut-side down, back onto the cookie sheet.
- Final Crisp: Bake for about 6 minutes on one side. Turn the cookies over and bake for another 6 minutes or so, until they are lightly browned and firm. This double-baking process is what gives biscotti its signature crispness.
- Cool Completely: Remove the biscotti from the baking sheet and cool them completely on a wire rack. This is crucial for achieving the perfect crunchy texture.
Expert Tips & Tricks
- Toasting the Nuts: For an even deeper flavor, consider toasting your walnuts briefly before chopping them. Spread them on a baking sheet and bake at 350°F (175°C) for about 5-7 minutes, until fragrant. Let them cool completely before adding them to the dough.
- Even Slices: A serrated knife can be your best friend when slicing the baked logs. It helps to get clean, even cuts without crushing the still-warm dough.
- Achieving Uniform Crunch: When placing the slices back on the baking sheet for the second bake, ensure they have a little space between them. This allows air to circulate and ensures they dry out evenly for that characteristic crunch.
- Doneness Check: For the first bake, the loaves should feel firm but not hard. For the second bake, the edges of the biscotti will start to turn a lovely golden brown, and the centers will feel dry and hard.
Serving & Storage Suggestions
Raisin Walnut Biscotti are incredibly versatile. They are, of course, the quintessential companion to your morning coffee, espresso, or a soothing cup of tea. Their firm texture makes them perfect for dipping without falling apart immediately. They also make a wonderful accompaniment to a glass of dessert wine, such as Vin Santo or a sweet sherry.
To store your beautiful biscotti, ensure they are completely cool. Place them in an airtight container at room temperature. They will retain their delightful crunch for up to two weeks, making them an excellent make-ahead treat for unexpected guests or simple everyday enjoyment. Avoid refrigerating them, as this can sometimes lead to a loss of crispness.
Nutritional Information
| Nutrient | Amount per Serving | % Daily Value |
|---|---|---|
| Calories | 106.6 kcal | |
| Calories from Fat | ||
| Total Fat | 4.5 g | 6% |
| Saturated Fat | 1.3 g | 6% |
| Cholesterol | 16.5 mg | 5% |
| Sodium | 43.3 mg | 1% |
| Total Carbohydrate | 15.3 g | 5% |
| Dietary Fiber | 0.7 g | 2% |
| Sugars | 7.5 g | 29% |
| Protein | 2 g | 4% |
Note: Nutritional values are approximate and can vary based on specific ingredients used.
Variations & Substitutions
While this classic Raisin Walnut combination is hard to beat, here are a few ideas to keep your biscotti baking exciting:
- Citrus Zest: Add the zest of one orange or lemon to the wet ingredients for a bright, fragrant twist.
- Chocolate Drizzle: Once cooled, dip half of each biscotti in melted dark or white chocolate.
- Nutty Alternatives: Swap out the walnuts for pecans, almonds, or even hazelnuts for a different nutty profile.
- Dried Fruit Swap: Experiment with other dried fruits like cranberries, dried cherries, or chopped dried apricots for a seasonal touch.
- Spice It Up: A pinch of nutmeg or cardamom can add another layer of warmth and complexity to the spice blend.
FAQs
Q: Why are my biscotti not crispy?
A: This is usually due to insufficient baking time during the second stage, or not allowing them to cool completely before storing. Ensure they are baked until firm and lightly browned, and let them cool fully on a rack.
Q: Can I make this recipe gluten-free?
A: Yes, you can substitute a good quality gluten-free all-purpose flour blend for the all-purpose flour. You might need to adjust the liquid slightly, as gluten-free flours can behave differently.
Q: My dough is too sticky to handle. What should I do?
A: If the dough is too sticky, you can chill it in the refrigerator for about 30 minutes. This will make it firmer and easier to shape. You can also lightly flour your hands and the work surface.
Q: How long does the dough keep before baking?
A: The dough can be refrigerated for up to 2 days. If you refrigerate it, let it sit at room temperature for about 15-20 minutes before shaping and baking.
Q: Can I add chocolate chips to this recipe?
A: Absolutely! Stir in about 1/2 cup of mini chocolate chips along with the raisins and walnuts for a delightful chocolatey crunch.
Final Thoughts
There’s a profound satisfaction in creating something as universally loved as biscotti. This Raisin Walnut version, with its perfect balance of sweet fruit, earthy nuts, and warm spice, is a testament to simple ingredients singing in harmony. Whether you’re dunking it into your morning brew or offering a plate to guests, these crisp, flavourful cookies are sure to bring smiles. I encourage you to try this recipe, experiment with the variations, and share the joy of homemade biscotti. Happy baking!