
The Sweet Art of Crystallization: Crafting Your Own Rock Candy
As a chef, there are certain ingredients that evoke a sense of childlike wonder, a connection to simpler times and pure, unadulterated joy. For me, rock candy is one of those treasures. I remember rainy afternoons spent in my grandmother’s kitchen, the air thick with the scent of brewing tea and the promise of a sweet reward. She’d pull out a small, chipped enamel pot and a bag of pristine sugar crystals, her eyes twinkling as she explained the magic of turning ordinary sugar and water into dazzling jewels. It wasn’t just about the taste; it was about the transformation, the patience required, and the sheer delight of watching tiny crystals sprout on strings, growing into edible gems right before our eyes. That process, so simple yet so profound, still captures my imagination and fuels my passion for creating edible art.
Recipe Overview
- Prep Time: 15 minutes
- Cook Time: 30 minutes
- Total Time: 45 minutes (plus cooling and crystallization time)
- Servings: N/A (yields customizable portions)
- Yield: 2-3 cups
- Dietary Type: Vegan, Vegetarian, Gluten-Free, Dairy-Free
Ingredients
This recipe is remarkably straightforward, relying on pantry staples to create something truly spectacular. The beauty lies in its simplicity and the endless possibilities for customization.
- 1 ¾ cups granulated sugar
- ½ cup water
- ½ cup light corn syrup
- ⅛ teaspoon salt
- 4-5 drops food coloring (any color you desire; consider matching it to your flavor!)
- ¼ – 1 teaspoon flavoring oil (any flavor; almond, peppermint, or fruit flavors work beautifully)
Equipment Needed
While the ingredients are few, having the right tools will make the process smoother and safer.
- Medium-sized, heavy-bottomed saucepan
- Candy thermometer
- Metal spoon
- Greased molds (for lollipops, if desired), a marble slab, or a greased shallow pan
- Scissors (for cutting if not using molds)
- Cleaned hammer or the blunt end of a butter knife (for breaking if not using molds)
Instructions
Creating rock candy is a lesson in controlled crystallization, a delicate dance between heat, sugar, and time. Follow these steps carefully, and you’ll be rewarded with shimmering, delicious crystals.
- In a medium-sized, heavy-bottomed saucepan, combine the granulated sugar, water, light corn syrup, and salt. Stir these ingredients together until the sugar dissolves completely. This initial stirring is crucial to prevent uneven crystallization later on.
- Cover the pan and bring the mixture to a rolling boil. This step helps to wash down any sugar crystals that might cling to the sides of the pan, ensuring a clear, smooth candy.
- Once the mixture reaches a rolling boil, remove the lid. Carefully insert a candy thermometer into the syrup, ensuring it doesn’t touch the bottom of the pan. Cook the syrup, without stirring, until the thermometer reaches 250°F (121°C). This is the initial stage, often referred to as the “soft ball” stage for other candies, but for rock candy, it’s just the beginning.
- Once the syrup reaches 250°F, carefully add the food coloring. Stir gently with a metal spoon until the color is thoroughly mixed and uniformly distributed throughout the syrup. Be cautious as the syrup is very hot.
- Continue cooking the syrup, again without stirring, until the temperature reaches hard crack, which is 300°F (149°C). This is the critical temperature for rock candy formation. The syrup will become very thick and stringy.
- As soon as the temperature reaches 300°F, remove the pan from the heat. Allow the syrup to cool for about 3 minutes. This brief cooling period allows the syrup to thicken slightly, making it easier to handle and incorporate the flavor.
- Now, add the flavoring oil. Mix it very well into the syrup. Ensure the flavor is evenly distributed for consistent taste throughout your rock candy.
- Cover the pan and let it sit for about 5 minutes. This resting period helps to stabilize the syrup before pouring.
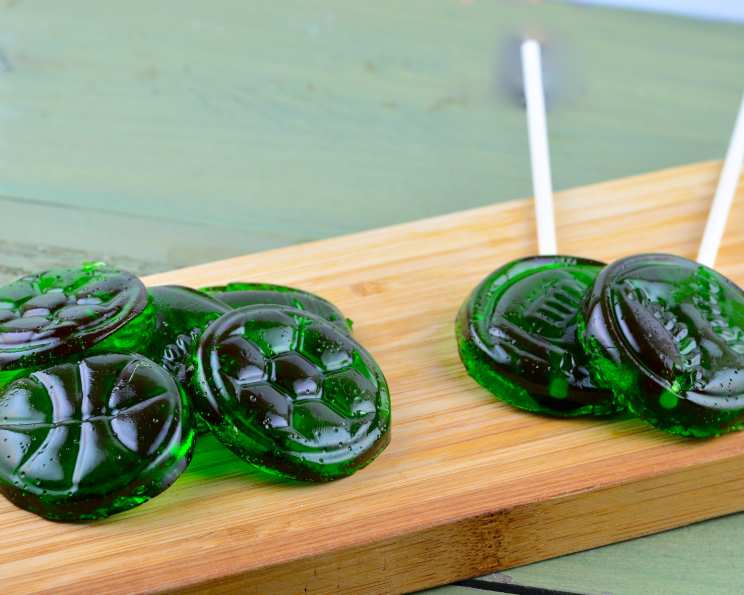
- Pour the candy into your prepared greased molds (if making lollipops or specific shapes), onto a marble slab (which provides excellent heat retention and allows for even cooling), or into a greased shallow pan. Work quickly as the syrup will begin to set.
- As soon as it is cool enough to handle, you have a few options for shaping:
- If using molds, allow them to cool and set completely before unmolding.
- If poured onto a slab or into a shallow pan, you can use scissors to cut the candy into squares while it’s still pliable enough.
- Alternatively, you can roll the candy into balls or shapes with your hands (wearing heat-resistant gloves is highly recommended for this step).
- Another option is to allow the candy to cool completely without cutting. Once fully hardened, you can then break the candy into bite-sized pieces using a cleaned hammer or the blunt end of a butter knife. This method creates irregular, gem-like shards.
Allow your rock candy to cool and harden completely before consuming or storing. The crystallization process continues as it cools, and the final texture will depend on how long it cools and how it is handled.
Expert Tips & Tricks
- Patience is Key: Rock candy requires patience. Resist the urge to stir the syrup once it’s boiling, as this can lead to cloudy or uneven crystals.
- Seed Crystals: For larger, more defined crystals, you can suspend a clean string or skewer (dipped in sugar solution and allowed to dry) into the cooling syrup. This provides a surface for crystals to grow upon. However, this recipe focuses on making the rock candy itself, rather than growing large crystals on a string.
- Flavor and Color Harmony: Think about pairing your flavors and colors. A vibrant red for strawberry, a cool blue for blueberry, or a sunshine yellow for lemon can enhance the sensory experience.
- Marble Slab Magic: If you have access to a marble slab, use it! Its ability to absorb and radiate heat evenly is ideal for candy making, leading to a more uniform set. Make sure it’s thoroughly cleaned and lightly greased.
- Safety First: Working with hot sugar syrup is dangerous. Always wear oven mitts or heat-resistant gloves when handling hot pans or syrup, and keep children and pets at a safe distance.
Serving & Storage Suggestions
Rock candy is a delightful treat served on its own, as a glittering garnish for desserts, or even as a whimsical addition to cocktails.
- Serving: Present your rock candy in small bowls, jars, or on decorative platters. For a festive touch, serve them on sticks like lollipops. They make a beautiful edible decoration for cakes, cupcakes, or ice cream sundaes.
- Storage: Store your rock candy in an airtight container at room temperature. It is very sensitive to moisture, so avoid humid environments. Properly stored, it can last for several months. If you notice any condensation, it means it has absorbed moisture and may start to become sticky.
Nutritional Information
Please note that nutritional information for homemade candy can vary significantly based on exact ingredients used, especially for flavoring oils. This is an approximation for the entire batch.
| Nutrient | Amount per Serving (approx.) | % Daily Value (approx.) |
|---|---|---|
| Calories | 923.5 | N/A |
| Calories from Fat | N/A | N/A |
| Total Fat | 0.7 g | 1 % |
| Saturated Fat | 0.1 g | 0 % |
| Cholesterol | 0 mg | 0 % |
| Sodium | 201.7 mg | 8 % |
| Total Carbohydrate | 240.4 g | 80 % |
| Dietary Fiber | 0 g | 0 % |
| Sugars | 197.5 g | 789 % |
| Protein | 0 g | 0 % |
Variations & Substitutions
The beauty of rock candy lies in its adaptability. While the base recipe is simple sugar, water, and corn syrup, a few tweaks can lead to exciting variations.
- Flavor Explorations: Beyond the common flavors, experiment with more exotic ones like lavender, rose, or even spicy notes like ginger or chili extract. Ensure you use high-quality flavoring oils specifically designed for candy making.
- Color Play: Don’t be afraid to get creative with colors. Swirl two colors together for a marbled effect, or use multiple colors in a single batch for a rainbow of sweetness.
- Natural Colorings: For those seeking natural alternatives, you can experiment with concentrated fruit juices or vegetable powders (like beetroot for red or spirulina for green), though these can sometimes affect the texture or flavor.
FAQs
Q: Why is my rock candy cloudy instead of clear?
A: Cloudiness typically occurs when the sugar syrup is agitated too much during boiling, or if impurities were present in the sugar or water. Ensuring the lid is on during the initial boil helps wash down any stray crystals.
Q: My rock candy is too sticky, what went wrong?
A: This usually means the syrup didn’t reach a high enough temperature (hard crack stage). It needs to reach 300°F (149°C) to evaporate enough water for the candy to harden properly.
Q: Can I use granulated sugar only, without corn syrup?
A: While possible, corn syrup helps prevent the sugar from crystallizing too quickly and becoming grainy. Without it, you’re more likely to get an undesirable grainy texture.
Q: How do I get larger, more defined crystals?
A: Larger crystals are typically grown over a longer period, often on a suspended string in a supersaturated solution. This recipe focuses on creating solidified candy pieces rather than growing large individual crystals on a string.
Q: Is it safe to cut the hot candy with scissors?
A: It is generally safe to cut the candy when it’s cool enough to handle but still pliable. However, always use extreme caution and consider wearing heat-resistant gloves for added safety.
Final Thoughts
Crafting your own rock candy is more than just making a sweet treat; it’s an engaging culinary adventure that appeals to all ages. It’s a tangible reminder that with a few simple ingredients and a little patience, you can create something truly magical. Whether you’re making it for a special occasion, a fun family activity, or simply to brighten your day, the satisfaction of breaking off your own glittering piece of edible art is immense. I encourage you to experiment with flavors and colors, and share your dazzling creations with friends and family. Happy candy making!