
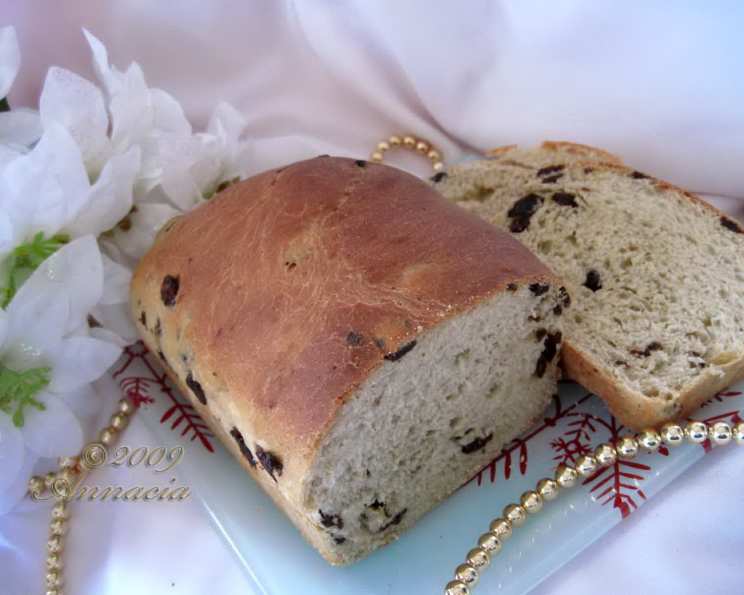
Raisin Breakfast Bread (Cramique): A Belgian Treasure
There’s a certain magic that happens when simple ingredients transform into something extraordinary, a culinary alchemy that has always captivated me. My first encounter with Cramique, or raisin breakfast bread as it’s often known outside its Belgian homeland, was on a chilly autumn morning in Brussels. Wandering through the bustling markets, the scent of freshly baked goods beckoned me into a charming patisserie. The Cramique, with its golden crust and visible pockets of plump raisins, was an instant allure. That first bite, a delicate balance of sweet, tender dough and fruity bursts, was a revelation. It wasn’t just bread; it was comfort, history, and a testament to the enduring power of artisanal baking.
This particular rendition, I discovered, hails from the esteemed Wittamer bakery, a true institution in Brussels, and its secrets are shared in Nick Malgieri’s insightful book, “A Baker’s Tour.” It’s a lean brioche, meaning it relies less on enriched fats and more on the magic of yeast and time to achieve its exquisite texture. The beauty of Cramique lies in its versatility; it’s perfect sliced thinly for a sophisticated breakfast or even as the foundation for delightful sandwiches.
Recipe Overview
- Prep Time: 2 hours 50 minutes (includes rising time)
- Cook Time: 30 minutes
- Total Time: 3 hours 20 minutes
- Servings: 6-8
- Yield: 1 loaf
- Dietary Type: Contains Eggs, Dairy, Gluten
Ingredients
This recipe is a celebration of simple, high-quality ingredients coming together to create something truly special. The leanness of the dough means the subtle flavors of the flour, yeast, and raisins can truly shine.
- 2 cups all-purpose flour, do not pack it down in the measuring cup
- 2 teaspoons active dry yeast
- 1/2 cup milk, warm (precisely 110 degrees F)
- 2 large egg yolks
- 4 tablespoons unsalted butter, very soft (precisely 2 ounces)
- 1 teaspoon sugar
- 3/4 teaspoon salt
- 3/4 cup dark raisins
Notes on Ingredients:
The temperature of the milk is crucial for activating the yeast. Too hot, and you’ll kill it; too cool, and it won’t activate properly. A reliable kitchen thermometer is your best friend here. Ensuring the butter is very soft allows it to incorporate smoothly into the dough without overpowering the mixer. If your raisins feel a bit dry, a quick soak can revive them.
Equipment Needed
- Stand mixer with a paddle attachment
- Medium bowl
- Measuring cups and spoons
- Whisk
- Plastic wrap
- Butter
- Loaf pan (approximately 9×5 inches)
- Parchment paper
- Floured board or clean work surface
- Oven
- Wire cooling rack
- Kitchen thermometer (for internal temperature of bread)
Instructions
Crafting this Cramique is a rewarding process, a dance between precision and patience. Follow these steps carefully to achieve a loaf that’s both beautiful and delicious.
- Begin by placing 1 1/2 cups of the all-purpose flour into the bowl of your stand mixer.
- In a medium bowl, whisk together the active dry yeast and the warm milk. Let this mixture sit for a few minutes until it looks foamy, indicating the yeast is active.
- Whisk in the two large egg yolks into the yeast and milk mixture until well combined.
- Pour the egg and milk mixture into the bowl with the flour.
- Using the paddle attachment on your mixer, mix on the lowest speed for 2 minutes. After this initial mix, stop the mixer and allow the dough to rest for ten minutes. This autolyse period helps the flour hydrate and gluten development begin.
- Now, add the very soft unsalted butter, the sugar, and the salt to the mixer bowl. Along with these, add the remaining 1/2 cup of all-purpose flour.
- Mix on the lowest speed again until all the ingredients are just combined. Once combined, increase the speed to medium and mix until the dough is smooth and elastic. This should take about another 3 to 4 minutes. The dough should start to pull away from the sides of the bowl.
- With the mixer still on the lowest speed, beat in the dark raisins. If your raisins are not plump and moist, you can plump them by soaking them in hot water for about 10 minutes, then draining them thoroughly and patting them dry before adding them to the dough.
- Scrape the dough into a buttered bowl. Turn the dough over so that the top surface is also buttered. This prevents a dry skin from forming.
- Cover the bowl with plastic wrap and allow the dough to rise in a warm place until it has doubled in size, which typically takes about an hour.
- While the dough is rising, prepare your loaf pan. Butter it thoroughly and line the bottom with parchment paper. This ensures easy removal of the baked bread.
- Once the dough has risen, scrape it gently onto a floured board or clean work surface.
- Press the dough into a rectangle. Brush off any excess flour. Then, stretch the dough into a rectangle that is approximately the length of your prepared loaf pan. Fold the dough like a business letter: fold one-third of the dough over the center, then fold the remaining third over that.
- Tuck in the ends of the folded dough to create a neat loaf shape.
- Carefully lay the shaped loaf into the prepared loaf pan, ensuring the seam side is down.
- Butter a piece of plastic wrap and cover the bread with it, buttered side down, directly onto the surface of the dough. This prevents the dough from sticking to the wrap as it rises and creates a smooth crust.
- Allow the loaf to rise again until it has doubled in size, which will take approximately another hour.
- Preheat your oven to 400 degrees F. Position a rack in the middle of the oven.
- When the loaf has completely risen and is beautifully puffed, place the loaf pan on the rack in the middle of the oven.
- Bake until the bread is a deep golden color and registers an internal temperature of 200 degrees F on a kitchen thermometer. This baking process will take about 30 minutes.
- Unmold the bread from the pan immediately onto a wire rack.
- Allow the bread to cool on its side. This allows air to circulate around the entire loaf, preventing a soggy bottom.
- The bread can be enjoyed immediately or wrapped and frozen for later.
Expert Tips & Tricks
Achieving that perfect Cramique texture is all about understanding the dough and giving it the care it deserves. Here are a few insights from my kitchen to yours:
- Yeast Awakening: Always ensure your yeast is active before incorporating it into the flour. A quick test in warm milk (around 105-115°F) should yield a frothy cap within 5-10 minutes. If it doesn’t, your yeast may be old and you’ll need to start with a fresh packet.
- Butter’s Role: The “very soft” butter is key. It should be pliable like a paste, not melted or solid. This allows it to disperse evenly throughout the dough during the longer kneading process, contributing to the bread’s tenderness without making it greasy.
- The Fold: The business letter fold isn’t just for aesthetics; it helps create layers within the dough, contributing to a better crumb structure and an even rise. Don’t be afraid to gently stretch the dough; it’s quite resilient at this stage.
- Proofing Perfection: The two proofing stages are vital. The first allows the yeast to develop flavor and structure. The second, in the pan, allows the shaped loaf to become airy and light before baking. Observe the dough, not just the clock, for its readiness. It should look visibly puffed and feel very light.
- The Bake: A 400°F initial temperature helps the bread get a beautiful, deep color quickly. The internal temperature check is the most reliable way to ensure it’s cooked through. If your oven tends to bake unevenly, you can rotate the loaf halfway through.
Serving & Storage Suggestions
Cramique is best enjoyed at its peak, but it stores beautifully for extended enjoyment.
- Serving: For the most delightful experience, serve slices of Cramique warm or at room temperature. It’s wonderful on its own, toasted to a light crisp, or spread with a good quality butter. It also makes an exceptional base for French toast or as a base for a simple sandwich, especially with mild cheeses or cured meats.
- Storage: Once completely cooled, Cramique can be stored at room temperature, well-wrapped in plastic wrap or in an airtight container, for 2-3 days. For longer storage, wrap it tightly in plastic wrap, then in foil, and freeze for up to 3 months. To reheat from frozen, unwrap and bake in a preheated oven at 350°F for 10-15 minutes, or until warmed through.
Nutritional Information
Here is an estimated nutritional breakdown for a serving of this Raisin Breakfast Bread (Cramique):
| Nutrient | Amount per Serving | % Daily Value |
|---|---|---|
| Calories | 350 kcal | 18% |
| Total Fat | 12 g | 15% |
| Saturated Fat | 7 g | 35% |
| Cholesterol | 90 mg | 30% |
| Sodium | 300 mg | 13% |
| Total Carbohydrate | 50 g | 18% |
| Dietary Fiber | 2 g | 7% |
| Total Sugars | 15 g | 30% |
| Protein | 8 g | 16% |
| Vitamin A | 5% | |
| Vitamin C | 0% | |
| Calcium | 4% | |
| Iron | 15% |
Please note: These are approximate values and can vary based on specific ingredient brands and exact portion sizes.
Variations & Substitutions
While this recipe is a classic for a reason, there’s always room for a touch of personal creativity.
- Beyond Raisins: Other dried fruits are fantastic in Cramique. Consider plumped currants, chopped dried apricots, or even candied citrus peel. A mix of a few different fruits can add delightful complexity.
- Spice it Up: For a warmer, spiced note, consider adding 1/2 teaspoon of ground cinnamon or nutmeg to the dry ingredients with the flour. This is particularly lovely during the autumn and winter months.
- A Touch of Citrus: Zest from half an orange or lemon can be added along with the butter, sugar, and salt to infuse the dough with a bright, fragrant note.
FAQs
Q: Why is the milk temperature so specific?
A: The 110 degrees F (or around 43 degrees C) is the ideal temperature range for activating active dry yeast. Too hot, and you’ll kill the yeast; too cool, and it won’t ferment properly, leading to a dense bread.
Q: Can I use instant yeast instead of active dry yeast?
A: Yes, you can use instant yeast. If you do, you can typically skip the step of proofing the yeast in milk separately and add it directly with the dry ingredients. You might also be able to reduce the rising times slightly, as instant yeast is often more vigorous.
Q: My dough feels too sticky. What should I do?
A: It’s normal for enriched doughs like this to be slightly sticky. Resist the urge to add too much extra flour, as this can make the bread tough. If it’s unmanageably sticky, add flour one tablespoon at a time until it just starts to pull away from the sides of the mixer bowl.
Q: How do I know when the bread is fully baked?
A: The best indicator is an internal temperature of 200 degrees F (93 degrees C) measured with a kitchen thermometer. Visually, the bread should be a deep golden brown and sound hollow when tapped on the bottom.
Q: Can I make this bread dairy-free?
A: You can try substituting the milk with a plant-based milk (like almond or soy) and the butter with a dairy-free butter substitute. However, note that this might alter the texture and richness slightly.
Final Thoughts
There’s a profound satisfaction in pulling a perfectly golden, raisin-studded loaf of Cramique from the oven. It’s a bread that speaks of comfort and tradition, yet feels wonderfully elegant. Whether you’re enjoying a quiet breakfast, packing a lunch, or sharing a slice with loved ones, this Belgian-inspired raisin bread is sure to bring a smile. I encourage you to try this recipe, to savor the aroma as it bakes, and to taste the simple joy of a well-made loaf. It pairs beautifully with a strong cup of coffee or a delicate Earl Grey tea. Let me know how your Cramique turns out – I always love hearing about your baking adventures!