
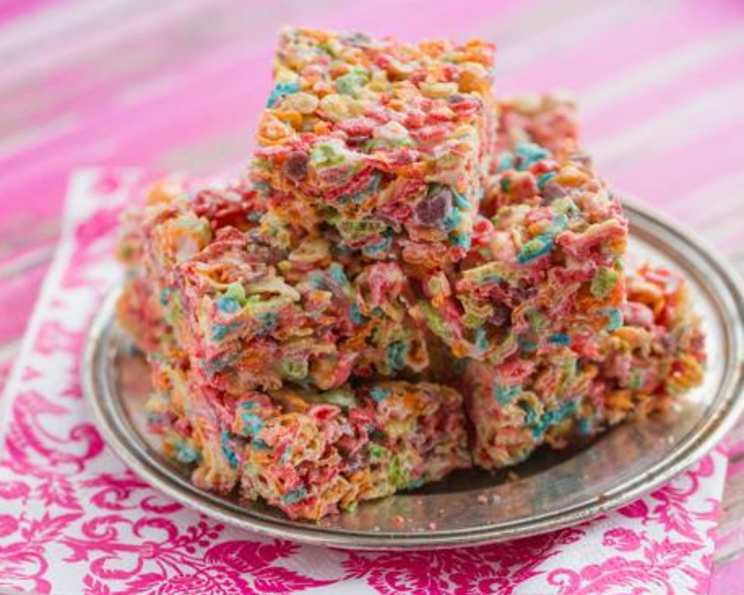
The Irresistible Charm of Rainbow Treats: A Nostalgic Journey
I still remember the vibrant, almost neon hues of these treats from a little dessert shop near my college campus. They were a delightful escape, a burst of color and sweetness that always managed to lift spirits after a long study session. My friends and I would pool our change, eagerly anticipating that satisfyingly chewy, crispy bite. Unlike the ubiquitous Rice Krispie treats, these possessed an extra layer of sugary magic, a unique sweetness that made them stand out. Every time I recreate them, those college days flood back, a fond reminder of simple pleasures and shared laughter over a colorful confection.
Recipe Overview
- Prep Time: 5 minutes
- Cook Time: 5 minutes
- Total Time: 10 minutes (plus cooling time)
- Servings: 24 treats
- Yield: 13x9x2-inch pan of treats
- Dietary Type: Vegetarian (can be adapted for vegan by using vegan butter and marshmallows)
Ingredients
This recipe is wonderfully straightforward, relying on just a few pantry staples to create its magic. The star, of course, is the cereal, which lends its distinctive fruity flavor and vibrant colors.
- 3 tablespoons butter or margarine (unsalted is preferred, but salted will work)
- 1 (10 ounce) package mini marshmallows (about 40 cups)
- 6 cups Fruity Pebbles cereal (or a similar store-brand fruity rice cereal)
Optional Add-in: For an extra pop of color and fun, consider adding rainbow colored chocolate candies into the mixture just before pressing into the pan.
Equipment Needed
The beauty of this recipe lies in its simplicity, requiring minimal specialized equipment.
- Large saucepan
- Spatula or large spoon for stirring
- Measuring cups and spoons
- 13x9x2-inch baking pan
- Cooking spray or parchment paper for greasing the pan
Instructions
Crafting these dazzling treats is a quick and rewarding process. The key is to work swiftly once the marshmallows are melted to ensure the cereal is evenly coated and the treats hold their shape.
- Prepare your pan: Lightly grease a 13x9x2-inch pan with cooking spray or line it with parchment paper. This step is crucial to prevent sticking.
- Melt the base: In a large saucepan, melt the 3 tablespoons of butter or margarine over low heat. You want it gently melted, not browned.
- Incorporate the marshmallows: Add the 1 (10 ounce) package of mini marshmallows to the melted butter.
- Stir until smooth: Continue to stir the marshmallows and butter constantly over low heat until the marshmallows are completely melted and the mixture is smooth.
- Remove from heat: Once the marshmallow mixture is smooth and glossy, immediately remove the saucepan from the heat. This prevents the marshmallows from becoming too tough or caramelized.
- Add the cereal: Immediately add the 6 cups of Fruity Pebbles cereal to the marshmallow mixture.
- Mix lightly: Using your spatula or spoon, mix lightly until the cereal is well coated with the marshmallow mixture. Be gentle; you don’t want to crush the cereal too much, as this can make the treats dense.
- Press into the pan: Transfer the coated cereal mixture into your prepared 13x9x2-inch pan.
- Firmly press: Press the mixture firmly into the pan using the back of your spoon, a spatula lightly greased with butter, or even lightly greased hands. The firmer you press, the more cohesive your treats will be. Ensure an even layer.
- Cool completely: Allow the treats to cool completely at room temperature. This typically takes at least 30 minutes to an hour, depending on your kitchen’s temperature. Resist the urge to cut them too soon, as they need time to set.
- Cut into squares: Once fully cooled and set, cut the treats into squares. A sharp knife or a pizza cutter works well for this.
Microwave Variation
For an even quicker preparation, you can use your microwave:
- In a large microwavable bowl, microwave the 3 tablespoons of butter or margarine at HIGH (100% power) for 45 seconds or until melted.
- Add the 1 (10 ounce) package of mini marshmallows to the bowl and toss to coat them with the melted butter.
- Microwave again at HIGH (100% power) for 1 minute 30 seconds, stirring after 45 seconds. Continue microwaving until the marshmallows are melted and the mixture is smooth.
- Proceed with step #5 of the stovetop instructions (Remove from heat) and continue with the remaining steps.
Expert Tips & Tricks
- Speed is Key: Once the marshmallows are melted, work quickly. The marshmallow mixture can start to set as it cools, making it harder to coat the cereal evenly.
- Grease Wisely: Lightly greasing your hands, a spatula, or parchment paper will prevent the sticky marshmallow mixture from adhering to your tools.
- Gentle Mixing: While you want the cereal to be well-coated, avoid overmixing or crushing the cereal. This can result in a denser, less airy treat.
- Uniform Pressing: Ensure you press the mixture into the pan evenly. This will help the treats cut cleanly and have a consistent texture throughout.
- Cooling is Crucial: Patience is a virtue! Letting the treats cool completely allows them to firm up properly. Cutting them too early will result in crumbly, misshapen squares.
Serving & Storage Suggestions
These Rainbow Treats are a delightful standalone snack, perfect for parties, lunchboxes, or as an afternoon pick-me-up. They pair wonderfully with a glass of cold milk or a refreshing fruit juice.
For storage, keep the treats at room temperature in an airtight container. They will maintain their best quality for up to 3 days. If you need to store them for longer, you can wrap them tightly in plastic wrap and then place them in an airtight container in the refrigerator for up to a week, though they may become slightly firmer. Freezing is also an option; wrap them well and they can be stored in the freezer for up to 2 months. Thaw at room temperature before serving.
Nutritional Information
Please note that these are estimated values and can vary based on the specific brands of ingredients used and the exact portion size.
| Nutrient | Amount per Serving (approx.) | % Daily Value |
|---|---|---|
| Calories | 150-180 kcal | 8-9% |
| Total Fat | 1.5 g | 2% |
| Saturated Fat | 0.9 g | 4% |
| Cholesterol | 3.8 mg | 1% |
| Sodium | 22.2 mg | 0% |
| Total Carbohydrate | 27-30 g | 9-10% |
| Dietary Fiber | 0 g | 0% |
| Sugars | 18-20 g | 20-22% |
| Protein | 0.2 g | 0% |
Variations & Substitutions
The beauty of this recipe is its adaptability. While Fruity Pebbles are iconic for this treat, you can certainly explore other colorful cereals.
- Cereal Swap: Experiment with other crispy rice cereals with fun colors and flavors. Just ensure the quantity is similar to maintain the correct ratio of cereal to marshmallow.
- Dietary Adjustments: To make these treats vegan, opt for vegan butter and vegan marshmallows. The texture might vary slightly, but the flavor will still be delightful.
- Add-ins: As mentioned in the ingredients, rainbow colored chocolate candies can be stirred in for an extra burst of flavor and color. You could also add sprinkles for more festive flair.
FAQs (Frequently Asked Questions)
Q: Why are my treats not holding their shape?
A: This is usually due to not pressing the mixture firmly enough into the pan or not allowing them to cool and set completely.
Q: Can I use regular-sized marshmallows instead of mini marshmallows?
A: Yes, you can, but you’ll need to use the same weight (10 ounces). They will just take a little longer to melt.
Q: How do I prevent the marshmallow mixture from sticking to my spoon?
A: Lightly grease your spoon with butter or cooking spray, or work quickly while the mixture is still warm.
Q: Can I make these gluten-free?
A: Look for gluten-free versions of fruity rice cereals. Many brands offer such options.
Q: My treats taste a bit burnt. What went wrong?
A: Ensure you are melting the butter and marshmallows over low heat and not rushing the process. If microwaving, be careful not to overcook the marshmallow mixture.
A Final Word
These Rainbow Treats are more than just a simple confection; they are a vibrant splash of joy, a delightful throwback to simpler times, and a testament to the magic that a few humble ingredients can create. Whether you’re revisiting cherished memories or creating new ones with loved ones, this recipe is sure to bring smiles and a burst of color to any occasion. So gather your ingredients, embrace the fun, and enjoy the sweet, chewy, crunchy delight that is the Rainbow Treat!