
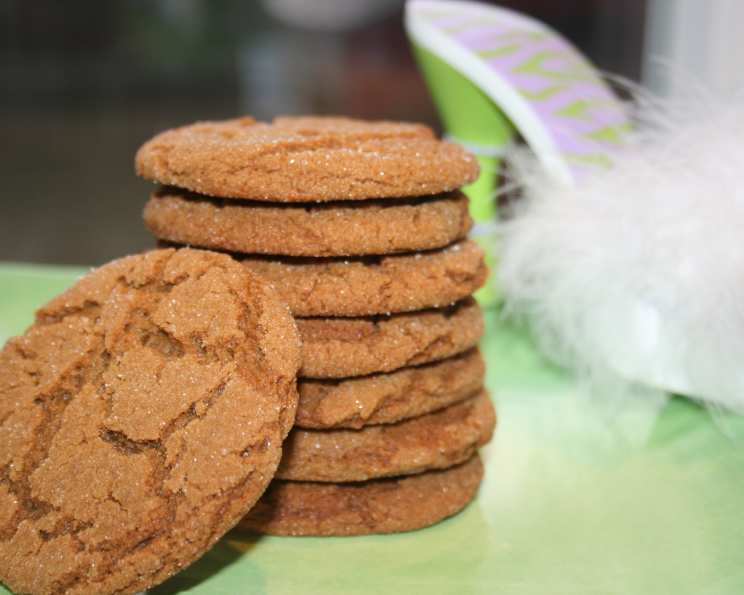
Regency Ginger Crisps: A Taste of Timeless Charm
The scent of ginger, warm and spicy, has always held a special place in my heart, evoking memories of crisp autumn days and cozy evenings by the fire. It was during one such evocative afternoon, curled up with a captivating mystery novel, that I stumbled upon a recipe for Regency Ginger Crisps. The book itself was a delight, a charming whodunit filled with delectable descriptions of baked goods, and this particular recipe jumped off the page, promising a delightful excursion into classic flavors. I eagerly earmarked it, already imagining the satisfying crunch and the lingering warmth of ginger with a cup of steaming tea.
Recipe Overview
- Prep Time: At least 1 hour (includes chilling time)
- Cook Time: 10-12 minutes per batch
- Total Time: At least 1 hour 10 minutes (includes chilling time)
- Servings: 36 cookies
- Yield: 36 cookies
- Dietary Type: Vegetarian
Ingredients
To recreate these delightful Regency Ginger Crisps, gather the following:
- 3/4 cup butter, melted
- 1 cup brown sugar
- 1 large egg, beaten (or two medium, just whip with a fork)
- 4 tablespoons molasses (which is equivalent to 1/4 cup)
- 2 teaspoons baking soda
- 1/2 teaspoon salt
- 2 teaspoons ground ginger
- 2 1/4 cups flour (do not sift)
- 1/2 cup white sugar, placed in a small bowl for coating later
Equipment Needed
You’ll want to have these tools at the ready for a smooth baking experience:
- Mixing bowls (at least two)
- Whisk or spatula for mixing
- Measuring cups and spoons
- Baking sheets
- Parchment paper or silicone baking mats (optional, for easier cleanup)
- Spatula for flattening cookies
- Wire cooling rack
Instructions
Crafting these ginger crisps is a straightforward process, but patience is key, especially during the chilling phase.
- Melt the butter in a saucepan over low heat or in a microwave-safe bowl.
- Once melted, mix the melted butter with the brown sugar in a medium-sized mixing bowl until well combined.
- Allow this mixture to cool slightly. This is an important step to prevent the egg from scrambling when added.
- Add the beaten egg to the cooled butter and sugar mixture. Stir until fully incorporated.
- Next, stir in the baking soda, molasses, salt, and ground ginger. Whisk or stir thoroughly until all these ingredients are evenly distributed throughout the dough.
- Gradually add the flour, mixing until just combined. Be careful not to overmix the dough.
- Chill the dough for at least 1 hour. For optimal results and flavor development, chilling the dough overnight is even better. Cover the bowl tightly with plastic wrap before refrigerating.
- Once the dough has thoroughly chilled, preheat your oven to 375 degrees Fahrenheit (190 degrees Celsius). Position an oven rack in the middle of the oven.
- Using a tablespoon or a small cookie scoop, roll the chilled dough into walnut-sized balls.
- Roll each dough ball in the white sugar. You can do this by simply dumping the balls into the bowl of sugar and gently shaking the bowl to coat them evenly.
- Place the sugar-coated cookie balls onto greased baking sheets. Aim for about 12 cookies per standard baking sheet, leaving some space between them as they will spread.
- Using the bottom of a glass or a spatula, flatten each cookie ball gently.
- Bake at 375 degrees Fahrenheit (190 degrees Celsius) for 10-12 minutes, or until the edges are nicely browned and the centers are set.
- Cool the cookies on the baking sheets for no more than 1 minute. This brief cooling period on the hot sheet helps them set.
- Carefully remove the cookies to a wire rack to finish cooling completely. It’s crucial to remove them from the baking sheets promptly, as leaving them on the warm surface for too long will cause them to stick.
Expert Tips & Tricks
- Room Temperature Ingredients: While the butter needs to be melted, ensuring your egg is at room temperature will help it emulsify more evenly into the dough, contributing to a smoother texture.
- Chilling is Key: Do not be tempted to skip or shorten the chilling time. This step is vital for managing the dough’s spread during baking and for developing the flavors. A well-chilled dough yields crisper cookies.
- Consistent Sizing: Using a cookie scoop ensures that all your cookies are the same size, leading to even baking.
- Oven Variations: Ovens can vary significantly. Keep a close eye on your first batch to gauge the perfect baking time for your specific oven. If they brown too quickly, reduce the temperature slightly for subsequent batches.
- Doneness Test: The cookies are ready when the edges are a lovely golden brown and the centers look slightly softer. They will continue to firm up as they cool.
Serving & Storage Suggestions
These Regency Ginger Crisps are delightful served warm or at room temperature. Their spiced, sweet flavor makes them an ideal accompaniment to a cup of tea, coffee, or even a glass of milk. They are perfect for afternoon tea, a simple dessert, or as a sweet treat any time of day.
For storage, once completely cooled, place the cookies in an airtight container. They will keep well at room temperature for up to 5 days, retaining their lovely crispness. If you wish to store them for longer, they can be frozen for up to 3 months. Thaw at room temperature before enjoying.
Nutritional Information
| Nutrient | Amount per Serving | % Daily Value |
|---|---|---|
| Calories | 105 kcal | |
| Calories from Fat | 36% | |
| Total Fat | 4.1 g | 6% |
| Saturated Fat | 2.5 g | 12% |
| Cholesterol | 16 mg | 5% |
| Sodium | 134.8 mg | 5% |
| Total Carbohydrate | 16.4 g | 5% |
| Dietary Fiber | 0.2 g | 0% |
| Sugars | 9.9 g | 39% |
| Protein | 1 g | 2% |
(Note: Nutritional information is an estimate and may vary based on specific ingredients and portion sizes.)
Variations & Substitutions
While the classic recipe is wonderfully satisfying, here are a few ideas to add your own touch:
- Orange Zest: For a subtle citrus note that complements the ginger beautifully, add 1-2 teaspoons of finely grated orange zest to the dough along with the flour.
- Crystalized Ginger: For an extra burst of ginger flavor and a delightful chewy texture, finely chop some crystalized ginger and fold it into the dough just before shaping the cookies.
- Spiced Sugar Coating: Instead of plain white sugar for rolling, try a mixture of white sugar with a pinch of cinnamon and nutmeg for a warmer, more complex coating.
FAQs
Q: Why does the dough need to be chilled?
A: Chilling the dough allows the flour to hydrate and the fats to solidify, which prevents the cookies from spreading too much during baking, resulting in a crispier cookie.
Q: Can I use a different type of sugar for the main dough?
A: The recipe specifically calls for brown sugar for its moisture and caramel notes, and white sugar for the coating. Sticking to these will yield the intended result.
Q: My cookies spread too much. What did I do wrong?
A: The most common culprit is insufficient chilling of the dough, or the oven not being hot enough. Ensure the dough is well-chilled and your oven is accurately preheated to 375°F.
Q: How long do these cookies typically stay crisp?
A: When stored properly in an airtight container at room temperature, these ginger crisps will retain their crispness for up to 3-4 days.
Q: Can I make these cookies ahead of time?
A: Yes! The dough can be made and chilled for up to 2 days. You can also bake the cookies and store them as directed.
Final Thoughts
These Regency Ginger Crisps are more than just a cookie; they are a delightful journey back in time, a testament to the enduring appeal of simple, well-loved flavors. The warmth of the ginger, the subtle sweetness of the molasses, and the satisfying crunch are sure to transport you. Bake a batch, brew a pot of your favorite tea, and savor the timeless charm of this classic recipe. I encourage you to share your experiences and any delightful twists you discover. Happy baking!