
A Taste of Home: Russian-Style Turkey Cutlets
There are certain dishes that transport you back in time with just one bite. For me, these Russian-Style Turkey Cutlets are one of them. I can vividly recall my grandmother, her hands dusted with flour, meticulously shaping these tender morsels. The aroma of butter and lightly seasoned turkey filling her cozy kitchen was the scent of pure comfort and love. It wasn’t just about the food; it was about the warmth, the stories shared, and the unwavering tradition of making every meal an occasion.
Recipe Overview
- Prep Time: 25 minutes
- Cook Time: (Implied by frying 4-5 minutes per side for 2 sides = 8-10 minutes per cutlet, for 4 cutlets) ~10 minutes
- Total Time: 35 minutes
- Servings: 4
- Yield: 4 cutlets
- Dietary Type: Contains Dairy, Egg, Gluten
Ingredients
This recipe relies on simple, wholesome ingredients that come together to create something truly special. The beauty lies in its unpretentiousness.
- 2 slices good-quality white bread, crusts removed
- 1/4 cup half-and-half
- 1 lb ground turkey
- 1 egg, lightly beaten
- 1/2 teaspoon salt
- 1/4 teaspoon fresh ground black pepper
- 1/2 teaspoon dried dill
- 5 tablespoons butter, divided (3 tablespoons at room temperature, 2 tablespoons for cooking)
- 1 cup dry breadcrumbs
- 2 tablespoons cooking oil
Equipment Needed
While this dish is straightforward, a few key pieces of equipment will make the process smooth and efficient.
- Large mixing bowl
- Small bowl
- Spatula or fork
- Baking sheet (for chilling)
- Large, nonstick frying pan
- Measuring cups and spoons
- Knife (for bread)
Instructions
The beauty of these Russian-Style Turkey Cutlets lies in their simplicity and the careful technique that ensures a wonderfully moist and flavorful result. Let’s embark on this culinary journey together.
-
Prepare the Bread Base: Begin by taking your 2 slices of good-quality white bread and tearing them into smaller pieces. Place these torn bread pieces into a large bowl. Pour the 1/4 cup of half-and-half over the bread. Allow the bread to soak for about 2 minutes, or until the liquid is fully absorbed, creating a soft, pulpy base. This is crucial for moisture.
-
Form the Turkey Mixture: To the soaked bread in the large bowl, add the 1 lb of ground turkey. Next, incorporate the 1 lightly beaten egg, 1/2 teaspoon of salt, 1/4 teaspoon of fresh ground black pepper, and 1/2 teaspoon of dried dill. Finally, add 3 tablespoons of the butter that has been softened to room temperature. Using your hands or a sturdy spoon, mix these ingredients thoroughly until everything is well combined. The butter will melt as the cutlets cook, contributing to their succulence.
-
Chill the Mixture: Once the turkey mixture is perfectly blended, cover the large bowl and place it in the freezer for about 10 minutes. This brief chilling period will help to firm up the mixture just enough to make it easier to shape without losing its tenderness.
-
Shape the Cutlets: After chilling, remove the turkey mixture from the freezer. It will still be quite soft, which is exactly what we want. Form the mixture into four oval cutlets. Aim for an even thickness for consistent cooking.
-
Coat the Cutlets: Spread the 1 cup of dry breadcrumbs onto a plate or shallow dish. Gently coat each formed cutlet in the breadcrumbs, ensuring they are evenly covered on all sides. Press the breadcrumbs lightly to help them adhere.
-
Cook the Cutlets: In a large, nonstick frying pan, melt the remaining 2 tablespoons of butter along with the 2 tablespoons of cooking oil over moderate heat. Once the butter is melted and the oil is shimmering, carefully place the breadcrumb-coated turkey cutlets into the pan. Cook them for 4 to 5 minutes per side. You are looking for a beautiful golden brown color and for the cutlets to be just done through. Adjust the heat as needed to prevent burning.
Expert Tips & Tricks
Crafting perfect cutlets is an art, and a few insider tips can elevate your results.
- Moisture is Key: The half-and-half and the softened butter are your secret weapons against dry turkey. Don’t skimp on them. If your ground turkey seems particularly lean, you could consider adding an extra teaspoon of butter to the mixture.
- Gentle Handling: Treat the turkey mixture with care when forming the cutlets. Overworking the meat can lead to a tougher texture.
- Nonstick is Your Friend: A good nonstick pan is essential for ensuring the cutlets don’t stick and for achieving that perfect golden crust.
- Checking for Doneness: The best way to ensure your cutlets are cooked through is to use an instant-read thermometer. The internal temperature should reach 165°F (74°C). If you don’t have one, you can carefully make a small slit in the thickest part of a cutlet to check for any pinkness; it should be uniformly cooked.
- Uniformity for Even Cooking: Try to make your cutlets as similar in size and thickness as possible. This guarantees they will cook evenly.
Serving & Storage Suggestions
These Russian-Style Turkey Cutlets are incredibly versatile.
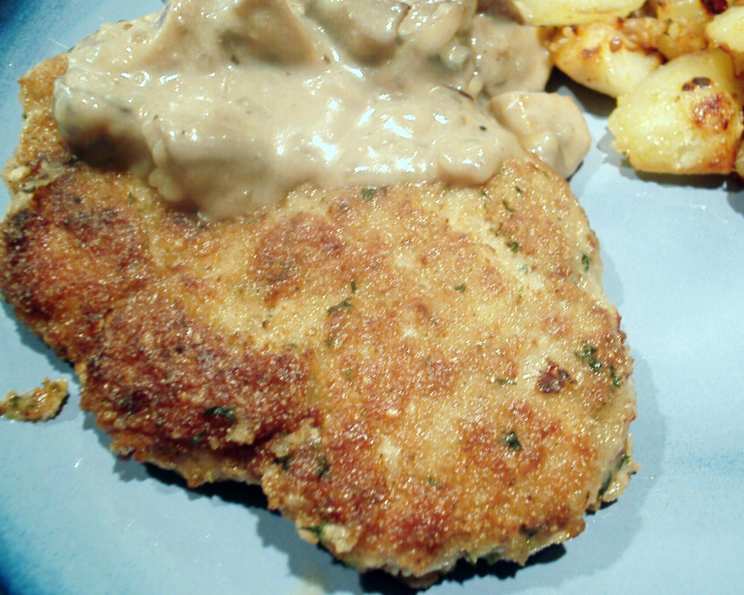
Serving: They are traditionally served with sautéed mushrooms, which offer a lovely earthy contrast. Other excellent accompaniments include beets (either roasted or in a salad), glazed carrots, or a comforting bowl of mashed potatoes. A simple dollop of sour cream or a squeeze of lemon can also be a delightful addition. For a lighter option, consider serving them over a bed of fluffy rice or with a crisp, fresh salad.
Storage: Leftovers can be stored in an airtight container in the refrigerator for up to 3 days. To reheat, gently warm them in a skillet over low heat with a little bit of butter or oil to revive their crispness, or place them on a baking sheet in a 350°F (175°C) oven for about 10-15 minutes, until heated through. Freezing is not typically recommended as it can affect the texture of the cutlets.
Nutritional Information
Here’s an estimated breakdown of the nutritional content per serving:
| Nutrient | Amount per Serving | % Daily Value |
|---|---|---|
| Calories | 454.9 kcal | |
| Calories from Fat | ||
| Total Fat | 33.6 g | 51 % |
| Saturated Fat | 13.9 g | 69 % |
| Cholesterol | 168.6 mg | 56 % |
| Sodium | 623.3 mg | 25 % |
| Total Carbohydrate | 12.3 g | 4 % |
| Dietary Fiber | 0.7 g | 2 % |
| Sugars | 1.1 g | 4 % |
| Protein | 26.4 g | 52 % |
Note: Nutritional values are approximate and can vary based on specific ingredient brands and portion sizes.
Variations & Substitutions
While this recipe is wonderful as is, feel free to explore some creative variations:
- Herbal Infusion: If you don’t have dried dill, fresh dill is an excellent substitute. Use about 1 tablespoon of finely chopped fresh dill. You could also experiment with other fresh herbs like parsley or chives.
- Gluten-Free Option: For a gluten-free version, use gluten-free bread and ensure your breadcrumbs are certified gluten-free.
- Spice it Up: A pinch of red pepper flakes or a dash of paprika can add a subtle warmth to the turkey mixture.
- Binder Boost: If you find your mixture is still too soft after the chilling period, you can add another tablespoon of breadcrumbs to help bind it.
FAQs
Q: Why is the bread soaked in half-and-half?
A: Soaking the bread in half-and-half is a key step that helps to keep the turkey cutlets incredibly moist and tender, preventing them from becoming dry.
Q: Can I use ground chicken instead of ground turkey?
A: Yes, you can substitute ground chicken for ground turkey. The cooking time might be similar, but always ensure the chicken is cooked through to an internal temperature of 165°F (74°C).
Q: How can I prevent the cutlets from sticking to the pan?
A: Using a good quality nonstick frying pan and ensuring the butter and oil are heated to the proper moderate temperature before adding the cutlets are crucial for preventing sticking.
Q: What if I don’t have half-and-half?
A: You can substitute whole milk for half-and-half, though the results might be slightly less rich.
Q: Can I make these cutlets ahead of time?
A: You can prepare the turkey mixture and form the cutlets up to a day in advance. Store them covered on a baking sheet in the refrigerator and coat them with breadcrumbs just before cooking.
These Russian-Style Turkey Cutlets are a testament to the fact that sometimes, the simplest dishes are the most profound. They are comforting, satisfying, and carry a whisper of culinary heritage. I encourage you to invite them into your kitchen and create your own cherished memories around this delightful meal. Enjoy!