
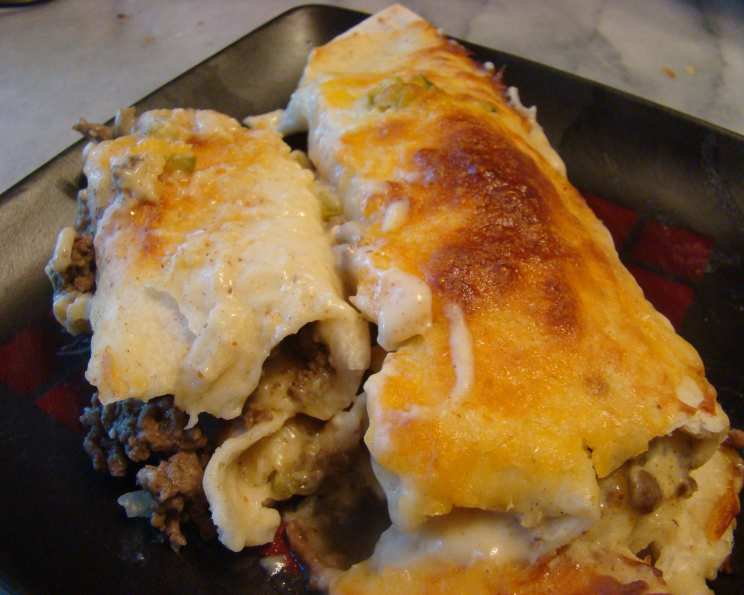
Rockin’ Enchiladas with Silky Sour Cream Sauce
My sister Alexis, bless her heart, has always been the culinary queen of our family. While I was busy experimenting with, shall we say, less successful kitchen endeavors, Alexis was crafting dishes that became legendary. Among her repertoire, these Rockin’ Enchiladas stand out, a testament to her knack for transforming simple ingredients into something truly spectacular. The moment you encounter the creamy, tangy sour cream sauce cascading over tender, savory filling, you know you’re in for a treat that transcends the ordinary.
Recipe Overview
- Prep Time: 25 minutes
- Cook Time: 20 minutes
- Total Time: 45 minutes
- Servings: 6
- Yield: 1 casserole dish
- Dietary Type: Contains Dairy
Ingredients
For the Savory Filling:
- 1 ½ pounds ground beef
- 1 tablespoon oil (such as vegetable or canola)
- 1 medium onion, finely chopped
- 1 (4-ounce) can chopped green chilies, undrained
- 1 (1 1/3-ounce) package taco seasoning
- ½ teaspoon chili powder
- ½ teaspoon garlic powder
- ½ teaspoon cayenne pepper (optional, for a touch of heat)
- ¼ teaspoon salt
- ¼ teaspoon black pepper
For the Tangy Sour Cream Sauce:
- 1 pint sour cream
- 2 (10 ¾-ounce) cans cream of chicken soup
- 1 (4-ounce) can chopped green chilies, undrained
For Assembly:
- 12 large flour tortillas
- ½ cup shredded cheddar cheese
Equipment Needed
- Large skillet or frying pan
- Wooden spoon or spatula
- Large mixing bowl
- Whisk or spoon for mixing sauce
- 9×13 inch baking dish or similar casserole dish
- Aluminum foil
Instructions
- Begin by preparing the flavor-packed meat filling. Heat the oil in a large skillet over medium-high heat. Add the chopped onion and sauté until it becomes translucent and softened, about 5-7 minutes.
- Introduce the ground beef to the skillet with the sautéed onions. Break up the meat with your spoon and cook until it’s thoroughly browned. Once browned, drain off any excess fat from the skillet.
- To the browned beef and onion mixture, add the taco seasoning, chili powder, garlic powder, cayenne pepper (if using), salt, and pepper. Stir well to ensure all the spices are evenly distributed throughout the meat.
- Next, incorporate the first can of chopped green chilies into the meat mixture. Stir to combine and cook for an additional 2 minutes, allowing the flavors to meld beautifully. Remove the skillet from the heat.
- Now, let’s craft the luscious sour cream sauce. In a large mixing bowl, combine the sour cream, the two cans of cream of chicken soup, and the second can of chopped green chilies (undrained). Whisk or stir vigorously until the sauce is smooth and well-integrated.
- Preheat your oven to 300 degrees Fahrenheit. This lower temperature is key to allowing the enchiladas to heat through gently and the sauce to become wonderfully bubbly without drying out.
- To assemble the enchiladas, take each flour tortilla and spoon about 3 to 4 tablespoons of the savory meat mixture into the center. Roll up the tortilla snugly, enclosing the filling.
- Arrange the rolled enchiladas seam-side down in your prepared baking dish. You’ll want to pack them in fairly tightly so they hold their shape.
- Evenly spread the prepared sour cream sauce over the top of all the rolled enchiladas, ensuring each one is generously coated.
- Finally, sprinkle the shredded cheddar cheese over the sour cream sauce.
- Cover the baking dish tightly with aluminum foil. This step is crucial for steaming the tortillas and allowing the flavors to meld without the cheese browning too quickly.
- Bake in the preheated oven at 300 degrees Fahrenheit for 15-20 minutes. The goal is to heat the enchiladas through and melt the cheese. You’ll know they’re ready when the sauce is bubbling around the edges.
Expert Tips & Tricks
- Toasting Tortillas (Optional but Recommended): For a more authentic texture and to prevent the tortillas from becoming overly mushy, you can briefly warm them in a dry skillet or microwave before rolling. This makes them more pliable and adds a subtle depth of flavor.
- Spice Level Adjustment: While the original recipe calls for cayenne, feel free to adjust its quantity or omit it entirely if you prefer a milder dish. The green chilies themselves provide a pleasant, mild heat.
- Make-Ahead Magic: You can assemble the enchiladas up to a day in advance. Store them covered in the refrigerator. You may need to add a few extra minutes to the baking time if baking from chilled.
- Cheese Varieties: While cheddar is classic, don’t hesitate to experiment with a blend of cheeses like Monterey Jack, a Mexican blend, or even a touch of Colby for added flavor complexity.
Serving & Storage Suggestions
These Rockin’ Enchiladas are best served immediately after baking, piping hot and bubbling. Garnish with a dollop of extra sour cream, a sprinkle of fresh cilantro, or a few slices of avocado for a burst of freshness.
Leftovers can be stored in an airtight container in the refrigerator for up to 3 days. To reheat, you can either microwave individual portions until heated through or place a larger portion back in a covered baking dish in a 300°F (150°C) oven for about 15-20 minutes, or until warmed.
Nutritional Information
| Nutrient | Amount per Serving | % Daily Value |
|---|---|---|
| Calories | 1248.5 kcal | N/A |
| Calories from Fat | N/A | 525 g |
| Total Fat | 58.4 g | 89% |
| Saturated Fat | 22.7 g | 113% |
| Cholesterol | 122.1 mg | 40% |
| Sodium | 2957.8 mg | 123% |
| Total Carbohydrate | 136 g | 45% |
| Dietary Fiber | 9.3 g | 37% |
| Sugars | 11.6 g | 46% |
| Protein | 43.9 g | 87% |
(Nutritional information is an estimate and can vary based on specific ingredients and portion sizes.)
Variations & Substitutions
- Chicken Enchiladas: Substitute the ground beef with shredded rotisserie chicken or cooked chicken breast. You might want to slightly adjust the seasoning to complement chicken.
- Vegetarian Option: For a meatless version, consider using a blend of sautéed mushrooms, black beans, corn, and your favorite vegetables as the filling.
- Spicier Kick: If you love heat, add a finely minced jalapeño pepper (seeds and all) to the meat mixture along with the green chilies, or add a pinch more cayenne to the sauce.
FAQs
Q: Can I make these enchiladas spicier?
A: Absolutely! You can add finely minced fresh jalapeños or a dash more cayenne pepper to the meat mixture or the sour cream sauce for an extra kick.
Q: What kind of baking dish is best for this recipe?
A: A 9×13 inch baking dish is ideal, but any similar-sized casserole dish will work. The key is to ensure the enchiladas fit snugly without too much extra space.
Q: Can I use corn tortillas instead of flour tortillas?
A: While this recipe is designed for flour tortillas, you could use corn tortillas. You would need to soften them first by briefly frying them in oil or warming them to prevent them from breaking.
Q: How do I prevent the cheese from burning before the enchiladas are heated through?
A: Covering the dish tightly with aluminum foil during the initial baking period is crucial. This steams the enchiladas and melts the cheese gently. You can uncover it for the last few minutes if you desire a more browned cheese topping.
Q: Is the cream of chicken soup essential for the sauce?
A: The cream of chicken soup provides a creamy base and helps thicken the sauce. While you could experiment with other creamy soups (like cream of mushroom), cream of chicken is specifically recommended for its neutral flavor profile in this dish.
Final Thoughts
There’s a comforting magic that happens when you combine tender, savory filling with a rich, velvety sauce, all encased in a soft tortilla and topped with melted cheese. These Rockin’ Enchiladas are more than just a meal; they’re a warm embrace on a plate, a dish that brings people together and creates lasting memories. I encourage you to channel your inner Alexis and give this recipe a try. Prepare to be amazed, and perhaps, discover your own family favorite. Serve them with a simple green salad and perhaps a refreshing margarita for a truly complete and celebratory experience. Enjoy every delicious bite!