
The Allure of Roasted Garlic Cheese Spread: A Hug in a Dish
There’s a certain magic that happens when garlic, that humble bulb, is coaxed into a state of mellow sweetness by the gentle kiss of the oven. I remember the first time I experienced truly roasted garlic – it wasn’t in a fancy restaurant, but at a casual summer barbecue. A friend had brought a simple spread, golden and fragrant, served with crusty bread. The creamy texture, the depth of flavor, and the sheer comfort it offered were utterly captivating. It was more than just an appetizer; it was an invitation to slow down, to savor, and to connect. That memory, of sharing laughter and simple pleasures over a dish that felt both sophisticated and incredibly homey, is what this Roasted Garlic Cheese Spread evokes for me every single time. It’s the kind of food that makes you feel good, inside and out.
Recipe Overview
- Prep Time: 15 minutes
- Cook Time: 60-75 minutes
- Total Time: 1 hour 15 minutes to 1 hour 30 minutes
- Servings: Approximately 6
- Yield: About 1 cup
- Dietary Type: Vegetarian
Ingredients
This recipe is wonderfully straightforward, relying on a few key ingredients to create its signature depth of flavor and irresistible creaminess.
- 1 whole head of garlic
- 1 tablespoon olive oil (this amount is approximate, you just need enough to saturate the cut surface)
- 1 (8 ounce) package cream cheese, softened
- 1⁄4 cup unsalted butter, softened
- 1⁄2 teaspoon salt
- 1⁄4 teaspoon black pepper
- 1⁄4 cup snipped fresh chives (optional; amount to taste)
Chef’s Note on Ingredients: The quality of your garlic will significantly impact the final flavor. Look for firm, plump heads with dry, papery skins. For the cream cheese and butter, ensuring they are truly softened is crucial for achieving a smooth, lump-free spread. Softened means it should yield easily to gentle pressure, not be melted. If you’re using salted butter, you may want to reduce or omit the added salt in the recipe to avoid an overly salty spread.
Equipment Needed
For this delightful spread, you won’t need an arsenal of specialized tools. Here’s what will make the process smooth:
- A sharp knife for preparing the garlic.
- An ovenproof ramekin or small baking pan to roast the garlic.
- A mini-food processor or a bowl and whisk for combining the ingredients.
- A serving dish for your finished spread.
Instructions
Crafting this roasted garlic cheese spread is a journey of transformation, from a sharp bulb to a mellow, creamy delight. Follow these steps carefully, and you’ll be rewarded with a truly delicious outcome.
- Preheat your oven to 325°F (160°C). This moderate temperature is perfect for gently coaxing the sweetness out of the garlic without burning it.
- Prepare the garlic for roasting. Take your whole head of garlic and, using a sharp knife, cut off the top third of the head. Be sure not to peel away the papery skin entirely; it will act as a natural parchment, holding the cloves together and preventing them from drying out. You want to expose the tops of the individual cloves.
- Drizzle with olive oil. Place the prepared garlic head, cut side up, in your ovenproof ramekin or baking pan. Drizzle the cut surface of the garlic with the olive oil until it is thoroughly saturated. This helps the garlic to roast evenly and become tender.
- Roast the garlic. Place the ramekin or baking pan in the preheated oven. Roast for 60-75 minutes, or until the garlic cloves are soft and tender when squeezed. They should feel yielding through their papery skins. The exact time will depend on the size of your garlic head and your oven’s performance.
- Extract the roasted garlic. Once the garlic is roasted and slightly cooled (enough to handle safely), it’s time to release its sweet, mellow goodness. Squeeze out the roasted garlic cloves from their skins directly into the bowl of your mini-food processor. If you don’t have a mini-food processor, you can place them in a bowl and carefully mash them with a fork or whisk them by hand.
- Combine the spread ingredients. To the extracted roasted garlic, add the softened cream cheese, softened butter, salt, and pepper.
- Process until smooth. If using a mini-food processor, pulse the ingredients until the mixture is creamy and smooth. If you’re whisking by hand, vigorously whisk until all ingredients are well incorporated and the spread has a uniform, creamy consistency.
- Incorporate the chives (if using). Transfer the creamy spread to a serving or storage dish. If you’ve chosen to use them, blend in the snipped fresh chives at this stage. Stir them gently until evenly distributed.
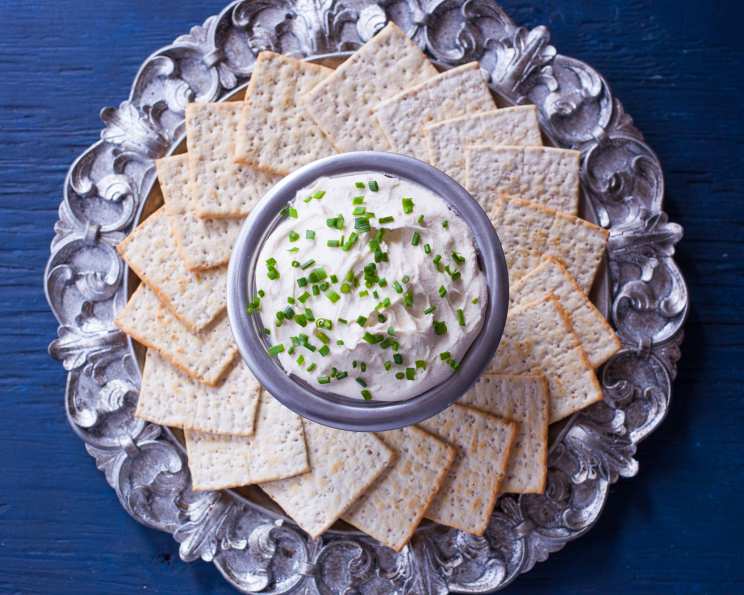
- Serve. Present your softened spread with an assortment of your favorite crackers, toasted baguette slices, or crudités.
Expert Tips & Tricks
To elevate your Roasted Garlic Cheese Spread from good to exceptional, consider these professional insights:
- Garlic Selection: For the deepest flavor, choose garlic bulbs that feel heavy for their size and have no soft spots. Different varieties of garlic can offer subtle flavor nuances, so experiment!
- Softening Fats: The key to a silky smooth spread is properly softened cream cheese and butter. If you forget to leave them out, you can gently soften cream cheese by placing the block in a microwave-safe bowl and microwaving on 50% power for 10-second intervals until just softened. For butter, slice it thinly to speed up the softening process at room temperature.
- Don’t Over-Process (if hand-whisking): While a food processor makes it easy, if you’re whisking by hand, be patient. Over-whisking can sometimes make the spread too airy or even break down the fats, leading to a greasy texture. Stop once it’s smooth and uniform.
- Roasting Time Variations: Ovens can be finicky! If your garlic doesn’t feel completely tender after 60 minutes, give it another 15 minutes. The goal is absolute softness.
- Seasoning to Perfection: Taste your spread before adding the chives and adjust the salt and pepper as needed. Roasted garlic is naturally sweet, so you might find you need less salt than you initially think.
Serving & Storage Suggestions
This Roasted Garlic Cheese Spread is incredibly versatile, making it a perfect addition to any gathering or a simple, satisfying snack.
Serving:
Serve the spread at room temperature for the best texture and flavor. It’s ideal for dipping assorted crackers, toasted baguette slices, grissini, or even sturdy vegetable sticks like carrots, celery, and bell peppers. You can also spread it generously on sandwiches or use it as a flavor booster for baked potatoes. For an elegant presentation, garnish the top with a few extra snipped chives or a drizzle of olive oil.
Storage:
Once prepared, store the Roasted Garlic Cheese Spread in an airtight container in the refrigerator. It will keep well for up to 4 to 5 days. When you’re ready to serve it again, allow it to sit at room temperature for about 20-30 minutes to soften up and regain its spreadable consistency. While freezing is possible, it can sometimes alter the texture of dairy-based spreads, making them a bit more watery upon thawing. If you do choose to freeze it, thaw it slowly in the refrigerator and then bring to room temperature.
Nutritional Information
Here’s an approximate nutritional breakdown for this delicious spread. Please note that these values are estimates and can vary based on specific ingredient brands and quantities used.
| Nutrient | Amount per Serving (approx. 2 tbsp) | % Daily Value |
|---|---|---|
| Calories | 180 kcal | |
| Total Fat | 17 g | 22% |
| Saturated Fat | 10 g | 50% |
| Cholesterol | 40 mg | 13% |
| Sodium | 150 mg | 7% |
| Total Carbohydrate | 3 g | 1% |
| Dietary Fiber | 0 g | 0% |
| Total Sugars | 1 g | |
| Protein | 2 g | 4% |
| Vitamin D | 0 mcg | 0% |
| Calcium | 50 mg | 4% |
| Iron | 0 mg | 0% |
| Potassium | 50 mg | 1% |
Disclaimer: Nutritional values are estimations.
Variations & Substitutions
While this recipe is wonderfully classic, here are a few ways to put your own spin on it:
- Herb Variations: Instead of or in addition to chives, try adding finely chopped fresh parsley, dill, rosemary, or thyme.
- Spicy Kick: For a touch of heat, stir in a pinch of red pepper flakes or a teaspoon of finely minced jalapeño (seeds removed for less heat).
- Cheesy Addition: For an even more decadent spread, mix in a couple of tablespoons of finely grated Parmesan cheese or sharp cheddar cheese along with the cream cheese and butter.
- Vegan Option: To make this vegan, you would need to substitute the cream cheese and butter with plant-based alternatives. Look for high-quality vegan cream cheese and butter that have a similar richness and texture. The roasting process for the garlic remains the same.
- Nutty Twist: A tablespoon or two of toasted pine nuts or walnuts, finely chopped, can add a lovely textural contrast and nutty depth.
FAQs
Q: How do I know when the garlic is perfectly roasted?
A: The garlic cloves should be very soft and tender. You’ll be able to easily squeeze them out of their skins, and they should feel mushy when gently pressed.
Q: Can I roast the garlic ahead of time?
A: Yes, you can roast the garlic up to a day in advance. Let it cool completely, then store the roasted cloves (still in their skins) in an airtight container in the refrigerator. Squeeze them out and proceed with the recipe when ready.
Q: My spread isn’t as smooth as I’d like. What can I do?
A: Ensure your cream cheese and butter were sufficiently softened. If using a food processor, make sure to process for long enough to achieve a truly smooth consistency. If whisking by hand, be sure to mash the roasted garlic very thoroughly first.
Q: Can I make this spread without a food processor?
A: Absolutely! While a food processor makes it quicker, you can achieve a wonderfully smooth spread by mashing the roasted garlic very well with a fork in a bowl, then vigorously whisking in the softened cream cheese, butter, salt, and pepper.
Q: How long does it take for the garlic to roast?
A: The roasting time for the garlic is typically between 60 to 75 minutes at 325°F (160°C). Keep an eye on it, as oven temperatures can vary.
A Final Thought
This Roasted Garlic Cheese Spread is more than just a recipe; it’s an experience. It’s an ode to the simple, profound pleasure of well-prepared ingredients. Whether you’re hosting a lively gathering or seeking a moment of quiet indulgence, this spread is sure to be a welcome addition. Serve it with a crisp Sauvignon Blanc or a robust red wine, and let the rich, comforting flavors transport you. I encourage you to try it, to taste the magic of roasted garlic, and to share this delightful creation with those you cherish. Don’t hesitate to let me know how yours turns out!