
The Ultimate Red Velvet Cheesecake Cake: A Symphony of Decadence
There are certain desserts that, when they appear, command an immediate hush and a collective “oooh.” The Red Velvet Cheesecake Cake is unequivocally one of them. I remember the first time I encountered it, not as a baker, but as a wide-eyed diner at a renowned restaurant. The slice arrived, a dramatic swirl of crimson cake and ivory cream cheese, and it was pure theater on a plate. That initial bite, a perfect harmony of moist, tangy red velvet and silken, rich cheesecake, was transformative. It wasn’t just a dessert; it was an experience, a revelation that lodged itself firmly in my culinary memory. Years later, the quest to recreate that magic, to capture its essence in my own kitchen, led me down a delightful, albeit intricate, path. This recipe is the culmination of countless trials and triumphant tastes, a testament to the enduring allure of this iconic confection.
Recipe Overview
- Prep Time: 1 hour
- Cook Time: 1 hour 15 minutes
- Total Time: 2 hours 45 minutes (plus chilling and freezing time)
- Servings: 12
- Yield: 1 layer cake
- Dietary Type: Contains Dairy, Eggs, Wheat
Ingredients
This masterpiece requires a bit of dedication, as we’re essentially crafting two distinct yet harmonious components: a luscious cheesecake filling and a vibrant red velvet cake.
For the Cheesecake Layer:
- 1 ¼ lbs cream cheese, softened to room temperature (approximately 20 oz)
- ¾ cup granulated sugar
- ½ tablespoon fresh lemon juice
- ¼ teaspoon coarse salt
- 2 large eggs
- ½ cup sour cream, at room temperature
For the Red Velvet Cake Layers:
- 2 ½ cups cake flour
- 1 ½ cups granulated sugar
- 1 ½ teaspoons baking soda
- 2 tablespoons unsweetened cocoa powder
- 1 teaspoon salt
- 2 large eggs
- 1 ½ cups vegetable oil (I often opt for melted coconut oil for a subtle flavor enhancement)
- 1 cup buttermilk
- 3 tablespoons red food coloring
- 2 teaspoons vanilla extract
- 1 ½ teaspoons white distilled vinegar
For the Cream Cheese Frosting:
- 12 ounces cream cheese, softened
- 12 ounces unsalted butter, softened
- 1 ½ teaspoons vanilla extract
- 3 cups confectioners’ sugar, sifted
Equipment Needed
To bring this stunning creation to life, you’ll want to have the following on hand:
- Two 9-inch round cake pans
- A 9-inch springform pan
- Electric mixer (stand mixer or hand mixer)
- Various mixing bowls
- Whisk
- Spatulas
- Parchment paper
- Aluminum foil
- Oven-safe roasting pan (large enough to fit the springform pan)
- Cooling racks
- Cake stand or serving platter
- Sieve or fine-mesh strainer (for sifting)
- Measuring cups and spoons
- Sharp knife
- Optional: Cake strips
Instructions
Embarking on the creation of this Red Velvet Cheesecake Cake is a journey, a multi-stage process that rewards patience and precision. Set aside a good portion of your day, or better yet, break it down into stages to truly savor the experience.
Crafting the Cheesecake Centerpiece
- Begin by preheating your oven to 325°F (160°C). Simultaneously, set a kettle of water to boil for the water bath.
- In a large bowl, using an electric mixer, beat the cream cheese on medium speed until it achieves a delightfully fluffy consistency, ensuring to scrape down the sides of the bowl periodically.
- Gradually add the granulated sugar, continuing to beat until the mixture is smooth and fluffy.
- Beat in the fresh lemon juice and coarse salt.
- Introduce the eggs one at a time, beating well after each addition and remembering to scrape down the bowl’s sides after each egg is incorporated.
- Finally, beat in the sour cream until everything is just combined. Avoid overmixing at this stage.
- Prepare your 9-inch springform pan by spraying it generously with a non-stick cooking spray.
- Cut a circle of parchment paper to fit the bottom of the springform pan and line it, then spray the parchment paper as well for good measure.
- To create a watertight seal for the water bath, wrap the bottom half of the springform pan securely in aluminum foil.
- Pour the prepared cheesecake filling into the prepared springform pan.
- Place the foil-wrapped springform pan into a larger, oven-safe roasting pan.
- Carefully pour the boiling water into the roasting pan, ensuring it comes about halfway up the side of the springform pan. This water bath will create a humid environment, preventing cracks and ensuring a silky-smooth texture.
- Bake for approximately 45 minutes, or until the cheesecake is just set in the center. It should still have a slight jiggle.
- Carefully remove the springform pan from the water bath. Let it cool on a wire rack for about 20 minutes.
- Once slightly cooled, run a knife around the edge of the cheesecake to loosen it from the sides of the pan, then continue to cool it completely.
- Once fully cooled, carefully place a plate on top of the cheesecake layer and flip it over onto the plate. Remove the parchment paper.
- Cover the cheesecake layer tightly with plastic wrap and freeze it. Freezing is crucial for ease of handling when assembling the cake.
Baking the Vibrant Red Velvet Layers
- Preheat your oven to 350°F (175°C). If you plan to use cake strips for perfectly flat layers, now is the time to soak them and attach them to your two 9-inch round cake pans.
- In a medium bowl, sift together the cake flour, granulated sugar, baking soda, cocoa powder, and salt. This ensures a light and airy cake.
- In a separate large bowl, using your electric mixer, beat the eggs, vegetable oil, buttermilk, red food coloring, vanilla extract, and white distilled vinegar until well combined.
- Add the sifted dry ingredients to the wet ingredients and beat until the batter is smooth, which should take about 2 minutes.
- Divide the batter evenly between the two prepared 9-inch round cake pans.
- Bake for 25-30 minutes, rotating the pans halfway through the baking time. The cakes are done when a toothpick inserted into the center of each cake comes out clean.
- Allow the cakes to cool in their pans for 5 minutes.
- Invert each cake onto a plate, and then invert again onto a cooling rack to cool completely.
- If you did not use cake strips, and your cake layers have domed, carefully level them now with a sharp knife to create a flat surface for assembly.
Whipping Up the Luscious Frosting
- In a large bowl, beat together the softened cream cheese, softened butter, and vanilla extract with your electric mixer until the mixture is well combined.
- Add the sifted confectioners’ sugar and beat until the frosting is light and fluffy, which will take approximately 5-7 minutes.
Assembling the Masterpiece
- Place the bottom red velvet cake layer onto your cake stand or serving platter.
- Retrieve the frozen cheesecake layer from the freezer. Unwrap it carefully.
- Place the cheesecake layer directly on top of the bottom red velvet cake layer.
- At this point, you may notice that the cheesecake is slightly wider than the cake. If necessary, allow the cheesecake to soften for approximately 10 minutes before carefully trimming it with a sharp knife to match the diameter of the cake.
- Gently place the top red velvet cake layer on top of the cheesecake.
- Using an offset spatula, coat the entire cake with a generous layer of the cream cheese frosting. This initial thin layer is your “crumb coat,” designed to trap any loose crumbs.
- Refrigerate the cake for approximately 30 minutes to allow the crumb coat to set.
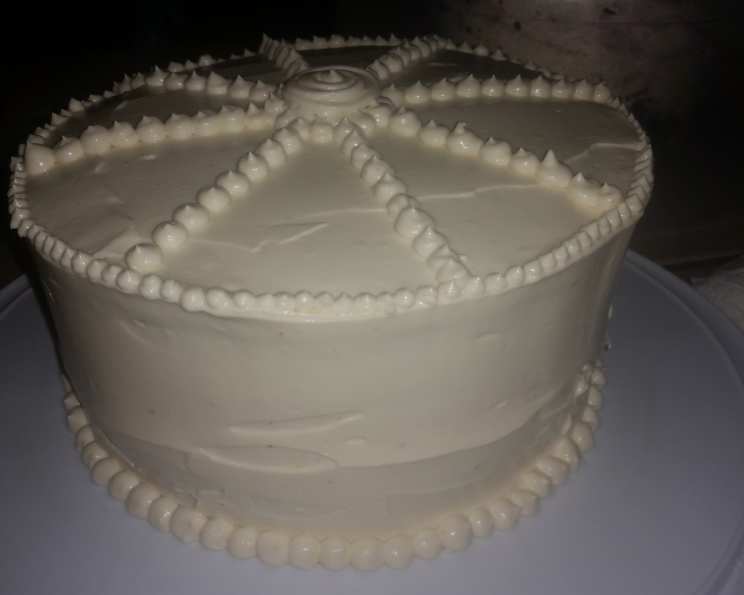
- Once chilled, frost the cake with the remaining cream cheese frosting as desired, creating smooth sides and a beautiful top.
- Refrigerate the finished cake until you are ready to serve.
Expert Tips & Tricks
- Room Temperature is Key: For both the cheesecake filling and the frosting, ensuring your cream cheese, butter, and sour cream are at room temperature is paramount for achieving a smooth, lump-free texture. Cold dairy products will lead to a grainy outcome.
- The Gentle Water Bath: The water bath, or bain-marie, is your secret weapon for a perfectly baked cheesecake. It provides gentle, even heat and prevents the edges from overcooking while the center remains underdone, ultimately avoiding cracks and a creamy, consistent texture.
- Don’t Overmix the Cheesecake: Once the eggs are added to the cheesecake batter, mix only until just combined. Overmixing can incorporate too much air, leading to cracks during baking.
- The Magic of Freezing: Freezing the cheesecake layer before assembly is an absolute game-changer. It firms it up beautifully, making it incredibly easy to place on the cake layers without any smudging or distortion.
- Leveling for Perfection: If you’re not using cake strips, don’t skip the leveling step! A flat surface is essential for a stable and aesthetically pleasing layered cake. A serrated knife is your best friend here.
- Sift, Sift, Sift: Sifting your dry ingredients, especially the confectioners’ sugar for the frosting, is non-negotiable. It removes lumps and aerates the mixture, resulting in a smoother, lighter texture.
- Crumb Coat for Cleanliness: The crumb coat is a baker’s best friend for a neat finish. It seals in all the stray crumbs, ensuring your final layer of frosting is pristine.
Serving & Storage Suggestions
This magnificent Red Velvet Cheesecake Cake is a showstopper that deserves to be presented with pride. Serve chilled, allowing the flavors to meld and the textures to shine. A simple dusting of confectioners’ sugar or a few fresh berries can add a touch of elegance.
Storage is straightforward, but important for maintaining quality. Refrigerate the cake in an airtight container or well-wrapped in plastic wrap. It will keep beautifully in the refrigerator for up to 3-4 days. This cake also freezes remarkably well. You can freeze the entire cake, or individual slices, wrapped tightly in plastic wrap and then in a layer of aluminum foil, for up to 1 month. Thaw overnight in the refrigerator before serving.
Nutritional Information
(Please note: Nutritional information is an estimate and can vary based on specific ingredients and portion sizes used.)
| Nutrient | Amount per Serving | % Daily Value |
|---|---|---|
| Calories | 1125 kcal | 2250% |
| Total Fat | 80.2 g | 123% |
| Saturated Fat | 34.5 g | 172% |
| Cholesterol | 212.1 mg | 70% |
| Sodium | 899.7 mg | 37% |
| Total Carbohydrate | 94.9 g | 31% |
| Dietary Fiber | 0.8 g | 3% |
| Total Sugars | 70.9 g | 283% |
| Protein | 10.2 g | 20% |
Variations & Substitutions
While this recipe is a faithful rendition of a classic, the adventurous baker can always add their personal touch:
- Gluten-Free: For a gluten-free version, substitute a high-quality gluten-free all-purpose flour blend for the cake flour, ensuring it contains xanthan gum.
- Dairy-Free Frosting: While challenging to replicate the exact texture and flavor, you could experiment with a dairy-free cream cheese alternative and vegan butter for the frosting, though results may vary.
- Chocolate Ganache Drizzle: For an extra layer of indulgence, consider a dark chocolate ganache drizzled over the top after the final frosting.
- Raspberry Swirl: Gently swirl some raspberry jam into the cheesecake batter before baking for a tart and fruity counterpoint.
FAQs
Q: Why did my cheesecake crack?
A: Cheesecake cracks are often caused by overmixing the batter, sudden temperature changes, or overbaking. Using a water bath and allowing the cheesecake to cool gradually can help prevent this.
Q: Can I make the cheesecake layer ahead of time?
A: Absolutely! The cheesecake layer is designed to be made ahead and frozen, which is ideal for simplifying assembly.
Q: How do I ensure my red velvet cake is moist?
A: The combination of buttermilk, oil, and the correct leavening agents (baking soda and vinegar) in this recipe helps ensure a wonderfully moist red velvet cake. Be careful not to overbake.
Q: Can I bake this in a single layer?
A: This recipe is specifically designed for a two-layer cake with a cheesecake in the middle. Adapting it to a single layer would significantly alter the structure and texture.
Q: What’s the best way to frost a layered cake like this?
A: The crumb coat followed by chilling is the best method for a clean, professional finish on any layered cake. Use an offset spatula for smooth application.
Final Thoughts
There’s a profound satisfaction that comes from creating a dessert as show-stopping as this Red Velvet Cheesecake Cake. It’s a labor of love, certainly, but every step, from the velvety cheesecake to the vibrant red velvet, is a testament to the joy of baking. The moment you slice into it, revealing that beautiful contrast of textures and colors, is truly magical. I encourage you to gather your ingredients, clear your schedule, and embark on this delicious adventure. And when you do, be sure to savor each bite, perhaps with a rich cup of coffee or a sparkling glass of champagne. I’d be absolutely delighted to hear about your own culinary triumphs with this magnificent cake.