
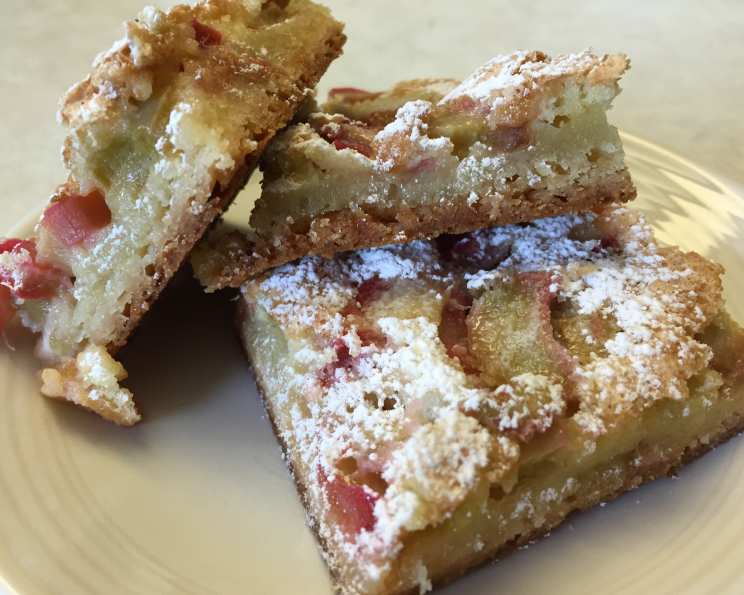
Rhubarb Dream Bars: A Tart and Sweet Symphony
There are certain flavors that instantly transport me back to my grandmother’s kitchen, a place perpetually filled with the comforting aromas of baking and love. Rhubarb, with its vibrant ruby stalks and intensely tart bite, is one of those flavors. I remember summers spent helping her in the garden, carefully pulling the crisp stalks from the soil, and then later, watching in awe as she transformed them into dazzling desserts. These Rhubarb Dream Bars are my absolute favorite way to capture that nostalgic magic. They possess a perfect balance of sweet and tart, a delightful crunch from the buttery crust, and a luscious, almost custardy filling that truly lives up to its name. If I’m not careful, these disappear from the pan faster than I can say “second helping!”
Recipe Overview
- Prep Time: 15 minutes
- Cook Time: 60 minutes
- Total Time: 1 hour 15 minutes (plus cooling time)
- Servings: 36
- Yield: 1 (15×10-inch) pan
- Dietary Type: Vegetarian
Ingredients
This recipe is beautifully straightforward, relying on simple, wholesome ingredients to create something truly special.
For the Crust:
- 2 cups all-purpose flour
- 3⁄4 cup powdered sugar (also known as confectioners’ sugar)
- 1 cup unsalted butter, softened (or 1 cup margarine)
For the Filling:
- 4 large eggs
- 2 cups granulated sugar
- 1⁄2 cup all-purpose flour
- 1⁄2 teaspoon salt
- 4 cups thinly sliced rhubarb (about 1-inch pieces)
Equipment Needed
To bring these Rhubarb Dream Bars to life, you’ll need a few essential kitchen tools:
- A food processor for easily preparing the crust.
- A 15×10-inch baking pan. A rimmed baking sheet or jelly-roll pan works perfectly.
- A large mixing bowl for combining the filling ingredients.
- A whisk for beating the eggs and incorporating the dry ingredients.
- A spatula for spreading the filling.
- An oven preheated to the correct temperature.
- A cooling rack for allowing the bars to set.
Instructions
The beauty of this recipe lies in its simplicity and the rewarding outcome. Follow these steps carefully, and you’ll be enjoying these delightful bars in no time.
- Prepare the Crust: Begin by preheating your oven to 350°F (175°C). In the bowl of a food processor, combine the 2 cups of all-purpose flour and the 3⁄4 cup of powdered sugar. Pulse a few times to thoroughly mix these dry ingredients.
- Add the Fat: Add the 1 cup of softened butter (or margarine) to the food processor. Process until the mixture resembles coarse crumbs. Be careful not to over-process; you want a crumbly texture, not a paste.
- Form the Crust: Pour the crumbly mixture into your 15×10-inch baking pan. Using your fingers or the bottom of a measuring cup, press the mixture evenly to form a firm crust across the bottom of the pan.
- Par-Bake the Crust: Place the pan with the crust into the preheated oven. Bake for 15 minutes. The crust will be very lightly colored at this stage; this is exactly what you want, as it will continue to bake with the filling.
- Prepare the Filling: While the crust is par-baking, prepare the luscious filling. In a large mixing bowl, add the 4 large eggs. Beat the eggs until they are well combined and slightly frothy.
- Incorporate Dry Ingredients: To the beaten eggs, add the 2 cups of granulated sugar, the 1⁄2 cup of all-purpose flour, and the 1⁄2 teaspoon of salt. Whisk these ingredients together until they are thoroughly combined and the mixture is smooth. Ensure there are no pockets of dry flour.
- Add the Rhubarb: Gently fold in the 4 cups of thinly sliced rhubarb into the egg and sugar mixture. Stir just enough to distribute the rhubarb evenly throughout the filling.
- Assemble and Bake: Carefully remove the hot crust from the oven. Spread the rhubarb filling mixture evenly over the hot crust.
- Second Bake: Return the pan to the oven. Bake for an additional 40-45 minutes. The filling should be set and slightly puffed, with a golden hue. A toothpick inserted into the center should come out mostly clean, though a few moist crumbs are acceptable due to the fruit.
- Cool and Cut: Once baked, remove the pan from the oven and place it on a cooling rack. Allow the bars to cool completely. This cooling process is crucial for the filling to set properly, making them easier to cut. Once completely cooled, cut into bars of your desired size.
Expert Tips & Tricks
Having spent countless hours in kitchens, I’ve learned a few tricks that can elevate even the simplest recipes. For these Rhubarb Dream Bars, a few considerations can make a significant difference:
- Butter Temperature is Key: For the crust, ensure your butter is softened but not melted. This allows it to incorporate properly with the dry ingredients in the food processor, creating that perfect tender, crumbly texture. If your butter is too cold, it won’t blend well. If it’s too warm, it can make the crust greasy.
- Don’t Overmix the Crust: When processing the crust ingredients, stop as soon as they come together into coarse crumbs. Over-processing can develop the gluten too much, resulting in a tough crust.
- Uniform Rhubarb Slicing: Aim for consistent slicing of your rhubarb. This ensures that all the rhubarb pieces cook evenly within the filling, preventing some from being too tough and others from being mushy. Aim for pieces about 1-inch long and roughly 1/4-inch thick.
- Hot Crust, Cold Filling (Sort Of): Spreading the filling over a hot crust allows the bottom layer to cook and set slightly more, creating a better barrier between the crisp crust and the moist filling. However, the filling ingredients themselves should be at room temperature for optimal blending.
- Cooling is Non-Negotiable: I cannot stress this enough: allow the bars to cool completely. This is where the magic happens. The filling will continue to set as it cools, making the bars firm enough to slice neatly. If you try to cut them warm, you’ll likely have a gooey mess. Patience here is rewarded.
- Checking for Doneness: The edges of the filling should look set, and the center should be mostly firm but may have a slight jiggle. If you’re unsure, gently touching the center – it should spring back slightly. Avoid overbaking, which can lead to a dry, rubbery filling.
Serving & Storage Suggestions
These Rhubarb Dream Bars are utterly delightful served at room temperature, allowing their flavors to shine. They pair wonderfully with a dollop of fresh whipped cream or a scoop of vanilla bean ice cream for an extra touch of indulgence. For a more refined presentation, a light dusting of powdered sugar just before serving adds a beautiful finish.
Storage:
- Room Temperature: Leftover bars can be stored in an airtight container at room temperature for up to 2 days. Ensure they are completely cooled before sealing.
- Refrigeration: For longer storage, wrap the cooled bars tightly and refrigerate. They will keep well in the refrigerator for up to 5 days.
- Freezing: These bars freeze beautifully! Wrap individual bars or the entire pan (once completely cooled and cut) tightly in plastic wrap, then in aluminum foil. They can be frozen for up to 2-3 months. Thaw overnight in the refrigerator before serving.
Nutritional Information
Here’s an approximate breakdown of the nutritional content per serving (assuming 36 servings). Please note that these are estimates and can vary based on specific ingredient brands and exact measurements.
| Nutrient | Amount per Serving | % Daily Value |
|---|---|---|
| Calories | 141 kcal | 7% |
| Total Fat | 5.8 g | 7% |
| Saturated Fat | 3.4 g | 17% |
| Cholesterol | 37.1 mg | 12% |
| Sodium | 77.1 mg | 3% |
| Total Carbohydrate | 20.9 g | 8% |
| Dietary Fiber | 0.5 g | 2% |
| Sugars | 13.8 g | 28% |
| Protein | 1.8 g | 4% |
Variations & Substitutions
While this recipe is classic and beloved, there’s always room for a little creativity in the kitchen!
- Citrus Zest: For a brighter, more complex flavor, add the zest of one lemon or orange to the filling mixture. This adds a wonderful aromatic lift that complements the tart rhubarb.
- Spice it Up: A pinch of cinnamon or nutmeg can add warmth to the crust or filling. Consider adding about 1/4 teaspoon of your chosen spice to the dry ingredients for the crust, or to the filling mixture.
- Nutty Crust: For added texture and flavor, incorporate 1/2 cup of finely chopped nuts (like pecans or walnuts) into the crust mixture before pressing it into the pan.
- Gluten-Free Option: To make these bars gluten-free, you can experiment with a gluten-free flour blend in both the crust and filling. You may need to adjust the liquid content slightly, as gluten-free flours can absorb moisture differently.
FAQs (Frequently Asked Questions)
Q: My rhubarb is very fibrous. How can I ensure a tender filling?
A: Make sure to slice your rhubarb thinly and discard any tough, stringy outer layers before slicing. Cutting the stalks into consistent, small pieces will also help them cook down evenly.
Q: Can I use frozen rhubarb instead of fresh?
A: Yes, you can use frozen rhubarb. Thaw it completely and drain off any excess liquid before folding it into the filling mixture. You might need to slightly increase the baking time if using frozen rhubarb.
Q: Why is my filling still liquidy after baking?
A: This often happens if the bars are cut before they have cooled completely. The cooling process is essential for the filling to set. Also, ensure you’ve used the correct amount of flour in the filling, as it acts as a binder.
Q: Can I make these bars ahead of time?
A: Absolutely! These bars are excellent for making a day or two in advance. They store well at room temperature or in the refrigerator, and the flavors often meld beautifully overnight.
Q: What kind of pan is best for these bars?
A: A 15×10-inch rimmed baking pan or jelly-roll pan is ideal. The rim helps contain the filling, and the larger surface area ensures a nice bar thickness and even baking.
Final Thoughts
These Rhubarb Dream Bars are a testament to how simple ingredients, when treated with care, can create something truly extraordinary. They are a celebration of the season, a delightful dance between tart and sweet, and a comforting reminder of cherished moments. I encourage you to gather your ingredients, embrace the process, and bake a batch of these delightful bars. Share them with loved ones, or savor them yourself – either way, I’m certain they’ll bring a smile to your face and a dream to your palate. Enjoy every delicious bite!