
The Humble Hero: Mastering the Perfectly Roasted Chicken Breast
There’s a certain magic that happens when a humble chicken breast transcends its plain reputation and emerges from the oven golden, juicy, and brimming with flavor. I remember a time, early in my culinary journey, when chicken breasts were often relegated to the realm of bland, boiled protein. They were a nutritional staple, yes, but hardly a star on the plate. Then, a revelation flickered across the Food Network, a casual mention of roasting imparting a depth of flavor that other methods simply couldn’t achieve. Intrigued, and frankly a little bored with my usual chicken repertoire, I decided to experiment. Lacking a go-to recipe that truly celebrated this cooking technique, I scoured sources, and it was on Cook.com that I stumbled upon this straightforward, yet profoundly effective, approach that forever changed my perception of this versatile cut.
Recipe Overview
- Prep Time: 10 minutes
- Cook Time: 1 hour
- Total Time: 1 hour 10 minutes
- Servings: 2
- Yield: 2 chicken breasts
- Dietary Type: Gluten-Free, Dairy-Free (if butter is substituted)
Ingredients
- 2 chicken breasts, skin side up
- Salt, to taste
- Pepper, to taste
- 1/2 – 1 teaspoon thyme, divided
- 1/8 cup butter (unsalted is preferable for controlling salt, or can be substituted with olive oil for dairy-free)
Equipment Needed
- Shallow baking dish
- Oven
- Pastry brush (optional, for buttering)
- Meat thermometer (highly recommended for perfect doneness)
Instructions
The beauty of this recipe lies in its elegant simplicity. It’s about allowing the natural qualities of the chicken to shine through, enhanced by a few key flavor boosters and the transformative power of roasting.
- Preheat your oven to 350 degrees Fahrenheit (175 degrees Celsius). Ensuring your oven is at the correct temperature is the first step to consistent results. Allow it at least 10-15 minutes to reach its set point.
- Prepare the chicken breasts. Pat the chicken breasts thoroughly dry with paper towels. This is a crucial step for achieving a beautifully browned exterior, as excess moisture will steam the skin instead of allowing it to crisp.
- Arrange in the baking dish. Place the chicken breasts in a shallow baking dish, ensuring they are positioned skin side up. This orientation is vital for the skin to develop that desirable golden hue and slightly crispy texture.
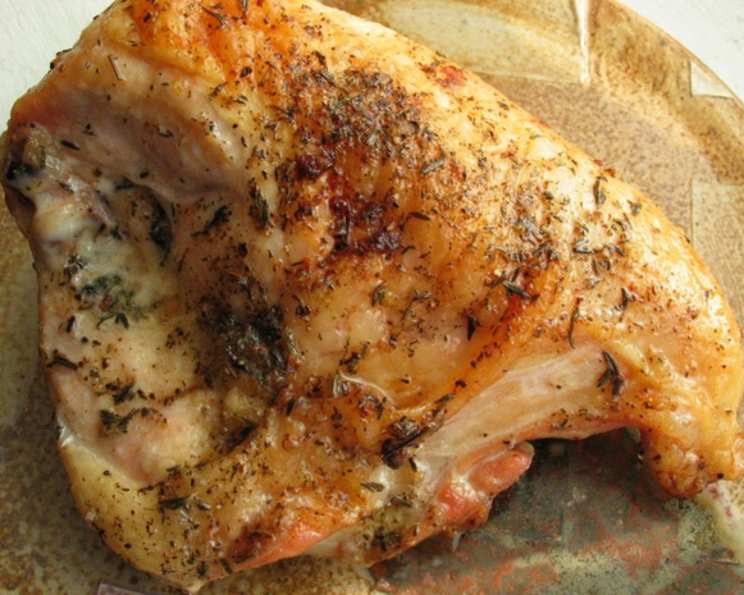
- Season generously. Sprinkle each chicken breast evenly with salt and pepper. Don’t be shy with the seasoning; it’s the foundation of flavor. Then, sprinkle 1/2 teaspoon of thyme over each breast. You can adjust the amount of thyme to your preference, but this recipe calls for a specific measurement.
- Melt and brush the butter. Gently melt the butter. You can do this in a small saucepan on the stovetop or in a microwave-safe bowl for short bursts. Once melted, brush the melted butter evenly over the chicken breasts, ensuring it coats the skin and any exposed flesh. This butter will not only add richness but will also help in browning and keeping the chicken moist.
- Roast to perfection. Place the baking dish into the preheated oven. Roast for 1 hour, or until the chicken is cooked through and reaches an internal temperature of 165 degrees Fahrenheit (74 degrees Celsius) when a meat thermometer is inserted into the thickest part of the breast, avoiding the bone if present. The roasting time can vary depending on the size and thickness of your chicken breasts, so always rely on a thermometer for accuracy rather than just the clock. If the skin begins to brown too quickly before the chicken is cooked, you can loosely tent the dish with aluminum foil.
Expert Tips & Tricks
- Bone-in vs. Boneless: While this recipe calls for boneless, skin-on chicken breasts for a faster cook and easier handling, you can adapt it for bone-in, skin-on breasts. Bone-in breasts will likely require a slightly longer roasting time, so continue to rely on your meat thermometer.
- The Power of Drying: I cannot stress enough the importance of patting your chicken breasts completely dry. It’s a small step that makes a monumental difference in achieving that coveted crispy skin.
- Butter Substitution: For a dairy-free option, replace the butter with an equal amount of olive oil. The olive oil will still provide a lovely coating and aid in browning, though the flavor profile will be slightly different.
- Thyme Variations: While fresh thyme is wonderful, you can certainly use dried thyme. If using dried, you might want to use slightly less, as its flavor is more concentrated. Always ensure your dried herbs are fresh for the best aroma and taste.
- Resting is Key: Once your chicken reaches the perfect internal temperature, remove it from the oven and let it rest in the baking dish for at least 5-10 minutes before slicing. This allows the juices to redistribute throughout the meat, ensuring a more tender and flavorful result. Skipping this step can lead to dry chicken as the juices run out onto the cutting board.
Serving & Storage Suggestions
This perfectly roasted chicken breast is incredibly versatile and can be the centerpiece of many meals. Serve it sliced over a vibrant salad, alongside roasted root vegetables, or nestled with a dollop of your favorite sauce. For a more elegant presentation, you can arrange the sliced chicken fanned out on the plate.
Leftovers can be stored in an airtight container in the refrigerator for up to 3-4 days. To reheat, gently warm the chicken in a low oven (around 300°F/150°C) or briefly in a skillet with a little extra butter or olive oil to revive its moisture and texture. Avoid microwaving if possible, as it can sometimes lead to tougher chicken.
Nutritional Information
| Nutrient | Amount per Serving | % Daily Value |
|---|---|---|
| Calories | 351.2 kcal | |
| Calories from Fat | ||
| Total Fat | 24.9 g | 38% |
| Saturated Fat | 11.2 g | 55% |
| Cholesterol | 123.3 mg | 41% |
| Sodium | 173.1 mg | 7% |
| Total Carbohydrate | 0 g | 0% |
| Dietary Fiber | 0 g | 0% |
| Sugars | 0 g | |
| Protein | 30.4 g | 60% |
Nutritional values are estimates and can vary based on specific ingredients and portion sizes used.
Variations & Substitutions
While the classic combination of salt, pepper, thyme, and butter is wonderfully effective, feel free to explore other flavor profiles.
- Lemon-Herb: Add the zest of one lemon and a tablespoon of fresh lemon juice to the melted butter before brushing. You could also add other herbs like rosemary or oregano.
- Garlic Lover’s: Mince 1-2 cloves of fresh garlic and add them to the melted butter. Be mindful that garlic can burn, so keep an eye on it during roasting.
- Spicy Kick: A pinch of red pepper flakes sprinkled along with the salt and pepper can add a subtle warmth.
- Paprika Perfection: A light dusting of sweet or smoked paprika before roasting can impart a beautiful color and a nuanced flavor.
FAQs
Q: Why skin side up?
A: Placing the chicken skin side up allows the heat to render the fat from the skin, basting the meat below and helping it crisp up beautifully.
Q: How can I tell if the chicken is done without a thermometer?
A: While a thermometer is the most accurate method, you can check for doneness by piercing the thickest part of the breast with a knife or skewer. The juices should run clear, with no pinkness in the meat.
Q: Can I roast more than two chicken breasts at once?
A: Yes, you can roast more chicken breasts, but ensure they are not overcrowded in the baking dish. Allow adequate space for hot air to circulate around each breast for even cooking. You may need to adjust the cooking time slightly if adding more.
Q: Is it safe to eat chicken breast that is slightly pink in the middle?
A: No, for food safety reasons, chicken breast should always be cooked to an internal temperature of 165°F (74°C) to kill any harmful bacteria. Pinkness indicates it is not fully cooked.
Q: What if my chicken breasts are very thin or very thick?
A: Cooking times will vary significantly. Thin breasts will cook much faster, potentially in 20-30 minutes, while very thick ones may require longer than an hour. Always use a meat thermometer for precision.
Final Thoughts
This simple roasted chicken breast recipe is a testament to the fact that sometimes, the most profound culinary experiences come from the most straightforward preparations. It’s a dish that has earned its place in my kitchen rotation, a reliable and delicious option that never disappoints. It’s the perfect canvas for a weeknight meal or an elegant addition to a more elaborate spread. I encourage you to try it, to experience the satisfaction of transforming a common ingredient into something truly special. Share your creations, experiment with the variations, and discover the joy of a perfectly roasted chicken breast.