
Perfectly Spiced Rice Krispie Pumpkin Treats: A Nostalgic Bite of Autumn
There are certain flavors that just feel like fall, and for me, one of those indelible tastes is the sweet, slightly chewy, and ever-so-familiar Rice Krispie treat. My earliest memories of making these delights are tied to my grandmother’s kitchen, a place perpetually filled with the aroma of baking and the comforting hum of conversation. One crisp October afternoon, we decided to give our classic treats a festive makeover. The transformation from simple squares to charming little pumpkins, complete with candy stems, was pure magic. Seeing those little orange orbs lined up on parchment paper, looking like a miniature pumpkin patch, filled me with a sense of accomplishment and joy that even a seasoned chef can’t replicate with the most complex of dishes. It’s a reminder that sometimes, the simplest recipes hold the most profound memories.
Recipe Overview
- Prep Time: 15 minutes
- Cook Time: 5 minutes (primarily microwave time)
- Total Time: 20 minutes (plus shaping time)
- Servings: 12-15 pumpkins
- Yield: 12-15 small pumpkins
- Dietary Type: Vegetarian (can be adapted for vegan with butter and marshmallow substitutions)
Ingredients
- 3 tablespoons melted margarine (or unsalted butter)
- 10 ounces miniature marshmallows (about 40 cups, loosely packed)
- Orange food coloring (gel or liquid, for desired pumpkin hue)
- 6 cups crispy rice cereal
- Green Mike and Ike candy (for stems)
Equipment Needed
- Large microwave-safe bowl
- Spatula or large spoon
- Parchment paper
- Baking sheet or flat surface
Instructions
- Begin by preparing your workspace. Line a baking sheet or a clean, flat countertop with parchment paper. This will prevent the treats from sticking and make them easy to remove once shaped.
- In a large microwave-safe bowl, combine the 3 tablespoons of melted margarine.
- Add the 10 ounces of miniature marshmallows to the bowl with the melted margarine.
- Place the bowl in the microwave and heat on high power for approximately 1 minute. Carefully remove the bowl and stir the marshmallows and margarine mixture. If the marshmallows are not completely melted and fluffy, return the bowl to the microwave for additional 30-second intervals, stirring after each, until the mixture is smooth and well combined. Be careful not to overcook, as this can make the treats tough.
- Once the marshmallows are melted and smooth, add a few drops of orange food coloring to the mixture. Start with a small amount and add more as needed, stirring thoroughly with a spatula or large spoon until you achieve your desired pumpkin-like orange color.
- Add the 6 cups of crispy rice cereal to the marshmallow mixture.
- Stir gently but thoroughly until the cereal is completely coated with the orange marshmallow mixture. Ensure all the cereal strands are evenly coated to create a cohesive treat.
- Now, it’s time for the fun part: shaping! Lightly grease your hands with a bit of softened margarine or cooking spray. This will prevent the sticky mixture from adhering to your hands.
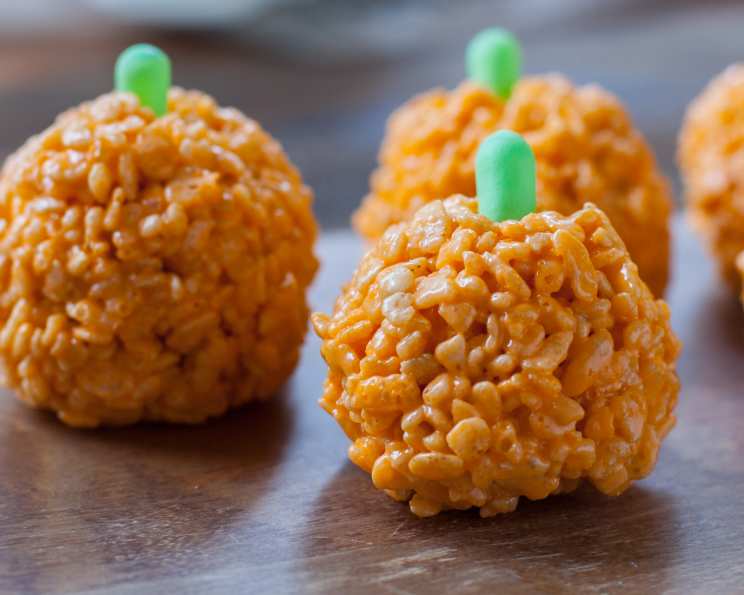
- Take a small handful of the mixture, about the size of a golf ball or slightly larger, and shape it into a small, round ball. Don’t worry about perfect spheres; real pumpkins have an organic, slightly irregular shape, which makes this recipe incredibly kid-friendly and forgiving.
- Place each shaped pumpkin onto the prepared parchment paper.
- For each pumpkin, take a piece of green Mike and Ike candy and gently press one end into the top center of the treat to create a stem. You can use one or two pieces depending on the desired look.
- Allow the Rice Krispie Pumpkin Treats to cool and set completely at room temperature. This usually takes about 30 minutes to an hour, depending on the ambient temperature.
Expert Tips & Tricks
The beauty of these Rice Krispie Pumpkin Treats lies in their simplicity, but a few pro tips can elevate them from good to unforgettable. When melting your marshmallows, err on the side of caution. Overheating can lead to a stiff, unworkable mass that’s difficult to shape and results in a tough treat. If you find your mixture is becoming too firm as you work, you can briefly pop it back into the microwave for 10-15 second bursts to soften it up, but be very quick about it. For an even more authentic pumpkin look, after shaping the balls, you can use the back of a spoon or a toothpick to gently indent lines radiating from the stem area, mimicking the natural segments of a pumpkin. When pressing in the Mike and Ike stem, a little bit of moisture on your finger can help it adhere without crushing the candy.
Serving & Storage Suggestions
These charming Rice Krispie Pumpkin Treats are perfect for a fall-themed party, a school event, or simply as an afternoon snack. Serve them on a platter alongside apple slices or a warm mug of spiced cider for a complete autumnal experience. For storage, as long as they are completely cooled and set, these treats can be kept in an airtight container at room temperature for up to 3 days. Avoid refrigerating them, as this can cause them to become hard and lose their desirable chewy texture. If you need to store them for longer, you can wrap individual treats tightly in plastic wrap and then place them in an airtight container. They can be frozen for up to a month, though I find their texture is best when enjoyed within the first few days of making them.
Nutritional Information
| Nutrient | Amount per Serving (approximate) | % Daily Value (approximate) |
|---|---|---|
| Calories | 151.4 kcal | |
| Calories from Fat | 44 kcal | |
| Total Fat | 3.1 g | 4% |
| Saturated Fat | 0.7 g | 3% |
| Cholesterol | 0 mg | 0% |
| Sodium | 159 mg | 6% |
| Total Carbohydrate | 31.3 g | 10% |
| Dietary Fiber | 0.1 g | 0% |
| Sugars | 14.7 g | 58% |
| Protein | 1.4 g | 2% |
Note: Nutritional values are estimates and can vary based on specific ingredients and portion sizes.
Variations & Substitutions
While the classic Rice Krispie Pumpkin Treat is a beloved favorite, there are always ways to put your own spin on this nostalgic confection. For a richer flavor, you can substitute the margarine with unsalted butter. If you’re looking to make these vegan, opt for vegan marshmallows and a plant-based butter alternative. The texture might be slightly different, but the festive flavor will still shine through. For an added layer of flavor, consider stirring in a pinch of ground cinnamon or nutmeg along with the cereal for a warmer, spiced pumpkin essence. Instead of Mike and Ike candies, you could also use small pieces of green fruit leather or even a dollop of green frosting for the stems, though the candy offers a nice chewy contrast.
FAQs
Q: Can I make these Rice Krispie Pumpkin Treats ahead of time?
A: Yes, these treats can be made a day or two in advance and stored in an airtight container at room temperature.
Q: My marshmallow mixture is too sticky to handle. What should I do?
A: Lightly grease your hands with butter or cooking spray, or wear food-safe gloves. If the mixture is still too sticky, you may have slightly overheated the marshmallows; try letting it cool for a minute or two before shaping.
Q: How long do these treats typically last?
A: They are best enjoyed within 3 days of being made when stored properly at room temperature.
Q: Can I use regular-sized marshmallows instead of mini marshmallows?
A: Yes, you can, but you will need to use a similar weight measurement (10 ounces) or roughly 4 cups of regular marshmallows. They will take a bit longer to melt.
Q: What if I don’t have any green Mike and Ike candies?
A: You can use small pieces of green fruit leather, a tiny bit of green frosting, or even a small green candy like M&M’s for the stems.
Final Thoughts
There’s a special kind of joy that comes from creating edible art, especially when that art is as delightful and approachable as these Rice Krispie Pumpkin Treats. They are a testament to how simple ingredients and a touch of creativity can bring smiles and create cherished memories. Whether you’re a seasoned baker or just starting in the kitchen, these little pumpkins are sure to be a hit. I encourage you to gather your ingredients, embrace the fun, and let the spirit of autumn fill your kitchen. Share them with loved ones, pair them with a warm beverage, and savor the sweet, cozy moments they bring. Happy baking, and may your fall be filled with deliciousness!