
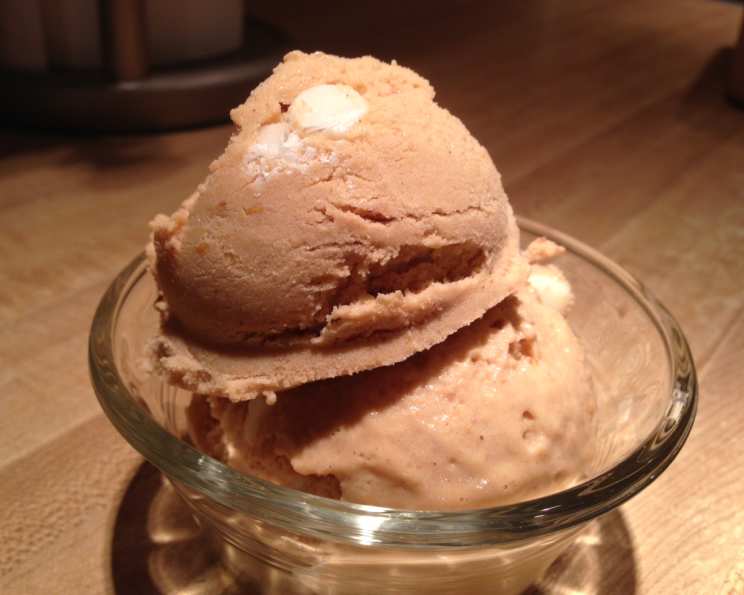
Embrace the Spiced Autumn Glow: Fat-Free Pumpkin Ice Cream
The scent of cinnamon, ginger, and nutmeg swirling through the air is, to me, the olfactory embodiment of pure comfort. Growing up, autumn wasn’t just a season; it was a promise of warmth, cozy sweaters, and the comforting embrace of holiday flavors. My grandmother, a woman whose kitchen was a sanctuary of delicious secrets, would often whip up a pumpkin pie that, while undeniably divine, carried a decadent richness. Years later, when I first encountered this fat-free pumpkin ice cream recipe, it felt like unlocking a culinary unicorn. The idea of capturing that beloved holiday essence – that creamy, spiced, soul-soothing goodness – without a trace of fat seemed almost magical, a testament to how innovation can bring cherished flavors to everyone.
Recipe Overview
- Prep Time: 15 minutes
- Cook Time: 30 minutes
- Total Time: 45 minutes
- Servings: 10
- Yield: Approximately 2 quarts
- Dietary Type: Fat-Free
Ingredients
- 3/4 cup packed dark brown sugar
- 1/2 cup Splenda granular
- 3 tablespoons cornstarch
- 1/8 teaspoon salt
- 1 teaspoon ground cinnamon
- 1 teaspoon ground ginger
- 1/4 teaspoon ground nutmeg
- 1/8 teaspoon ground cloves
- 4 cups fat-free half-and-half
- 1/2 cup Egg Beaters egg substitute
- 1 (15-ounce) can pumpkin puree
- 2 teaspoons vanilla extract
- 1 teaspoon spiced rum (optional, but highly recommended for depth of flavor)
Equipment Needed
- Large saucepan
- Whisk
- Metal bowl
- Ice bath (large bowl filled with ice and water)
- Ice cream maker
- Freezer-safe container
Instructions
The journey to this remarkably fat-free, creamy indulgence begins with a symphony of dry ingredients. In the heart of your large saucepan, combine the packed dark brown sugar, Splenda granular, cornstarch, salt, ground cinnamon, ground ginger, ground nutmeg, and ground cloves. Whisk these dry components together thoroughly, ensuring there are no clumps and that the spices are evenly distributed. This initial step is crucial for a smooth, lump-free custard later on.
Next, gradually add 1 cup of the fat-free half-and-half to the dry mixture in the saucepan. Whisk vigorously until you achieve a smooth paste. This gradual incorporation prevents the cornstarch from clumping. Once you have a uniform mixture, stir in the remaining half-and-half.
Now, place the saucepan over medium heat. Begin to slowly heat the mixture, stirring constantly. It’s important to watch this mixture carefully; you’re aiming for it to barely come to a boil. You’ll notice it begin to thicken as it heats. Once it reaches this gentle boiling point, remove the saucepan from the heat immediately.
While the custard is still warm, it’s time to temper your egg substitute. In a separate, medium bowl, whisk the Egg Beaters egg substitute until lightly beaten. Now, the crucial tempering step: very gradually whisk 1 cup of the hot half-and-half mixture into the beaten egg substitute. This slow addition of hot liquid to the eggs prevents them from scrambling. Once you’ve incorporated that cup, return the tempered egg mixture to the saucepan with the rest of the custard, whisking constantly.
Continue to cook and stir the mixture over medium heat until it reaches 165 degrees Fahrenheit. A reliable kitchen thermometer is your best friend here. This final cooking step ensures the custard is safe and has reached its desired thickness.
Once the mixture hits 165 degrees, remove it from the heat. The next step is to chill it rapidly. Transfer the hot custard to a metal bowl that has been placed within an ice bath. The ice bath is essential for quickly cooling the custard and preventing a skin from forming. Stir the custard until it is cool.
With the custard thoroughly cooled, it’s time to infuse it with that quintessential pumpkin flavor. Add the pumpkin puree, vanilla extract, and the spiced rum (if using). Mix everything well until the ingredients are completely incorporated and you have a smooth, homogenous mixture.
To ensure a perfectly smooth texture and prevent a skin from forming during refrigeration, press plastic wrap directly onto the surface of the custard. This acts as a barrier. Refrigerate the mixture for several hours, or preferably, overnight. This chilling period allows the flavors to meld and ensures the custard is thoroughly cold, which is vital for optimal ice cream maker performance.
The magic of transforming this chilled custard into ice cream happens in your ice cream maker. Fill the cylinder of your 2-quart ice cream maker and follow the manufacturer’s instructions for churning. The machine will work its wonders, transforming the liquid into a soft-serve consistency.
For those who wish to add a touch of indulgence, there’s an optional, albeit slightly fat-introducing, but incredibly rewarding addition. During the last 5 minutes of churning, you can add 2/3 cup of graham crackers crumbled into 1/4-inch morsels and 1/3 cup of white chocolate chips. This creates delightful textural contrasts and bursts of flavor within your fat-free base.
Once churning is complete, transfer the ice cream to a freezer-safe container. For the best scoopable consistency, allow it to firm up in the freezer for 2-4 hours before serving.
A crucial note on nutritional calculations: It’s worth mentioning that the nutritional information for fat-free half-and-half can sometimes be inconsistently reported, potentially affecting the overall fat calculation. This recipe is designed to be virtually fat-free, and any slight discrepancies in ingredient labeling should not deter you from enjoying its healthy, creamy goodness.
Expert Tips & Tricks
To achieve the silkiest, creamiest texture, ensure your custard is thoroughly chilled before churning. A warm base will result in icy ice cream. The ice bath is your best friend for rapid chilling, so don’t skimp on the ice! If you find your ice cream maker struggles to fully incorporate the optional add-ins, consider gently folding them in by hand after churning is complete, just before transferring to the freezer container. This gives you more control over their distribution.
Serving & Storage Suggestions
Serve your fat-free pumpkin ice cream in chilled bowls or cones. A sprinkle of cinnamon or a tiny dollop of fat-free whipped topping can elevate the presentation. For a truly festive touch, consider a light dusting of nutmeg.
Leftovers should be stored in an airtight, freezer-safe container. Properly stored, this ice cream will maintain its optimal texture for about 2-3 weeks. It’s best enjoyed within this timeframe. If it becomes too hard to scoop, let it sit at room temperature for 5-10 minutes before serving.
Nutritional Information
| Nutrient | Amount per Serving (approx.) | % Daily Value |
|---|---|---|
| Calories | 145.6 | |
| Total Fat | 1.4 g | 2% |
| Saturated Fat | 0.9 g | 4% |
| Cholesterol | 4.9 mg | 1% |
| Sodium | 174.9 mg | 7% |
| Total Carbohydrate | 30.4 g | 10% |
| Dietary Fiber | 0.4 g | 1% |
| Sugars | 21.6 g | 86% |
| Protein | 3 g | 6% |
Note: Nutritional values are estimates and can vary based on specific ingredient brands and optional additions.
Variations & Substitutions
While this recipe is meticulously crafted for a fat-free experience, a few variations can be explored. For a dairy-free option, you could experiment with a full-fat, unsweetened coconut milk or a rich, unsweetened cashew milk to replace the fat-free half-and-half, though this would alter the fat-free claim. For those who prefer a richer flavor profile, a splash of maple syrup can be added alongside or in place of some of the sweeteners, but again, this will impact the fat-free aspect. The optional graham cracker and white chocolate chip add-ins can be swapped for chopped nuts (like pecans or walnuts) for added crunch and flavor, or even small chunks of dark chocolate for a more intense cocoa experience.
FAQs
Q: Can I make this ice cream without an ice cream maker?
A: While an ice cream maker provides the smoothest texture, you can achieve a frozen dessert by pouring the chilled mixture into a freezer-safe container, freezing it, and then breaking up the ice crystals with a fork or blender every 30-60 minutes until it reaches your desired consistency. This method, however, often results in a more sorbet-like texture.
Q: Why is it important to temper the egg substitute?
A: Tempering gradually introduces the hot liquid to the egg substitute, slowly raising its temperature. This prevents the proteins in the eggs from coagulating too quickly and scrambling, ensuring a smooth, velvety custard.
Q: How long does it take for the custard to chill completely?
A: For optimal results, chilling the custard overnight (8-12 hours) is recommended. This allows the flavors to fully develop and ensures the base is thoroughly cold for churning.
Q: Can I use fresh pumpkin puree instead of canned?
A: While fresh pumpkin puree can be used, it often contains more moisture than canned pumpkin. You may need to roast and strain the fresh pumpkin to achieve a similar consistency to canned puree, and you might need to adjust the cornstarch slightly.
Q: What is the purpose of the spiced rum?
A: The spiced rum adds a subtle depth of flavor that enhances the warm spices and pumpkin notes. It also helps to lower the freezing point of the ice cream, contributing to a slightly softer, more scoopable texture.
Final Thoughts
This fat-free pumpkin ice cream is more than just a dessert; it’s a comforting hug in a bowl, a reminder of autumn’s warmth and the joy of guilt-free indulgence. It’s proof that delicious, deeply satisfying flavors don’t always require rich fats. I encourage you to gather your spices, embrace the season, and let this creamy, spiced delight bring a touch of homemade magic to your table. It pairs wonderfully with a warm slice of apple pie or a simple cup of spiced apple cider. Share your creations and thoughts; I’d love to hear how this recipe brings a smile to your face.