
Fat-Free Pumpkin Pie to Die For!
As a chef who’s spent decades in the kitchen, I’ve encountered countless pies. But there’s something profoundly comforting and uniquely satisfying about a truly excellent pumpkin pie, especially one that defies convention. This particular recipe, a delightful revelation, brings back the pure essence of autumn’s bounty, minus the usual calorie load. It’s a testament to how simple, honest ingredients, thoughtfully prepared, can deliver an unparalleled taste experience.
Recipe Overview
- Prep Time: 15 minutes
- Cook Time: 30 minutes
- Total Time: 45 minutes
- Servings: 8-12 slices
- Yield: 1 pie
- Dietary Type: Vegetarian (can be adapted)
Ingredients
This recipe relies on a handful of pantry staples, elevated by the star ingredient: fresh pumpkin.
- 1 cup semolina
- 1 cup flour
- 1 cup sugar
- 2 cups pumpkin (fresh grated)
- 1 dash cinnamon
- ½ teaspoon vanilla
- 1 teaspoon baking powder
Equipment Needed
You won’t need a vast array of specialized tools for this straightforward bake.
- 9-inch pie dish
- Medium mixing bowl
- Whisk or fork
- Spatula or spoon
- Oven
- Cooling rack
Instructions
The beauty of this fat-free pumpkin pie lies in its elegant simplicity. The method is almost intuitive, layering flavors and textures to create a delightful, guilt-free treat.
- Begin by preheating your oven to a robust 200°C (approximately 400°F). This initial high heat is crucial for achieving a perfectly golden crust.
- In a medium mixing bowl, combine the semolina, flour, and sugar. Whisk these dry ingredients together until they are thoroughly incorporated. This forms the base of our delightful crust.
- Next, gently stir in the baking powder. Ensure it’s evenly distributed throughout the dry mixture.
- Now, it’s time to introduce the star of the show: the fresh, grated pumpkin. Add the pumpkin to the dry ingredients.
- Incorporate the cinnamon and vanilla into the pumpkin and dry mixture.
- Stir everything together until just combined. The mixture will be moist and have a thick, cake-like consistency. Avoid overmixing; we want to preserve the integrity of the ingredients.
- Lightly grease your 9-inch pie dish. This step is essential to prevent sticking and ensure easy removal of the pie after baking.
- Begin layering the pie filling into the greased pie dish. Start by spooning about half of the dry ingredient mixture (the semolina, flour, and sugar mix) into the bottom of the dish, spreading it evenly.
- Next, spread the entire pumpkin mixture (pumpkin, cinnamon, vanilla, and any remaining dry ingredients that may have adhered to the bowl) evenly over the first layer of the dry mixture.
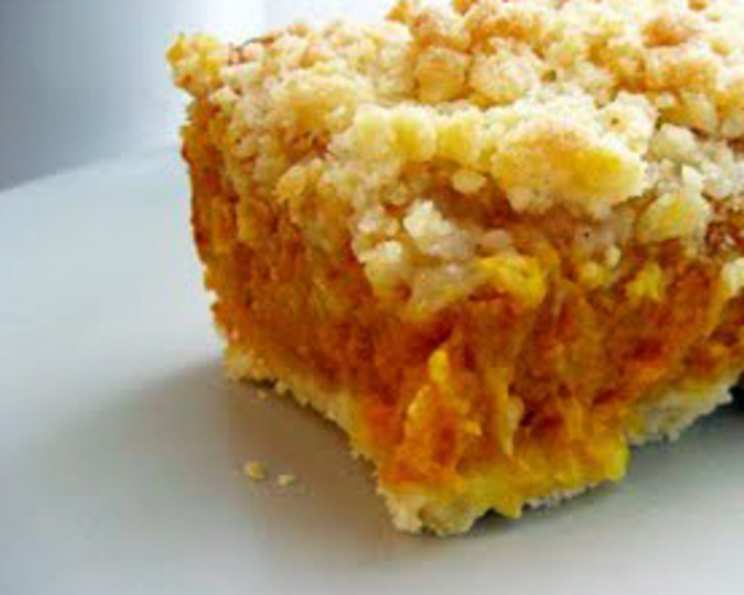
- Finally, spoon the remaining dry ingredient mixture over the pumpkin layer, ensuring it forms a complete top layer. This layering technique is key to the pie’s unique texture.
- Carefully place the pie dish into the preheated oven.
- Bake for 30 minutes. During this time, the pie will set, and the top crust will turn a beautiful golden brown.
- Once baked, remove the pie from the oven.
- Allow the pie to cool completely on a wire rack before slicing and serving. This resting period is vital for the pie to firm up and for the flavors to meld perfectly.
Expert Tips & Tricks
While this recipe is wonderfully straightforward, a few seasoned insights can elevate your experience even further.
- Pumpkin Perfection: For the best texture and flavor, use fresh pumpkin rather than canned. Roasting your own pie pumpkin (like Sugar Pie or Kabocha) and then pureeing it will yield a richer, less watery result. Ensure your grated pumpkin is not excessively wet; if it is, gently press out some of the excess moisture with a clean kitchen towel.
- Spice Adjustment: The recipe calls for just a dash of cinnamon, allowing the natural sweetness of the pumpkin to shine. However, feel free to adjust the spice level to your preference. A pinch of nutmeg or a whisper of ginger can add delightful complexity.
- Sweetness Control: The recipe uses 1 cup of sugar. Depending on the natural sweetness of your pumpkin and your personal palate, you might find you can slightly reduce this amount. Always taste a tiny bit of the pumpkin mixture before baking to gauge its sweetness.
- Cooling is Crucial: Resist the urge to slice into this pie while it’s warm. The chilling and setting process after baking is integral to achieving those clean, satisfying slices. Patience truly is a virtue here!
Serving & Storage Suggestions
This Fat-Free Pumpkin Pie is a versatile delight, perfect for any occasion. It shines on its own, showcasing the pure flavors of pumpkin and spice.
- Serving: Serve chilled or at room temperature. It’s wonderful on its own, but if you desire a touch of indulgence, a dollop of dairy-free whipped cream or a sprinkle of toasted pumpkin seeds can be a lovely accompaniment.
- Storage: Leftovers can be stored, tightly covered, in the refrigerator for up to 3-4 days. The flavors often meld and deepen beautifully overnight. Due to its moisture content and the absence of heavy fats, this pie is best enjoyed fresh. Freezing is not generally recommended as the texture may suffer upon thawing.
Nutritional Information
Here’s a glimpse into the nutritional profile of this guilt-free indulgence. Please note these are estimated values and can vary based on specific ingredients used.
| Nutrient | Amount per Serving (approx.) | % Daily Value (approx.) |
|---|---|---|
| Calories | 237.4 kcal | |
| Total Fat | 0.4 g | 0% |
| Saturated Fat | 0.1 g | 0% |
| Cholesterol | 0 mg | 0% |
| Sodium | 46.2 mg | 1% |
| Total Carbohydrate | 54.2 g | 18% |
| Dietary Fiber | 1.4 g | 5% |
| Sugars | 25.4 g | 101% |
| Protein | 4.5 g | 9% |
Variations & Substitutions
While the original recipe is a gem, you can certainly tailor it to your liking.
- Gluten-Free: To make this pie gluten-free, you can experiment with a gluten-free flour blend in place of the regular flour. Ensure the blend is designed for baking.
- Vegan Adaptation: For a vegan version, ensure your sugar is vegan-certified. The recipe itself is naturally free from animal products if standard sugar is used.
- Spice Palette: Don’t be afraid to explore other warming spices. A ¼ teaspoon of nutmeg, ginger, or even a pinch of cloves can add wonderful depth. Consider adding a bit of ground cardamom for an exotic twist.
- Nutty Addition: For added texture and a hint of richness, you could gently fold in ¼ cup of finely chopped nuts (like pecans or walnuts) into the pumpkin mixture.
FAQs
Q: Can I use canned pumpkin puree instead of fresh grated pumpkin?
A: While fresh grated pumpkin offers the best texture, you can use canned pumpkin puree. Ensure it’s 100% pure pumpkin, not pumpkin pie filling, and drain any excess liquid before using.
Q: Why is my pie crust not golden brown?
A: Ensure your oven is accurately calibrated to 200°C. If your oven tends to run cool, you might need to bake it for a few minutes longer. You can also finish it under the broiler for a minute or two, watching very carefully to prevent burning.
Q: My pie seems a bit wet. What did I do wrong?
A: This can happen if your pumpkin was too wet. Gently pressing out excess moisture from the grated pumpkin before adding it to the dry ingredients is key. Also, ensure you’ve baked it for the full 30 minutes until the top is set and golden.
Q: Can I make this pie ahead of time?
A: Yes, this pie can be made a day in advance and refrigerated. The flavors often deepen overnight, making it even more delicious.
Q: Is this pie considered truly “fat-free”?
A: This recipe is designed to be very low in fat, utilizing minimal or no added fats for greasing. The primary ingredients are naturally low in fat.
Final Thoughts
This Fat-Free Pumpkin Pie is more than just a dessert; it’s a testament to the joy of simple, wholesome baking. It’s the kind of recipe that reminds you that incredible flavor doesn’t require heavy fats. I encourage you to try it, to share it with loved ones, and to savor each delicious, guilt-free bite. Serve it with a steaming mug of chai or a crisp, cold glass of apple cider for the perfect autumnal pairing. Happy baking!