
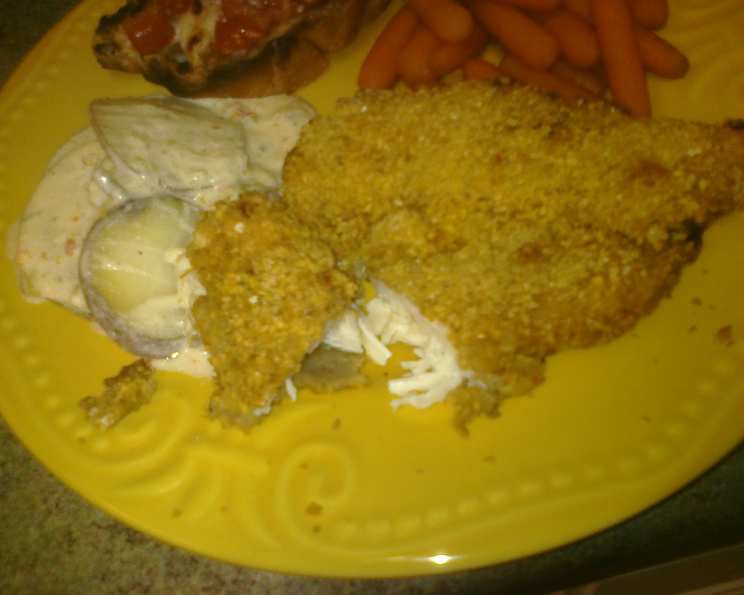
Faux Fried Chicken: Crispy, Juicy, and Unbelievably Baked
There are certain dishes that transport you back to childhood in an instant, and for me, that’s often a plate piled high with perfectly fried chicken. The satisfying crunch of the seasoned coating, followed by the tender, juicy meat – it’s pure comfort. So, when I first stumbled upon a recipe promising all that fried chicken glory without the deep-frying, I was intrigued, to say the least. This “Faux Fried Chicken” from the pages of the “Crazyplates” cookbook by Janet and Greta Podleski has been a game-changer in my kitchen, proving that you can achieve that irresistible crispy exterior and succulent interior through the magic of baking. It’s become my go-to for a healthier, yet equally delicious, rendition of a beloved classic.
Recipe Overview
- Prep Time: 15 minutes
- Cook Time: 40 minutes
- Total Time: 55 minutes
- Servings: 6
- Yield: 40 minutes
- Dietary Type: Chicken Dish
Ingredients
This recipe relies on a few simple pantry staples and a clever coating technique to achieve its remarkable results.
- 2⁄3 cup all-purpose flour
- 1 teaspoon dried oregano
- 1⁄2 teaspoon dried thyme
- 1⁄2 teaspoon paprika
- 1⁄2 teaspoon salt
- 1⁄4 teaspoon garlic powder
- 1⁄4 teaspoon ground black pepper
- 1 1⁄2 cups crushed corn flakes (about 1.5 cups of crushed cereal)
- 2 tablespoons grated Parmesan cheese
- 1 cup buttermilk
- 3 lbs skinless chicken breasts (or your favorite cuts of chicken)
A Note on Buttermilk: If you find yourself like I often do, not regularly using buttermilk, a fantastic tip from the cookbook is to keep a can of Saco cultured Buttermilk Blend in the refrigerator. You can mix up small amounts as needed by following the package directions. It’s a lifesaver for recipes like this where buttermilk is key to tenderizing the chicken and helping the coating adhere.
Equipment Needed
- Large roasting pan
- Non-stick cooking spray
- Three shallow bowls or pie plates (for flour mixture, cornflake mixture, and buttermilk)
- Measuring cups and spoons
- Tongs (helpful for handling chicken)
- Paper towels
Instructions
The beauty of this faux fried chicken lies in its straightforward assembly. The key is building up those layers of flavor and crispiness.
- Preheat your oven to a hot 425 degrees Fahrenheit. This high heat is crucial for achieving that signature fried-like crispness.
- Prepare your roasting pan: Lightly spray a large roasting pan with non-stick spray. Set it aside. This will prevent any sticking and make cleanup a breeze.
- Create the seasoned flour mixture: In a shallow bowl or pie plate, whisk together the all-purpose flour, dried oregano, dried thyme, paprika, salt, garlic powder, and ground black pepper. Ensure all the spices are evenly distributed.
- Prepare the crispy coating: In a separate bowl or pie plate, combine the crushed corn flakes and the grated Parmesan cheese. Mix them well. The corn flakes provide the essential crunch, and the Parmesan adds a savory depth of flavor.
- Set up the buttermilk dip: Pour the buttermilk into a third separate bowl or pie plate. This will be the binder that helps the flour and cornflake coatings adhere to the chicken.
- Prepare the chicken: Rinse the chicken pieces under cool water and then pat them thoroughly dry with paper towels. Removing as much moisture as possible will help the coating stick better and create a crispier exterior.
- First coating – buttermilk and flour: Working with one piece of chicken at a time, dip the chicken pieces in the buttermilk, ensuring all sides are well moistened. This adds moisture and helps the first layer of coating adhere.
- Second coating – flour mixture: After the buttermilk dip, place the chicken in the bowl with the seasoned flour mixture and turn to coat thoroughly on all sides. Make sure every surface is covered.
- Third coating – back to buttermilk: Now, dip the flour-coated chicken back into the buttermilk. This second dip is essential for creating a surface that the cornflake mixture will adhere to effectively.
- Final coating – cornflake crunch: Finally, coat the chicken generously with the cornflake mixture, pressing gently to ensure it sticks. This is where the magic happens, creating that wonderfully crunchy crust.
- Arrange for baking: Arrange the coated chicken pieces in the prepared roasting pan, making sure to leave some space between each piece. Overcrowding will steam the chicken instead of allowing it to crisp up. This process can get a little messy, but the delicious results are well worth the effort!
- Bake to perfection: Bake, uncovered, in the preheated oven at 425 degrees Fahrenheit for 40 minutes. Keep an eye on it, as oven temperatures can vary. The chicken is done when it is no longer pink inside and the juices run clear. You can check this by inserting a meat thermometer into the thickest part of a piece – it should register 165 degrees Fahrenheit.
- Serve immediately: Serve your faux fried chicken immediately for the ultimate crispy, juicy experience.
Expert Tips & Tricks
- Crushing Corn Flakes: For the best texture, avoid using a food processor to crush your corn flakes, as this can turn them into a fine powder. Instead, place them in a zip-top bag and gently crush them with a rolling pin or the bottom of a heavy glass. You want a mix of fine crumbs and some slightly larger pieces for varied crunch.
- Even Coating is Key: Don’t rush the coating process. Ensure each piece of chicken is thoroughly coated at each stage. This layered approach is what builds up the delicious, crispy exterior.
- Don’t Overcrowd the Pan: As mentioned in the instructions, leaving space between the chicken pieces in the roasting pan is critical. This allows the hot air to circulate evenly, promoting crisping rather than steaming. If you have too much chicken for one pan, use two!
Serving & Storage Suggestions
This faux fried chicken is a star on its own, but it’s also incredibly versatile.
Serving: Serve piping hot straight from the oven. It’s fantastic alongside classic comfort food sides like creamy mashed potatoes, coleslaw, or a fresh green salad. A squeeze of lemon or a drizzle of your favorite hot sauce can add an extra layer of brightness.
Storage: Leftovers can be stored in an airtight container in the refrigerator for up to 3-4 days. While it won’t be as crispy as when freshly baked, you can reheat it in a single layer on a baking sheet in a 350-degree oven for about 10-15 minutes until warmed through. This helps to re-crisp the coating. Freezing is also an option, though the texture will be most affected.
Nutritional Information
This information is an estimate and can vary based on the exact ingredients and portion sizes used.
| Nutrient | Amount per Serving | % Daily Value |
|---|---|---|
| Calories | 360.8 kcal | |
| Calories from Fat | ||
| Total Fat | 7 g | 10% |
| Saturated Fat | 1.9 g | 9% |
| Cholesterol | 148.7 mg | 49% |
| Sodium | 577.3 mg | 24% |
| Total Carbohydrate | 19.2 g | 6% |
| Dietary Fiber | 0.8 g | 3% |
| Sugars | 2.8 g | 11% |
| Protein | 52.3 g | 104% |
(Note: Nutritional values are approximate and based on ingredients listed. Exact values may vary.)
Variations & Substitutions
While this recipe is fantastic as is, here are a few ideas to mix things up:
- Gluten-Free: For a gluten-free version, substitute the all-purpose flour with a good quality gluten-free all-purpose flour blend. Ensure your corn flake cereal is certified gluten-free.
- Spicier Kick: Add a pinch of cayenne pepper or red pepper flakes to the flour mixture for a touch of heat.
- Herb Garden: Experiment with other dried herbs like rosemary or marjoram in the flour coating for a different flavor profile.
- Different Cuts: While chicken breasts are used here, you can adapt this recipe for chicken thighs or drumsticks. Adjust baking time accordingly, as darker meat often takes a bit longer to cook through and can benefit from being cooked to a slightly higher internal temperature (around 175°F for thighs for optimal tenderness).
FAQs
Q: Can I use regular milk instead of buttermilk?
A: While buttermilk is ideal for its tenderizing qualities and tangy flavor, you can substitute it with regular milk mixed with 1 tablespoon of lemon juice or white vinegar. Let it sit for 5-10 minutes before using to mimic the acidity of buttermilk.
Q: Why is my chicken coating not crispy?
A: This can happen if the oven temperature wasn’t high enough, if the chicken was overcrowded in the pan, or if the chicken wasn’t patted dry before coating. Ensure your oven is preheated accurately and allow ample space for air circulation.
Q: Can I prepare the chicken ahead of time?
A: You can prepare the chicken up to the coating stage and refrigerate it on the baking sheet for a few hours before baking. However, for the crispiest results, it’s best to bake it soon after coating.
Q: What’s the best way to crush corn flakes?
A: Place them in a resealable plastic bag and use a rolling pin or the bottom of a heavy glass to crush them. This gives you more control over the texture, resulting in a mix of fine crumbs and larger pieces for optimal crispiness.
Q: How do I know if the chicken is fully cooked?
A: The chicken is cooked when it’s no longer pink inside and the juices run clear. You can also use an instant-read thermometer; it should register 165°F (74°C) in the thickest part of the chicken.
Final Thoughts
This faux fried chicken recipe is a true testament to creative cooking. It delivers all the satisfying crunch and juicy tenderness of its deep-fried counterpart, but with a fraction of the fuss and a lighter touch. It’s a dish that’s sure to become a family favorite, proving that you don’t need to compromise on flavor or texture when opting for a baked approach. Give it a try, and prepare to be amazed by how a few simple ingredients and a clever technique can transform everyday chicken into something truly special. I find it pairs wonderfully with a crisp, cold beverage – perhaps a refreshing iced tea or a light lager – and a side of vibrant, fresh slaw to cut through the richness. Enjoy!