
Feather Bread: Effortless Baking with Your Bread Maker
The aroma of freshly baked bread is, for me, the epitome of comfort. It’s a scent that instantly transports me back to my grandmother’s kitchen, where flour dust danced in sunbeams and the rhythmic thud of kneading was the soundtrack to our lives. As my own wrists began to protest the demands of traditional kneading, the bread maker became my culinary companion, a marvel of modern convenience that allows me to recreate that beloved, old-fashioned taste without the physical strain. This recipe, born from my early days with my first bread maker, is a testament to its reliability, delivering perfect bread, rolls, and buns every single time – a true lifesaver when expecting guests or simply craving that nostalgic flavor. It’s also wonderfully versatile; the dough cycle is a dream for crafting dinner rolls or even providing the perfect base for pull-apart breads, and it yields just the right amount of dough for those delightful bundt pan creations like Manda’s famous Monkey Bread.
Recipe Overview
- Prep Time: 5 minutes
- Cook Time: Varies (dependent on bread maker cycle and oven baking time)
- Total Time: Approximately 2 hours 5 minutes (including machine cycles and baking)
- Servings: 6-8
- Yield: 1 large loaf, or multiple rolls/buns
- Dietary Type: Vegetarian
Ingredients
- 1 ½ cups lukewarm water
- 3 tablespoons margarine
- 2 teaspoons salt (I personally prefer 1 teaspoon for a less salty flavor)
- 2 tablespoons sugar (adjust to taste: 1 tablespoon for everyday bread and dinner buns, 2-3 tablespoons for sweeter rolls)
- 4 cups flour (I always whisk the flour before measuring to ensure lightness and accuracy)
- 1 ½ teaspoons bread machine yeast (I rely on Fleischmann’s Bread Maker Yeast; I store it in the fridge and take it out about five minutes before use to ensure optimal activity)
Equipment Needed
- Bread Maker Machine
- Microwave (for softening margarine, optional)
- Measuring cups and spoons
- Baking sheets (if making rolls/buns)
- Oven (if baking rolls/buns separately)
- Cooling rack
Instructions
- Begin by ensuring all your ingredients are measured out accurately. For the margarine, I find softening it gently in the microwave for a few seconds is the quickest method, but it can also be softened at room temperature.
- It’s crucial to add the ingredients to your bread maker pan in the exact order listed. This arrangement is key to the success of the bread maker’s mixing and kneading process. Typically, liquids go in first, followed by other wet or dry ingredients, with the flour and yeast going in last. Make sure the yeast is placed on top of the flour, creating a barrier from the liquid until the machine starts.
- Close the lid of your bread maker and select your desired cycle. For a standard loaf, choose the appropriate bread cycle (usually indicated as “Basic,” “White,” or “Whole Wheat” depending on your machine and flour choice).
- During the first mixing stage of the cycle, it’s important to observe the dough. Open the lid briefly and check its consistency. The dough should look smooth, well-hydrated, and have a nice, shiny appearance.
- Troubleshooting the Dough Consistency:
- If the dough appears too dry and crumbly, add lukewarm water a teaspoon at a time. Be cautious; never add more than 3 tablespoons of liquid.
- If the dough seems too sticky and is clinging excessively to the sides of the pan, add a sprinkling of flour. Again, do not exceed 3 tablespoons of flour. My bread maker, with the whisked flour and carefully measured ingredients, typically hits the perfect consistency right away.
- Once the dough cycle is complete, you have a few options:
- For a standard loaf: Allow the bread maker to complete its baking cycle. The recipe as written makes a large loaf, which is perfect for most standard bread maker pans.
- For rolls, buns, or shaped loaves: Remove the dough from the bread maker pan. The dough cycle is designed to knead and rise the dough sufficiently. Shape the dough into your desired forms – individual rolls, small buns, or even braided loaves. I often top braided loaves with sesame seeds for added flavor and texture.
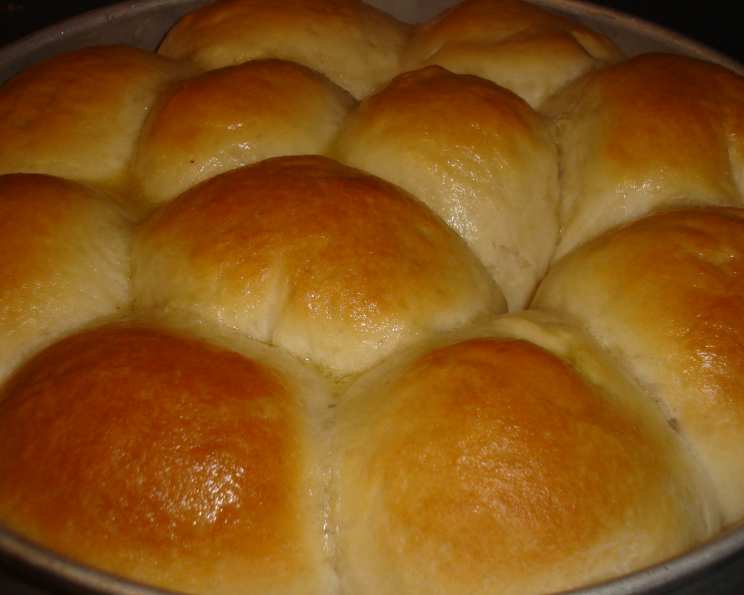
- For shaped rolls and buns: Place the shaped dough onto a greased baking sheet or in muffin tins. Cover them loosely with a clean kitchen towel and allow them to rise for 20 to 30 minutes, or until they have visibly doubled in size.
- Bake the rolls and buns in a preheated oven at 350°F (175°C) until they are nicely golden brown. This usually takes about 15-20 minutes, but times can vary.
- Finishing Touches: Just before the rolls or buns are done baking, and immediately after they come out of the oven, I like to brush their tops with softened butter or margarine. This step adds a beautiful sheen and enriches the crust, making for truly inviting results.
- Baking Time Variability: Always check your bread maker’s manual for specific cycle lengths. The cooking time within the machine is also machine-dependent, and the subsequent baking time for rolls and buns will vary based on your oven and the size of the baked goods.
Expert Tips & Tricks
- The Power of Whisking Flour: I cannot stress enough how much of a difference whisking your flour before measuring can make. It aerates the flour, preventing compaction and ensuring you don’t end up with too much flour, which can lead to a dense loaf.
- Yeast Activation: Storing your bread machine yeast in the refrigerator helps maintain its potency. Taking it out for a few minutes before use ensures it’s at an optimal temperature to start working its magic.
- Dough Cycle Versatility: Don’t underestimate the power of the dough cycle. It’s a phenomenal tool for not just bread, but also for pizza dough, cinnamon roll dough, and any recipe that calls for a well-developed bread dough without the manual labor.
- Controlling Sweetness: The amount of sugar is a wonderful variable. For a neutral bread that pairs well with savory spreads, stick to 1 tablespoon. If you’re planning on making it for dinner buns or a slightly sweeter loaf, 2 tablespoons is a good middle ground. For truly sweet rolls, pushing it to 3 tablespoons will yield a delightful, dessert-like quality.
- Baking Temperature Check: If your oven tends to run hot or cold, an inexpensive oven thermometer can be invaluable for ensuring you’re baking at the correct temperature, especially for the rolls and buns.
Serving & Storage Suggestions
This Feather Bread is at its absolute finest served warm, straight from the oven. For a loaf, slice it generously and serve with your favorite butter, jam, or as the foundation for hearty sandwiches. The rolls and buns are perfect alongside soups, stews, or as slider buns.
Storage:
- At Room Temperature: Once completely cooled, store leftover bread in an airtight container or bread bag for 2-3 days. For rolls and buns, a sealed plastic bag works well.
- Refrigeration: While refrigerating can extend shelf life, it can also dry out the bread. If you must refrigerate, store in an airtight container for up to 5 days.
- Freezing: This bread freezes beautifully. Wrap cooled bread, rolls, or buns tightly in plastic wrap, then in foil or a freezer bag. It will keep well in the freezer for 2-3 months. To reheat, thaw at room temperature or gently warm in a low oven.
Nutritional Information
(Note: Nutritional values are approximate and can vary based on specific ingredients used.)
| Nutrient | Amount per Serving (approx. 1 slice/bun) | % Daily Value |
|---|---|---|
| Calories | 373.5 kcal | 18% |
| Total Fat | 6.6 g | 10% |
| Saturated Fat | 1.3 g | 6% |
| Cholesterol | 0 mg | 0% |
| Sodium | 845.6 mg | 35% |
| Total Carbohydrate | 68.3 g | 22% |
| Dietary Fiber | 2.5 g | 10% |
| Sugars | 4.4 g | 17% |
| Protein | 9.1 g | 18% |
Variations & Substitutions
- Whole Wheat Variation: For a heartier loaf, substitute up to half of the all-purpose flour with whole wheat flour. You might need to slightly adjust the liquid or flour if the dough consistency changes significantly.
- Herbed Bread: Add 1-2 tablespoons of dried herbs such as rosemary, thyme, or Italian seasoning to the dry ingredients for an aromatic twist.
- Garlic Parmesan Rolls: Incorporate 1-2 cloves of minced garlic and ¼ cup of grated Parmesan cheese into the dough during the last few minutes of kneading or shape them into rolls and brush with garlic butter before baking.
- Sweet Rolls with Cinnamon: Increase the sugar to 3 tablespoons and add 1 teaspoon of cinnamon to the dry ingredients. After the dough cycle, shape into a log, flatten, spread with butter and a cinnamon-sugar mixture, roll up, and slice into buns.
- Dairy-Free Option: Substitute the margarine with a dairy-free alternative or vegetable oil for a dairy-free version.
FAQs
Q: My bread maker dough seems too wet. What should I do?
A: If the dough is too sticky during the first mixing, add a teaspoon of flour at a time, but do not exceed 3 tablespoons total.
Q: My bread maker dough seems too dry. What should I do?
A: If the dough is too dry and crumbly, add a teaspoon of lukewarm water at a time, but do not exceed 3 tablespoons total.
Q: Can I use all-purpose flour instead of bread machine flour?
A: Yes, you can often use all-purpose flour. However, bread flour has a higher protein content, which can result in a chewier texture and better rise.
Q: How can I get a golden crust on my rolls and buns?
A: Brushing the tops with softened butter or margarine just before they finish baking and again immediately after they come out of the oven will help achieve a beautiful golden, slightly shiny crust.
Q: Can I skip the oven baking and let the bread maker bake the rolls?
A: Most bread makers are designed for a single loaf. While some might have specific settings for smaller items, the general instructions here assume you will remove the dough for separate shaping and baking for rolls and buns.
This Feather Bread recipe, with its reliance on the bread maker, is a wonderful bridge between tradition and modern convenience. It’s proof that you don’t need years of kneading practice to achieve that satisfying, homemade bread experience. So, the next time you crave the comforting embrace of freshly baked bread, let your bread maker do the heavy lifting and enjoy the delightful results. This versatile dough is a baker’s best friend, ready to transform into loaves, rolls, or buns that will grace any table with warmth and flavor.