
Felicity’s Garlicky Grilled Chicken
There are some recipes that, from the moment you first encounter them, feel like they’ve always been a part of your culinary repertoire. Felicity’s Garlicky Grilled Chicken is one such dish for me. I stumbled upon a version of this recipe years ago, a digital whisper from a fellow home cook, and it immediately resonated. The promise of intensely flavored, tender chicken, packed with the bold punch of garlic, was irresistible. It’s the kind of dish that doesn’t just satisfy hunger; it ignites the senses and leaves a lingering warmth, a testament to the simple, honest magic of good ingredients handled with care.
Recipe Overview
- Prep Time: 30 minutes
- Marinating Time: 3 to 24 hours
- Cook Time: 20 minutes
- Total Time: 50 minutes (plus marinating)
- Servings: 4
- Dietary Type: Gluten-Free, Dairy-Free (if butter is omitted)
Ingredients
This recipe celebrates the power of a few key ingredients, letting their natural flavors shine. The star, of course, is the garlic, which we’ll transform into a fragrant, savory paste.
- 4 large chicken breasts, trimmed of excess fat and skin (about 6-8 ounces each)
- 8 cloves garlic, peeled
- 1/2 teaspoon salt
- 8-10 whole black peppercorns
- 2 lemons, juiced (approximately 1/4 cup)
- 1 bunch fresh parsley, roughly chopped (about 1/4 cup)
- Olive oil, for the marinade
- Butter, for frying (optional)
Equipment Needed
For this recipe, you’ll need a few essential tools to help you create that beautiful garlic paste and cook the chicken to perfection:
- Food processor or blender
- Sharp knife
- Cutting board
- Measuring cups and spoons
- Large bowl or resealable bag for marinating
- Large skillet or grill pan
- Tongs
Instructions
The beauty of Felicity’s Garlicky Grilled Chicken lies in its straightforward preparation and the deep flavor it develops through marination. We’re essentially creating a vibrant, herbaceous garlic sauce that will infuse the chicken, then finishing it with a quick pan-sear for that irresistible golden crust.
-
Prepare the Chicken: Begin by trimming any excess fat from the chicken breasts. Using a sharp knife, make a couple of diagonal slashes across each piece of chicken, about 1/4-inch deep. These slashes will help the marinade penetrate the meat more effectively, ensuring a more flavorful and tender result. Set the prepared chicken breasts aside.
-
Create the Garlic Marinade: In a food processor or blender, combine the peeled garlic cloves, salt, whole black peppercorns, fresh lemon juice, and chopped parsley.
-
Emulsify with Olive Oil: With the food processor running, slowly drizzle in the olive oil until the mixture forms a smooth, pale green paste. You’re looking for an emulsified consistency, similar to a pesto. I found that about 1/4 cup of olive oil worked perfectly for me, but this can be adjusted to your personal preference for the richness of the marinade.
-
Marinate the Chicken: Place the prepared chicken breasts in a large bowl or a resealable plastic bag. Pour the garlic marinade over the chicken, ensuring each piece is generously coated. Cover the chicken with the marinade and refrigerate for as long as possible. The longer the chicken marinates, the more intensely flavored it will become. Aim for at least 3 hours, but for truly deep flavor, up to 24 hours is ideal.
-
Prepare for Cooking: When you’re ready to cook, if you’re opting to use butter for that extra richness and browning, melt a tablespoon or two of butter in a large skillet over medium-low heat. The key here is to keep the heat low initially.
-
Poach and Cook: Place the chicken breasts directly into the skillet along with all of the marinade. Cover the skillet with a lid. The steam generated from the marinade and chicken will begin to cook the chicken gently. This step is particularly helpful if you’re using very thick chicken breasts, as it helps to cook them through evenly without drying out the exterior. Cook for approximately 10 minutes.
-
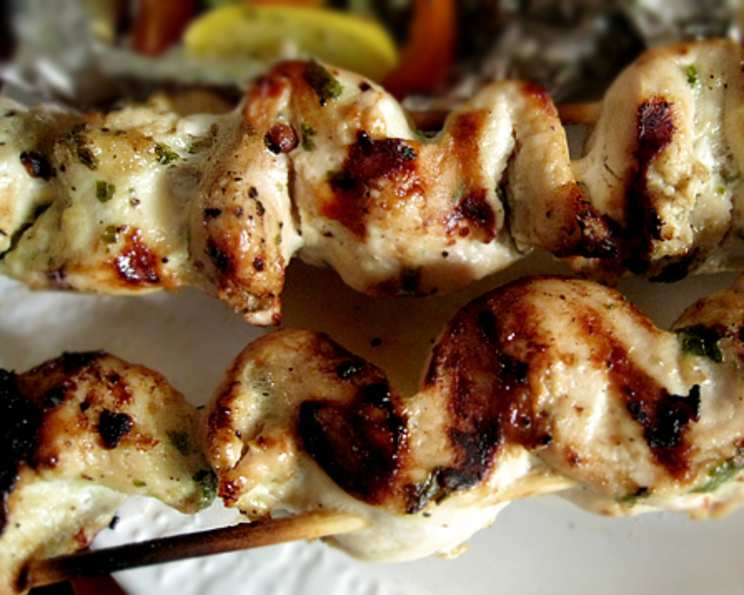
Increase Heat and Brown: After about 10 minutes, the steam will have helped to cook the chicken through. Remove the lid from the skillet. Increase the heat to medium-high. Now, you’ll brown the chicken on both sides until it develops a beautiful golden-brown crust. This browning not only enhances the visual appeal but also adds a crucial layer of flavor through the Maillard reaction.
-
Check for Doneness: The chicken is cooked when it has reached an internal temperature of 165°F (74°C). You can also check for doneness by piercing the thickest part of the breast with a fork; the juices should run clear. Be careful not to overcook, as this will result in dry chicken.
-
Rest and Serve: Once cooked, remove the chicken from the skillet and let it rest for 5-10 minutes on a clean cutting board before slicing or serving whole. This resting period allows the juices to redistribute throughout the meat, ensuring a moist and tender result.
I love to serve this chicken with a side of steamed spinach, or as I often do, alongside a portion of “Felicity’s Stuffed Red Peppers” (a recipe also found on ‘Zaar, if you’re curious!). Even the leftovers are a revelation – cold for lunch the next day, the garlic flavor has intensified wonderfully, and the meat remains incredibly moist.
Expert Tips & Tricks
To elevate your Felicity’s Garlicky Grilled Chicken experience, consider these professional insights:
- Garlic Paste Consistency: If your food processor struggles to create a smooth paste, add a tiny splash more olive oil or a teaspoon of water to help it along. The goal is a thick, emulsified paste that clings to the chicken.
- Marinating Vessel: For optimal marination, especially for longer periods, a glass or ceramic bowl is ideal. If using a plastic bag, ensure it’s a good quality one designed for food storage to prevent any leakage or absorption of odors.
- Grill Pan vs. Skillet: A grill pan will impart attractive grill marks, adding another dimension to the presentation. However, a regular cast-iron skillet will achieve excellent browning and flavor.
- Thick Chicken Breasts: If your chicken breasts are exceptionally thick, you can gently pound them to an even thickness before marinating. This ensures more uniform cooking. Alternatively, you can begin by poaching them for a few minutes longer before increasing the heat to brown.
- Butter Optionality: While butter adds a lovely richness and aids browning, if you’re aiming for a dairy-free meal, simply omit it and use a little extra olive oil in the pan. The chicken will still be delicious.
Serving & Storage Suggestions
This garlicky chicken is incredibly versatile. It’s fantastic served hot, sliced thinly over a fresh green salad, alongside roasted vegetables, or spooned over a bed of rice or quinoa.
To serve: Allow the chicken to rest for at least 5 minutes before slicing against the grain. This will ensure maximum juiciness.
Storage: Leftovers can be stored in an airtight container in the refrigerator for up to 3-4 days. The flavors, particularly the garlic, tend to deepen and intensify as it sits, making it even more delicious cold.
Reheating: For the best results, gently reheat the chicken in a covered skillet with a splash of water or broth over low heat, or briefly in a moderate oven (around 300°F/150°C) until warmed through. Avoid microwaving, as it can dry out the chicken.
Nutritional Information
While exact nutritional values can vary based on ingredient brands and specific portion sizes, here’s an estimated breakdown for Felicity’s Garlicky Grilled Chicken per serving (assuming 4 servings):
| Nutrient | Amount per Serving | % Daily Value |
|---|---|---|
| Calories | 264.2 kcal | |
| Calories from Fat | 120 kcal | |
| Total Fat | 13.4 g | 20% |
| Saturated Fat | 3.9 g | 19% |
| Cholesterol | 92.8 mg | 30% |
| Sodium | 383.3 mg | 15% |
| Total Carbohydrate | 4 g | 1% |
| Dietary Fiber | 0.2 g | 0% |
| Sugars | 0.6 g | 2% |
| Protein | 30.7 g | 61% |
Note: Percent Daily Values are based on a 2,000 calorie diet. Your daily values may be higher or lower depending on your calorie needs.
Variations & Substitutions
While this recipe is designed to be celebrated in its current form, here are a few ideas for creative twists:
- Herbal Infusion: Experiment with other fresh herbs in the marinade, such as cilantro or a mix of Mediterranean herbs like oregano and thyme.
- Spicy Kick: For those who enjoy a little heat, add a pinch of red pepper flakes or a small deseeded chili pepper to the food processor along with the garlic.
- Lemon Zest: Incorporate the zest of one of the lemons into the marinade for an extra layer of bright, citrusy aroma.
- Different Cuts of Chicken: While chicken breasts are ideal for their lean texture and quick cooking, thighs (boneless, skinless) can also be used. Adjust cooking time as needed, as thighs take slightly longer to cook through.
- Grilling: If you prefer grilling outdoors, marinate the chicken as directed and then grill over medium-high heat for about 5-7 minutes per side, until cooked through and nicely charred.
FAQs
Q: Can I make the garlic marinade ahead of time?
A: Yes, you can prepare the garlic marinade up to 2 days in advance and store it in an airtight container in the refrigerator.
Q: My chicken breasts are quite thin. How should I adjust the cooking time?
A: For thinner chicken breasts, you may be able to skip the initial steaming step and proceed directly to browning over medium-high heat. Cook for approximately 4-6 minutes per side, or until cooked through.
Q: Is it essential to poach the chicken in the marinade first?
A: The initial poaching step helps to cook thicker chicken breasts through evenly and gently. If your chicken breasts are thin and uniform in thickness, you might be able to go straight to browning, but the poaching step contributes to a more tender result.
Q: What if I don’t have a food processor?
A: You can finely mince the garlic and other ingredients by hand and then whisk them together vigorously with the olive oil until emulsified. Alternatively, a blender will work just as well.
Q: Can I use pre-minced garlic?
A: While pre-minced garlic can be used in a pinch, it won’t offer the same vibrant, fresh flavor as whole cloves that are freshly processed. Fresh garlic will yield the best results for this recipe.
Final Thoughts
Felicity’s Garlicky Grilled Chicken is more than just a recipe; it’s an invitation to embrace simple, bold flavors. It’s proof that with a few quality ingredients and a touch of thoughtful preparation, you can create a dish that is both deeply satisfying and remarkably easy to make. I encourage you to try it, to let the intoxicating aroma of garlic fill your kitchen, and to savor each moist, flavorful bite. It’s a dish that’s perfect for a weeknight meal but impressive enough for company, and I have a feeling it will become a cherished favorite in your home, just as it has in mine. Enjoy!