
Filomena’s Pasta Fresca: A Taste of Generations
The aroma of freshly milled flour and warm eggs is more than just a scent to me; it’s a portal to my childhood. I can vividly recall the hum of chatter, the gentle thud of dough being worked, and the laughter that filled my grandmother Esther’s kitchen on pasta-making days. It was a ritual passed down from my great-grandmother, Filomena, a woman whose hands, though weathered, possessed a magic that transformed simple ingredients into silken strands of happiness. These weren’t just meals; they were edible expressions of love, shared generously with family, creating memories that still nourish my soul.
Recipe Overview
- Prep Time: 30 minutes
- Cook Time: 3 minutes (per batch)
- Total Time: 35 minutes (plus chilling and optional freezing time)
- Servings: 4
- Yield: Approximately 1 pound of fresh pasta
- Dietary Type: Vegetarian
Ingredients
- 3 cups unbleached white flour
- 4 large eggs
Equipment Needed
- Food processor
- Large zip-top bag
- Pasta machine (stand mixer attachment or hand-crank model)
- Sharp knife or pasta cutter attachment
- Large pot
- Slotted spoon or pasta strainer
- Small containers or freezer-safe bags for storage
Instructions
Creating truly exceptional fresh pasta is a journey of tactile pleasure and a rewarding culinary endeavor. Filomena’s recipe, scaled down from the grand quantities of her bustling kitchen, is a testament to the beauty of simplicity. It’s a foundational dough that, with a little practice, becomes as intuitive as breathing.
-
Begin with the Flour: To commence, pour your 3 cups of unbleached white flour into the bowl of your food processor. Pulse the flour about five to six times. This brief aeration helps to create a lighter texture in the final pasta.
-
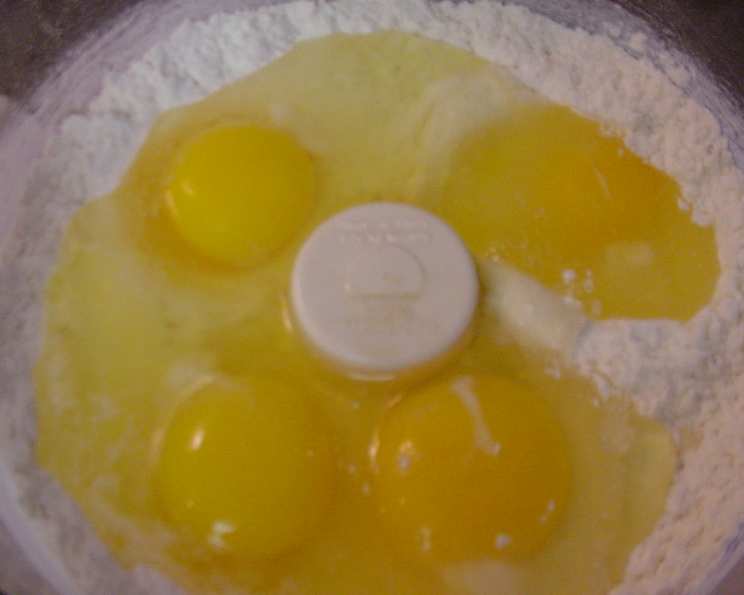
Introduce the Eggs: Next, add the 4 large eggs directly into the food processor with the flour. Pulse again, this time for five to six times. You’ll begin to see the ingredients start to combine.
-
Form the Dough: Now, pause and scrape down the sides of the processor bowl to ensure all the flour is incorporated. Whiz the mixture until the dough begins to come together. The ideal consistency at this stage is crumbly and appears a little dry. This initial dryness is actually beneficial; it allows the gluten to develop more effectively, leading to a pasta with a superior texture and a delightful chew.
-
Adjust Consistency (if needed): If, after squeezing a bit of the dough in your hand, it doesn’t hold its shape, you can rectify this by adding a few drops of water, one at a time, and pulsing briefly until the desired consistency is achieved. Conversely, if the dough feels too wet or sticky, add a few teaspoons of flour and pulse again until it reaches the correct pliable, but not overly wet, state.
-
Rest the Dough: Transfer the dough from the food processor into a large zip-top bag. Press the dough together within the bag, shaping it into a somewhat compact log. Seal the bag and refrigerate for 30 minutes. This chilling period is crucial for allowing the gluten to relax, making the dough much easier to handle and roll.
-
Initial Kneading with the Pasta Machine: Remove the chilled dough from the bag. Cut the log into eight equal slices. Working with one slice at a time, begin the kneading process with your pasta machine. If you have a stand mixer attachment, set it to the lowest speed. If using a hand-crank machine, prepare to feed the dough through. Run each slice through the pasta kneader on setting #1, folding over the ends of the dough each time. Aim to fold it into thirds, like a letter, and try to keep the dough somewhat square and uniform. Pass each piece through this setting four to five times. The kneaded dough should feel remarkably smooth and luxurious to the touch, with absolutely no graininess or roughness.
-
Rolling to Desired Thickness: Once all eight pieces have undergone the initial kneading, you are ready to roll them to your preferred thickness. Continue to use your pasta machine, starting with setting #2 and gradually progressing up one or two settings at a time. A personal preference for this dough is to roll it to number 6 on a KitchenAid pasta attachment or number 7 on an Atlas Pasta maker. Remember to keep the pasta well-floured throughout this process to prevent any sticking.
-
Cutting the Pasta: Now, it’s time to shape your pasta. Choose your preferred cutter attachment – fettuccine (a personal favorite) or spaghetti. Carefully feed the rolled pasta sheets through the chosen cutter. Ensure the strands are kept well-floured and that your work surface also has a generous dusting of flour. The key here is abundance: in this case, there is truly no such thing as too much flour. Make certain that the strands are all separated immediately after cutting.
-
Drying the Strands: Once cut, let the pasta dry for a few minutes on a lightly floured surface or a pasta drying rack. This brief drying period helps the strands hold their shape during cooking. After this short rest, separate the pasta into four equal servings.
-
Cooking Fresh Pasta: If you plan to enjoy your pasta right away, bring a large pot of water to a rolling boil. Add one tablespoon of olive oil and two to three tablespoons of kosher salt to the water. Carefully add one serving of your fresh pasta to the boiling water. Check the pasta after one minute and continue to check it periodically until it is cooked to your liking. Most fresh pastas will achieve a perfect al dente texture in under three minutes. Once cooked, drain the pasta thoroughly using a colander or a pasta strainer. Toss with your favorite sauce and serve immediately.
Expert Tips & Tricks
The beauty of Filomena’s recipe lies in its inherent simplicity, but a few chef-level insights can elevate your pasta-making experience even further.
- Flour Power: The emphasis on keeping everything heavily floured is paramount. Fresh pasta dough is thirsty, and a little extra flour on your hands, work surface, and the pasta itself is your best defense against a sticky, unmanageable mess. It ensures clean cuts and prevents strands from clumping together during drying and cooking.
- The Chill Factor: Don’t be tempted to skip the chilling step. Relaxing the gluten is non-negotiable for achieving a smooth, pliable dough that rolls out beautifully without tearing. If you find your dough is still a bit resistant after chilling, let it rest for another 10-15 minutes at room temperature.
- Dough Hydration Nuances: While the recipe aims for a specific hydration, the ambient humidity and the size of your eggs can cause slight variations. Learning to read your dough is the most valuable skill. Too dry? A few drops of water. Too wet? A whisper more flour. It’s a dance, not a rigid command.
- Pasta Machine Settings: Each pasta machine is slightly different. The numbers provided are a guide, but trust your instincts. The goal is a smooth, thin sheet that yields easily to the cutters without being so thin it tears or so thick it’s gummy.
- Sauce Pairing: Fresh pasta, especially a beautifully textured dough like this, shines with simpler, lighter sauces. Think about a delicate butter and sage sauce, a vibrant pesto, or a classic cacio e pepe. Overpowering sauces can mask the subtle, delightful flavor of the pasta itself.
Serving & Storage Suggestions
Freshly made pasta is a celebration, and how you serve and store it can enhance its charm.
Serving: Serve your Filomena’s Pasta Fresca immediately after cooking. It pairs wonderfully with a light drizzle of good quality olive oil, a sprinkle of freshly grated Parmesan cheese, and a scattering of fresh herbs like parsley or basil. For a more robust meal, consider classic sauces like a simple marinara, a creamy Alfredo, or a rich Bolognese.
Storage:
- To Freeze: Curl the pasta into small, manageable nests. This prevents the strands from becoming a tangled, sticky mass. Place these nests in small, airtight containers or freezer-safe bags. Freeze for up to 1 month. Remember, you can’t use too much flour when preparing it for freezing; a light dusting helps prevent sticking.
- To Cook from Frozen: You can cook the pasta directly from frozen. Add it to your boiling, salted water, and it will likely take an extra minute or two to cook compared to fresh. Do not thaw frozen pasta before cooking.
Nutritional Information
(Please note: Nutritional values are approximate and can vary based on specific ingredients and portion sizes.)
| Nutrient | Amount per Serving | % Daily Value |
|---|---|---|
| Calories | 412.8 kcal | 21% |
| Total Fat | 5.7 g | 7% |
| Saturated Fat | 1.7 g | 9% |
| Cholesterol | 186 mg | 62% |
| Sodium | 72.9 mg | 3% |
| Total Carbohydrate | 71.9 g | 26% |
| Dietary Fiber | 2.5 g | 9% |
| Total Sugars | 0.4 g | 1% |
| Protein | 16 g | 32% |
Variations & Substitutions
While this recipe is a beautiful classic, there’s always room for creative exploration.
- Whole Wheat Blend: For a nuttier flavor and added fiber, you can substitute up to half of the unbleached white flour with whole wheat flour. You may need to adjust the liquid slightly.
- Herb Infusion: For a subtle herbaceous note, finely chop fresh herbs like parsley, basil, or chives and incorporate them into the dough during the initial pulsing stage in the food processor.
- Egg-Free Pasta: While this recipe is fundamentally egg-based, for an egg-free version, you can use water (about 1/2 cup, added gradually) or a plant-based milk to bind the flour. The texture will be different, but still delicious.
FAQs
Q: Why does the recipe call for dry dough?
A: A slightly drier dough allows the gluten to develop properly, resulting in a firmer texture and a better bite in the cooked pasta. It also makes the dough easier to handle and less likely to become gummy.
Q: Can I make this pasta dough by hand if I don’t have a food processor or pasta machine?
A: Absolutely! You can make a well in the flour on a clean surface, add the eggs to the well, and then gradually incorporate the flour with a fork, eventually kneading by hand until smooth and elastic. Rolling will require a rolling pin and significant effort, and cutting will be done with a sharp knife.
Q: How long can I store fresh pasta if I’m not freezing it?
A: Freshly made pasta that has been allowed to dry slightly can be stored at room temperature for about 30 minutes to an hour, or in an airtight container in the refrigerator for 1-2 days. However, it is best cooked and consumed the same day it is made.
Q: What is the best way to prevent my fresh pasta from sticking together when cooking?
A: Generous amounts of kosher salt in the boiling water and a tablespoon of olive oil before the water heats up are key. Stirring the pasta gently as soon as you add it to the pot also helps to keep the strands separated.
Q: Is it really necessary to add salt and oil to the pasta water?
A: Adding kosher salt to the boiling water is crucial for seasoning the pasta from the inside out. The olive oil helps to prevent boil-overs and can also aid in keeping the pasta from sticking. For best results, add them before you place the pot on the stove to heat.
Final Thoughts
Filomena’s Pasta Fresca is more than just a recipe; it’s an invitation to connect with the heart of Italian culinary tradition. It’s a reminder that the most profound flavors often arise from the simplest ingredients, lovingly prepared. So, gather your flour, crack your eggs, and embark on this delightful journey. Share it with loved ones, savor each silken strand, and perhaps, create your own cherished memories around the kitchen table. Serve it with a crisp glass of Pinot Grigio and a simple side salad for a meal that sings with authenticity and homemade goodness.