
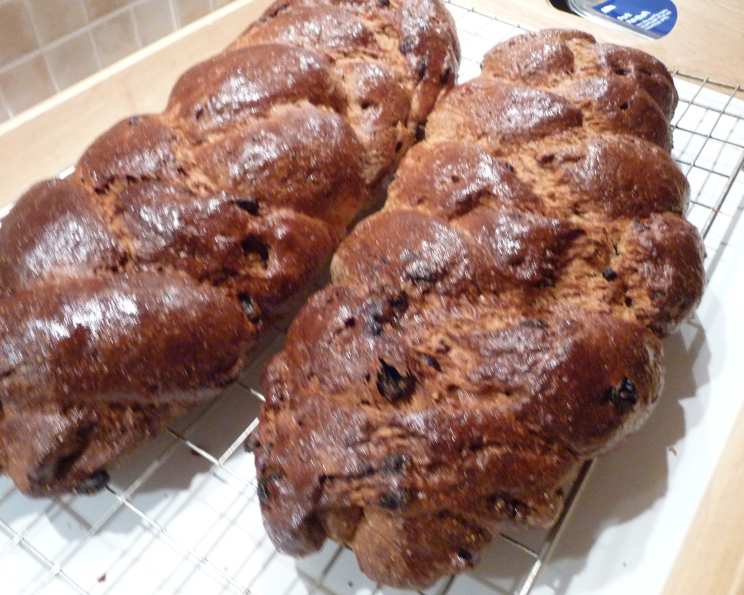
Finnish Sweet Cardamom Raisin Bread (Pulla)
There’s a certain magic that happens when the aroma of freshly baked bread fills the kitchen, a scent that instantly transports me back to crisp Finnish mornings. My grandmother, with her nimble hands and knowing smile, would often prepare pulla on special occasions, its sweet, spiced fragrance a prelude to the cozy warmth of family gatherings. The tender, pull-apart texture, studded with plump, sweet raisins and infused with the unmistakable perfume of cardamom, was always a highlight, a comforting embrace in every slice. It wasn’t just bread; it was a ritual, a whispered promise of good things to come.
Recipe Overview
- Prep Time: 25 minutes (plus dough rising time)
- Cook Time: 40 to 45 minutes
- Total Time: Approximately 4 hours 45 minutes (including rising)
- Servings: 2 loaves
- Yield: 2 loaves
- Dietary Type: Vegetarian
Ingredients
Here’s what you’ll need to create this delightful Finnish treat:
- 1 cup raisins
- ¼ cup warm water (105-115°F)
- 1 (¼ ounce) package active dry yeast (which is equivalent to 2 ¼ teaspoons)
- 5 cups all-purpose flour
- ⅔ cup sugar
- 1 teaspoon ground cardamom
- 1 ¼ teaspoons salt
- ¾ cup cold unsalted butter, cut into small pieces
- 1 ¼ cups warm whole milk (105-115°F)
- 1 large egg, lightly beaten
- 1 large egg yolk, lightly beaten with 1 tablespoon water (for egg wash)
Equipment Needed
- Large mixing bowls
- Pastry blender or your fingertips
- Wooden spoon
- Measuring cups and spoons
- Bench scraper (optional, but helpful for handling dough)
- Parchment paper
- Large baking sheet
- Wire cooling rack
Instructions
Crafting this beautiful pulla is a rewarding process, involving a few key stages to ensure a tender, flavorful loaf.
-
Plump the Raisins: Begin by placing the raisins in a small bowl. Pour enough hot tap water to generously cover them. Let them soak for about 20 minutes. This crucial step allows the raisins to plump up, ensuring they are soft and sweet within the bread rather than becoming dry and tough during baking. Once plumped, drain them thoroughly.
-
Activate the Yeast: In a separate small bowl, combine the warm water, yeast, and a pinch of sugar (you can take a tiny bit from the measured sugar). Stir gently and let it stand for approximately 5 minutes. You’re looking for a foamy, bubbly mixture. This indicates that the yeast is alive and active. If the yeast doesn’t foam, it’s essential to start over with fresh yeast, as inactive yeast won’t be able to leaven your bread properly.
-
Prepare the Dry Ingredients: In a large mixing bowl, whisk together the all-purpose flour, the remaining sugar, ground cardamom, and salt. These dry ingredients form the foundation of your dough.
-
Incorporate the Butter: Now, add the cold unsalted butter, cut into small pieces, to the dry ingredients. Using a pastry blender or your fingertips, work the butter into the flour mixture. The goal is to create a texture that resembles coarse meal, with the butter pieces distributed throughout. This technique, known as “cutting in,” is vital for achieving a tender crumb in the final bread.
-
Form the Dough: Create a well in the center of the flour and butter mixture. Pour in the warm whole milk, the lightly beaten whole egg, and the foamy yeast mixture. Using a wooden spoon, stir everything together until a soft dough begins to form. It will be shaggy at this stage.
-
Knead for Elasticity: Turn the dough out onto a well-floured surface. Begin to knead the dough. As you knead, you’ll need to add just enough flour to your surface and your hands to prevent the dough from sticking. Continue kneading for about 8 to 10 minutes, or until the dough becomes smooth and elastic. A well-kneaded dough will spring back slowly when you gently poke it.
-
Incorporate the Raisins: Pat the kneaded dough into a rough 9-inch square. Evenly sprinkle the plumped raisins over the surface of the dough. Carefully fold the dough over to enclose the raisins and pinch the edges securely to seal them inside. Then, knead the dough again, this time dusting your surface and hands lightly with flour. The goal is to distribute the raisins evenly throughout the dough. Be patient; the dough will likely feel lumpy and slightly sticky, and it’s perfectly normal if a few raisins pop out – just push them back in. Once the raisins are distributed, form the dough into a ball.
-
First Rise (Bulk Fermentation): Lightly butter a large bowl. Place the dough ball into the buttered bowl and turn it to coat all sides. This prevents the dough from drying out. Cover the bowl tightly with plastic wrap and then with a kitchen towel. Find a draft-free place at warm room temperature and let the dough rise until it has doubled in size, which typically takes 2 to 2 ½ hours.
-
Shape the Loaves: Once the dough has doubled, gently punch it down. Do not knead it at this stage. Halve the dough. For each half, cut it into thirds. Roll each of these smaller pieces into a 15-inch rope. Take three ropes and braid them together to form a loaf. Carefully transfer the braided loaf to a parchment-lined large baking sheet, tucking the ends underneath for a neat appearance. Repeat this process with the remaining three ropes to create the second loaf. Arrange the loaves on the baking sheet, ensuring they are at least 4 inches apart to allow for expansion.
-
Second Rise (Proofing): Loosely cover the shaped loaves with plastic wrap. Again, place them in a draft-free place at warm room temperature and let them rise until they have doubled in size, which usually takes 1 to 1 ½ hours.
-
Preheat the Oven: While the loaves are on their second rise, preheat your oven to 350°F (175°C). Position an oven rack in the middle of the oven.
-
Egg Wash and Bake: Once the loaves have doubled and the oven is preheated, brush the tops of the loaves generously with the egg wash (the beaten egg yolk mixed with water). This will give the bread a beautiful golden sheen and a slightly crisp crust. Bake the loaves for 40 to 45 minutes, or until they are golden brown and the bottoms sound hollow when tapped. This tapping test is a classic way to check for doneness in bread.
-
Cooling: Carefully transfer the baked loaves from the baking sheet to a wire cooling rack. Allow them to cool completely before slicing. This is essential for the texture of the bread to set properly.
Cooks’ Note: This beautiful bread can be made up to 2 days ahead of time. Once completely cool, wrap it well at room temperature. For longer storage, it can be frozen for up to 1 month.
Expert Tips & Tricks
- Room Temperature Ingredients: While the butter needs to be cold, it’s beneficial for your milk and egg to be at room temperature for the dough. This helps with even activation of the yeast and a smoother dough.
- The “Flour Handful”: When kneading, resist the urge to add too much flour. A slightly sticky dough will produce a more tender bread. Think of adding just enough flour to make the dough manageable, not dry.
- Don’t Over-Knead: While kneading develops gluten, over-kneading can lead to a tough bread. Stop when the dough is smooth and elastic.
- Warm, Draft-Free Rising Spot: This is crucial. If your kitchen is cool, you can create a warm environment by placing the covered dough bowl near a pilot light, in a slightly warmed oven (turned off!), or in a sunny spot. Just avoid direct heat, which can cook the dough.
- Uniform Braiding: For the most aesthetically pleasing braid, try to keep the thickness of your ropes as consistent as possible.
Serving & Storage Suggestions
Finnish Pulla is wonderfully versatile. It’s traditionally enjoyed with a cup of coffee or tea, making it a perfect accompaniment to an afternoon fika. Slice it thick and serve it plain, or add a smear of good quality butter. It’s also delightful with a dollop of lingonberry jam or a light cream cheese.
For storing, ensure the bread is completely cool before wrapping. At room temperature, it will keep well for 2-3 days when tightly wrapped in plastic wrap or placed in an airtight container. If you plan to freeze it, wrap it tightly in plastic wrap first, then in a layer of aluminum foil or a freezer bag. To reheat from frozen, unwrap and bake at 300°F (150°C) for about 10-15 minutes, or until warmed through and slightly crisp.
Nutritional Information
Here’s an estimated nutritional breakdown per serving (assuming 2 loaves, sliced into approximately 12 slices each):
| Nutrient | Amount per Serving | % Daily Value |
|---|---|---|
| Calories | 2391.9 kcal | |
| Calories from Fat | ||
| Total Fat | 82.4 g | 126% |
| Saturated Fat | 48.7 g | 243% |
| Cholesterol | 408.9 mg | 136% |
| Sodium | 1579.8 mg | 65% |
| Total Carbohydrate | 372 g | 124% |
| Dietary Fiber | 12.1 g | 48% |
| Sugars | 118.7 g | 474% |
| Protein | 46.1 g | 92% |
Note: Nutritional values are estimates and can vary based on specific ingredients and portion sizes.
Variations & Substitutions
While this recipe is classic, feel free to explore some variations:
- Citrus Zest: Add the zest of one orange or lemon to the dry ingredients for a brighter flavor profile.
- Cardamom Intensity: If you adore cardamom, feel free to increase the amount to 1 ½ or even 2 teaspoons.
- Nutty Addition: Toasted slivered almonds or chopped pecans can be added along with the raisins for an extra textural element.
- Gluten-Free: While challenging, a gluten-free version would require a specialized gluten-free flour blend and likely adjustments to the liquid content and kneading technique. This recipe, as written, relies on gluten development for its structure.
FAQs
Q: Why is my pulla dough not rising?
A: This is most often due to inactive yeast. Ensure your yeast is fresh and was activated correctly in warm (not hot) water. Also, check that your rising environment is warm and free of drafts.
Q: My raisins keep falling out during kneading, what can I do?
A: Try to be very gentle when kneading after adding the raisins. If they pop out, simply push them back in and continue with minimal pressure. Ensuring the dough is not too dry also helps.
Q: Can I use whole milk powder instead of liquid whole milk?
A: Yes, you can substitute whole milk powder by mixing it with water according to the package directions to achieve the equivalent of 1 ¼ cups of whole milk.
Q: How can I tell if the bread is baked through without a thermometer?
A: The best method is to tap the bottom of the loaf. If it sounds hollow, it’s done. The crust should also be a deep golden brown.
Q: My pulla came out too dry. What did I do wrong?
A: This can happen if too much flour was added during kneading or if the bread was over-baked. Be mindful of adding only enough flour to manage stickiness and pull the bread out as soon as it’s golden brown and sounds hollow.
Final Thoughts
There’s a profound sense of satisfaction that comes from baking Pulla, a taste of tradition and comfort that’s hard to match. This soft, fragrant bread, with its hints of cardamom and sweet raisins, is more than just a treat; it’s an invitation to slow down, to share, and to savor the simple joys. Whether you’re enjoying it with your morning coffee, a cozy afternoon tea, or as a sweet end to a meal, I encourage you to bake a batch and experience the warmth and tradition of Finnish Pulla for yourself. It’s a recipe that’s sure to become a cherished part of your own culinary repertoire.