
The Unexpectedly Delicious Flourless Pizza Crust: A Chef’s Embrace of Dietary Needs
There was a time, not so long ago in my culinary journey, when the idea of a truly satisfying pizza crust without flour seemed like a culinary oxymoron. I remember a dear friend, a vibrant soul with a sharp wit, who confided in me about her struggles with gluten and dough. Her eyes would cloud over when the topic of pizza night arose, a beloved ritual for so many of us. Witnessing her disappointment sparked a personal challenge – could I create something that not only accommodated her dietary needs but genuinely celebrated them? This flourless pizza crust, born out of that desire to share joy and comfort around the table, has since become a staple, a testament to how innovation can arise from necessity, and how even the most restrictive diets can lead to surprisingly delicious discoveries. It’s an egg-based marvel, soft and yielding, and with a few strategic additions, it convincingly echoes the comforting essence of a traditional pizza dough.
Recipe Overview
- Prep Time: 15 minutes
- Cook Time: 20 minutes (for crust) + additional time for toppings
- Total Time: 35 minutes (for crust)
- Servings: 12 (as a pizza base, serving 2-4 depending on toppings)
- Yield: 1 pizza crust
- Dietary Type: Gluten-Free, Low-Carbohydrate
Ingredients
For the Flourless Pizza Crust:
- 4 egg whites
- 1/8 teaspoon cream of tartar
- 3 egg yolks
- 1 teaspoon Splenda sugar substitute (or your preferred granular sweetener)
- 1 pinch salt
- 2 tablespoons grated Parmesan cheese, plus extra for sprinkling
- 1 teaspoon garlic powder
- 4 ounces fat-free cream cheese, softened
Equipment Needed
- Electric mixer (stand mixer or hand mixer)
- Two medium-sized mixing bowls
- Rubber spatula
- Medium-sized pizza pan (approximately 10-12 inches in diameter)
- Cooking spray or parchment paper
- Oven
- Cooling rack
Instructions
Embarking on the creation of this flourless pizza crust is a delightful process that relies on a bit of culinary technique to achieve its unique texture. The key is to harness the power of whipped egg whites for structure and lightness.
-
Prepare the Egg Whites: In a clean, dry medium-sized mixing bowl, combine the 4 egg whites and the 1/8 teaspoon of cream of tartar. Begin beating them with your electric mixer on medium speed. Gradually increase the speed to high and continue beating until stiff peaks form. This means that when you lift the beaters, the egg whites will stand up straight, holding their shape without drooping. Be patient; this step is crucial for the crust’s structure.
-
Mix the Yolks and Cream Cheese Base: In a separate medium-sized mixing bowl, combine the 3 egg yolks, the 1 teaspoon of Splenda sugar substitute, the 1 pinch of salt, the 2 tablespoons of grated Parmesan cheese, the 1 teaspoon of garlic powder, and the 4 ounces of softened fat-free cream cheese. Beat these ingredients together with the mixer until the mixture is completely smooth and well combined. Ensure there are no lumps of cream cheese.
-
Gently Fold the Mixtures: This is a critical step to maintain the airiness of the egg whites. Take about a third of the whipped egg whites and gently fold them into the egg yolk mixture using a rubber spatula. Use an under-and-over motion, being very careful not to deflate the whites. Once this first portion is incorporated, gently fold in the remaining egg whites in two more additions until just combined. The goal is a uniform, airy batter, not a dense mixture.
-
Prepare the Pizza Pan: Lightly spray a medium-sized pizza pan with cooking spray. For extra insurance against sticking, you can also line it with parchment paper, though the cooking spray often suffices.
-
Shape the Crust: Carefully spread the batter evenly onto the prepared pizza pan. Aim for a consistent thickness across the entire surface, forming your desired pizza crust shape.
-
Add the Parmesan Topping: Sprinkle the top of the crust with a little extra grated Parmesan cheese. This adds a lovely golden hue and a subtle, savory crispness to the edges as it bakes.
-
Pre-Bake the Crust: Preheat your oven to 300°F (150°C). Place the pizza pan with the crust into the preheated oven and bake for 20 minutes.
-
Remove and Top: After 20 minutes, carefully remove the partially baked crust from the oven. At this point, your crust will be set and slightly golden. You can now add your favorite pizza toppings.
-
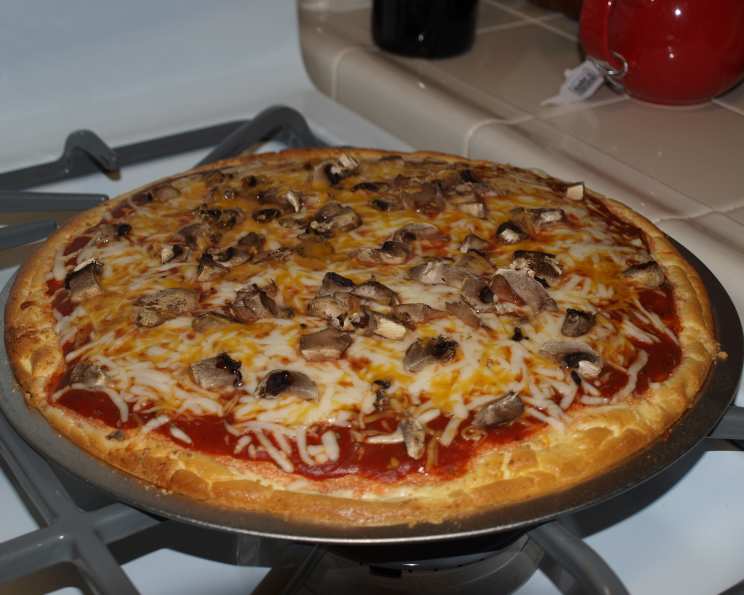
Bake with Toppings: Return the pizza with toppings to the oven and continue to bake until the toppings are cooked through and the cheese is melted and bubbly. The total baking time with toppings will vary depending on what you use, but typically another 10-15 minutes will suffice. This will result in a soft crust pizza that is a delightful departure from traditional dough.
Expert Tips & Tricks
- Achieving Stiff Peaks: Ensure your egg whites and the bowl you are using are absolutely free of any grease or yolk. Even a tiny amount can prevent the egg whites from reaching stiff peaks. If you’re worried about separating yolks perfectly, consider using a dedicated egg separator.
- Folding Technique Mastery: Think of folding as gently lifting the heavier mixture up and over the lighter mixture. Don’t stir or beat; use deliberate, sweeping motions with your spatula. The less you agitate the batter, the lighter your crust will be.
- Oven Temperature Calibration: Ovens can vary. If your oven tends to run hot, you might consider reducing the temperature slightly to 275°F (135°C), especially if you find your crust browning too quickly. Conversely, if your oven runs cool, you might need to increase it a few degrees. Keep an eye on it during the first bake.
- Pan Choice Matters: A dark, non-stick pizza pan will conduct heat more efficiently and can lead to a crispier bottom crust compared to a lighter-colored or thin aluminum pan.
Serving & Storage Suggestions
This flourless pizza is best served immediately after the final baking, allowing you to enjoy the contrast between the melted toppings and the tender crust. Slice it using a sharp knife or a pizza cutter.
Leftovers can be stored by covering the pizza tightly with plastic wrap or placing it in an airtight container. It will keep in the refrigerator for 1-2 days. Reheating is best done in a toaster oven or a conventional oven at 300°F (150°C) for about 5-10 minutes to regain some crispness without overcooking the toppings. Microwaving is an option, but it will result in a softer, less crisp crust. This crust is not recommended for freezing.
Nutritional Information
Here’s an approximate nutritional breakdown for the flourless pizza crust itself, before adding toppings.
| Nutrient | Amount per Serving (approx. 1/12 of crust) | % Daily Value (approx.) |
|---|---|---|
| Calories | 33.6 kcal | |
| Calories from Fat | Varies (depends on cream cheese fat %) | |
| Total Fat | 1.4 g | 2% |
| Saturated Fat | 0.6 g | 3% |
| Cholesterol | 43.5 mg | 14% |
| Sodium | 115.2 mg | 4% |
| Total Carbohydrate | 1.3 g | 0% |
| Dietary Fiber | 0 g | 0% |
| Sugars | 0.7 g | 2% |
| Protein | 3.7 g | 7% |
(Note: Nutritional values are estimates and can vary based on specific ingredients used and precise measurements.)
Variations & Substitutions
While this recipe is wonderfully designed, a few tweaks can cater to different tastes and dietary needs:
- Herbal Infusion: Add a teaspoon of dried Italian herbs or a tablespoon of finely chopped fresh rosemary or basil to the egg yolk mixture for an aromatic boost.
- Cheesy Variations: If you don’t have Parmesan, a finely grated Pecorino Romano or even a mild cheddar can be used, though they will alter the flavor profile.
- Sweetener Swap: If Splenda isn’t your preference, feel free to use a finely granulated alternative like erythritol or monk fruit sweetener in the same quantity.
- Spicy Kick: A pinch of red pepper flakes added to the yolk mixture will give your crust a subtle heat.
FAQs (Frequently Asked Questions)
Q: Why is it important to use stiff peaks for the egg whites?
A: Stiff peaks provide the structure and lift for this flourless crust. Without them, the crust will be dense and gummy.
Q: Can I use whole eggs instead of separating them?
A: No, separating the eggs is crucial. The egg whites are whipped to incorporate air, while the yolks bind and add richness. Using whole eggs will not yield the same light texture.
Q: My crust didn’t get very crispy. What could I have done differently?
A: Ensure your oven was properly preheated and consider using a darker, heavier pizza pan. Also, don’t overcrowd the crust with very wet toppings, as this can steam the crust.
Q: How can I make this crust dairy-free?
A: This recipe relies on cream cheese and Parmesan, making it difficult to make dairy-free without significant recipe adjustment. A different approach, perhaps using a base of almond flour and psyllium husk, would be needed for a truly dairy-free flourless crust.
Q: Is this crust suitable for a low-carb diet?
A: Yes, with its minimal carbohydrate content, this flourless pizza crust is an excellent option for those following a low-carbohydrate or ketogenic diet.
Final Thoughts
This flourless pizza crust is more than just a recipe; it’s a culinary bridge. It’s a testament to the fact that dietary restrictions don’t have to mean deprivation. It’s an invitation to gather, to share, and to enjoy the simple pleasure of pizza, regardless of what’s on your plate. I encourage you to try this recipe, to experience its unique tenderness, and to top it with your wildest pizza dreams. Share your creations, your favorite topping combinations, and your experiences. Perhaps it will inspire a new favorite in your own kitchen, just as it has in mine.