
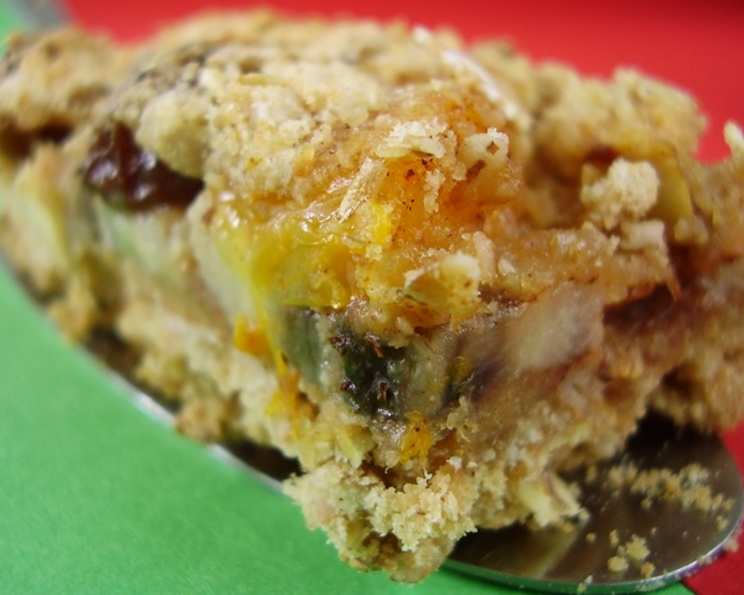
Fresh Fruit Fiesta Bars: A Burst of Sunshine in Every Bite
There are certain aromas that, for me, instantly transport me back to my grandmother’s kitchen, a place perpetually filled with the comforting scents of baking and the warmth of her love. This recipe for Fresh Fruit Fiesta Bars is one of those olfactory anchors. I remember, as a child, peeking over the counter as she meticulously layered the fragrant oat and cinnamon base, her hands dusted with flour. The vibrant colors of the fruit topping – the golden mandarin oranges, the pearly slices of banana, and the jewel-toned raisins – were like a miniature edible rainbow. It wasn’t just a dessert; it was a celebration of the season, a testament to simple ingredients coming together in perfect harmony, and a sweet memory I cherish to this day.
Recipe Overview
- Prep Time: 15 minutes
- Cook Time: 35 minutes
- Total Time: 50 minutes
- Servings: 36 bars
- Yield: One 13×9 inch pan
- Dietary Type: Contains Wheat, Dairy (can be adapted)
Ingredients
Gather your ingredients for this delightful fruit bar. The base provides a wonderfully sturdy and slightly chewy foundation, while the topping is a vibrant medley of fresh and dried fruits, kissed with cinnamon.
For the Base:
- 1 ¾ cups all-purpose flour
- 1 ½ cups old-fashioned oats
- ½ teaspoon ground cinnamon
- ¾ cup butter or ¾ cup margarine, softened
- 1 cup packed brown sugar
For the Topping:
- 10 ounces canned mandarin oranges, drained
- 1 banana, sliced
- 1 apple, cubed and peeled
- ½ cup raisins
- ¼ cup orange juice
- 1 teaspoon ground cinnamon
Equipment Needed
- 13×9 inch baking pan
- Large mixing bowls (at least two)
- Electric mixer or sturdy whisk
- Measuring cups and spoons
- Spatula or offset spatula
- Wire cooling rack
- Sharp knife
- Cutting board
Instructions
Creating these Fresh Fruit Fiesta Bars is a straightforward process, blending simple pantry staples with the vibrant sweetness of fresh fruit. Follow these steps carefully, and you’ll be rewarded with a delightful treat.
-
Preheat Your Oven: Begin by preheating your oven to 375 degrees Fahrenheit (190 degrees Celsius). This consistent temperature is crucial for achieving the perfect texture for both the base and the topping.
-
Prepare the Base Dry Ingredients: In a large mixing bowl, combine the all-purpose flour, old-fashioned oats, and ground cinnamon. Whisk them together gently to ensure the cinnamon is evenly distributed throughout the dry ingredients. This forms the aromatic backbone of your crust.
-
Cream the Butter and Sugar: In a separate, larger bowl, cream together the softened butter (or margarine) and the packed brown sugar. Use an electric mixer or a sturdy whisk to beat them until the mixture is smooth and creamy. This process incorporates air, which contributes to the tenderness of the base.
-
Combine Base Ingredients: Gradually add the dry flour mixture to the creamed butter and sugar. Mix until just combined and a crumbly dough forms. Be careful not to overmix, as this can result in a tough crust.
-
Reserve Base Mixture: Before pressing the base into the pan, carefully measure out and set aside 1 ¼ cups of the crumbly base mixture. This reserved portion will be sprinkled over the fruit topping later, adding another layer of texture and flavor.
-
Form the Base Layer: Take the remaining base mixture and press it evenly into the bottom of an ungreased 13×9 inch cake pan. Use your fingers or the flat bottom of a measuring cup to create a compact and even layer. This will form the foundation of your fruit bars.
-
Initial Bake of the Base: Place the pan with the pressed base into your preheated oven and bake for 15 minutes. This initial bake helps to set the crust and prevent it from becoming soggy under the fruit topping.
-
Prepare the Fruit Topping: While the base is baking, prepare the vibrant fruit topping. In a medium bowl, gently combine the drained canned mandarin oranges, sliced banana, peeled and cubed apple, and raisins.
-
Add Flavor to the Topping: Drizzle the orange juice over the fruit mixture. Sprinkle the ground cinnamon over the top. Gently toss everything together to coat the fruits evenly with the liquid and spice. The orange juice will help meld the flavors and add a touch of moisture.
-
Assemble the Bars: Once the base has baked for 15 minutes, carefully remove it from the oven. Spread the fruit topping evenly over the warm base. Ensure you leave a small margin, about a ¼ inch from the edges of the pan, to prevent the topping from oozing out excessively during baking.
-
Add the Reserved Crumble: Sprinkle the reserved base mixture evenly over the fruit topping. Gently pat it down so it adheres to the fruit and creates a cohesive top layer. This adds a delightful crunch and reinforces the buttery flavor of the base.
-
Second Bake: Return the pan to the preheated oven and bake for an additional 15 to 20 minutes, or until the top is golden brown and the fruit topping is bubbling slightly around the edges. The exact time will depend on your oven.
-
Cool Completely: Once baked to perfection, carefully remove the pan from the oven. Place the pan on a wire cooling rack to cool completely. This is a crucial step; trying to cut the bars while they are warm will result in a messy, broken-apart situation. Patience here is key to clean, neat bars.
-
Cut and Serve: After the bars have cooled completely (this can take a couple of hours), you can cut them into desired bar shapes. Use a sharp knife for clean cuts.
Expert Tips & Tricks
- Butter vs. Margarine: While both will work, using real butter will impart a richer, more authentic flavor to the base. If you opt for margarine, ensure it’s a good quality stick margarine rather than a soft spread for the best texture.
- Oat Texture: For a chewier base, use old-fashioned oats. If you prefer a finer texture, you can pulse the oats briefly in a food processor before adding them to the dry ingredients.
- Fruit Prep: Ensure your apple is peeled and cut into relatively small cubes so it softens nicely during baking. Similarly, slice the banana just before adding it to the fruit mixture to prevent browning.
- Even Spreading: When pressing the base into the pan, aim for an even layer. An uneven base can lead to some bars being too crumbly and others too dense.
- Cooling Patience: I cannot stress enough the importance of letting these bars cool completely. Resist the urge to cut them while warm; it’s the most common mistake that leads to a less-than-perfect presentation.
Serving & Storage Suggestions
These Fresh Fruit Fiesta Bars are wonderfully versatile. They are delicious served on their own as a delightful snack or dessert. For an extra touch of indulgence, consider serving them slightly warmed with a dollop of whipped cream, a scoop of vanilla ice cream, or a drizzle of caramel sauce. They also pair beautifully with a cup of hot tea or coffee.
For storage, these bars are best kept at room temperature in an airtight container for up to 2 days. If you live in a very warm climate, or if you’ve used particularly ripe fruit, refrigerating them might be a better option to prevent spoilage. In the refrigerator, they will stay fresh for up to 4 days. To reheat, you can gently warm individual bars in a microwave for a few seconds or in a low oven for a few minutes. They also freeze well; wrap individual bars tightly in plastic wrap and then place them in a freezer-safe bag or container for up to 2 months. Thaw at room temperature or in the refrigerator.
Nutritional Information
Here’s an approximate nutritional breakdown per bar, assuming the yield of 36 bars. Please note that these are estimates and can vary based on the specific ingredients and brands used.
| Nutrient | Amount per Serving | % Daily Value |
|---|---|---|
| Calories | 107 kcal | 5% |
| Total Fat | 4.1 g | 5% |
| Saturated Fat | 2.5 g | 13% |
| Cholesterol | 10.2 mg | 3% |
| Sodium | 30.6 mg | 1% |
| Total Carbohydrate | 16.7 g | 6% |
| Dietary Fiber | 0.9 g | 3% |
| Sugars | 8.8 g | 18% |
| Protein | 1.4 g | 3% |
Note: Percent Daily Values are based on a 2,000 calorie diet.
Variations & Substitutions
While this recipe is wonderfully balanced as is, feel free to get creative and adapt it to your preferences!
- Nutty Base: For added texture and flavor, stir in ½ cup of chopped nuts (like walnuts or pecans) into the reserved base mixture before sprinkling it on top.
- Different Fruits: Feel free to swap out the fruits based on what’s in season or your personal favorites. Peaches, pears, berries, or even pineapple chunks would be delicious additions or substitutions. Just ensure they are cut into similar-sized pieces.
- Citrus Zest: For an extra layer of bright flavor, add the zest of one orange or lemon to the fruit topping mixture.
- Spice it Up: If you enjoy a bit more spice, consider adding a pinch of nutmeg or ginger to the fruit topping along with the cinnamon.
- Gluten-Free Option: To make these gluten-free, you would need to substitute the all-purpose flour with a gluten-free all-purpose flour blend. Ensure your oats are certified gluten-free as well.
FAQs
Q: Can I use fresh mandarin oranges instead of canned?
A: Yes, you can. However, you will need to peel and segment them yourself, and they may have a different moisture content, so you might need to adjust the orange juice slightly.
Q: My base seems too dry to press into the pan. What should I do?
A: Ensure your butter or margarine was truly softened. If it’s still too dry, you can add a tablespoon of milk or orange juice to help it bind together.
Q: The fruit topping is a bit wet. Will it affect the baking?
A: As long as you’ve drained the canned mandarins well, a little moisture is expected. The reserved crumble on top will help absorb excess liquid, and the bake time should be sufficient to cook it through.
Q: How can I get cleaner cuts when slicing the bars?
A: Ensure the bars are completely cool. Using a sharp, long knife and wiping the blade clean between cuts can also help achieve sharp, clean edges.
Q: Can I make these bars ahead of time?
A: Absolutely! These bars are excellent candidates for making a day or two in advance. They hold up well and the flavors have a chance to meld.
Final Thoughts
These Fresh Fruit Fiesta Bars are more than just a recipe; they are an invitation to create joyful moments in the kitchen and share them with loved ones. They embody the beauty of simple, honest ingredients coming together to create something truly special. Whether you’re reminiscing about childhood favorites or embarking on a new culinary adventure, I encourage you to whip up a batch of these sun-kissed bars. They are a perfect accompaniment to any gathering, a welcome treat after a meal, or simply a delightful way to brighten any afternoon. Bake them, share them, and savor every delightful bite!