
The Art of Freshness: Crafting Organic Raw Milk Mozzarella at Home
There’s a magic that happens when you transform simple, pure ingredients into something truly extraordinary. For me, that magic is most potent when I’m coaxing beautiful, creamy mozzarella from raw organic milk. I remember my first attempt years ago, the anticipation building as the curds began to form, the kitchen filling with a subtle, milky aroma. It wasn’t just about the cheese; it was about reconnecting with a culinary tradition, about understanding the fundamental alchemy of food. The resulting ball of fresh mozzarella, warm and yielding, was unlike anything I’d ever tasted from a store – a revelation of pure, unadulterated dairy goodness.
Recipe Overview
- Prep Time: 30 minutes
- Cook Time: 45 minutes
- Total Time: 1 hour 15 minutes (plus setting time)
- Servings: 4-6
- Yield: 1 1/2 pounds
- Dietary Type: Vegetarian, Gluten-Free, Organic
Ingredients
- 1 1/2 teaspoons citric acid, powder
- 6 quarts raw grass-fed organic whole milk
- 1/4 teaspoon liquid rennet
- 2-3 tablespoons kosher salt
Equipment Needed
- Large stainless steel pot
- Small glass bowl or measuring cup
- Stainless steel spoon
- Long-bladed knife
- Colander
- Heat-resistant gloves (recommended)
- Three bowls (for hot water, cool water, and brine)
- Paper towels
Instructions
The journey to homemade mozzarella begins with proper sanitation. Thoroughly wash all equipment in hot, soapy water and rinse well. If you have a dishwasher, the sanitizing rinse cycle is an excellent way to ensure everything is pristine.
-
Prepare the Citric Acid Solution: In a small glass bowl or measuring cup, dissolve the 1 1/2 teaspoons of citric acid, powder in 1/4 cup of lukewarm water. Stir with a stainless-steel spoon until completely dissolved.
-
Combine Milk and Citric Acid: Pour the 6 quarts of raw grass-fed organic whole milk into a large stainless steel pot. Add the dissolved citric acid solution. Gently stir with an up-and-down motion to blend the ingredients well.
-
Warm the Milk: Place the pot over medium heat. Warm the milk mixture to 90ºF, stirring gently and continuously to prevent any scorching on the bottom of the pot. Once it reaches the target temperature, remove the pot from the heat.
-
Prepare and Add Rennet: In a separate small cup, dilute the 1/4 teaspoon of liquid rennet in 1/4 cup of cool water. Pour this diluted rennet into the warmed milk. Using an up-and-down motion with your spoon or a clean hand, draw the rennet down into the milk until it is thoroughly blended. Cover the pot and let the mixture set undisturbed for 45 minutes.
-
Check for a Clean Break: After 45 minutes, gently probe the curd. It should have firmed up, resembling a block of tofu, and pull away cleanly from the sides of the pot when you insert a knife and lift. If the curd is still too fragile and breaks apart easily, cover the pot again and allow it to set for an additional 15 minutes, or until a clean break is achieved.
-
Cut the Curds: Using a long-bladed knife, carefully cut the firmed curd into 1/2-inch cubes. Allow the cut curds to stand for 5 minutes to firm up further.
-
Cook the Curds: Place the pot back over low heat. Slowly warm the curds to 106ºF, stirring gently and continuously. It is crucial that this warming process takes approximately 15 minutes. Adjust the heat as needed to maintain a slow, steady rise in temperature. As the curds warm, try to avoid breaking them up too much. You will notice that they begin to clump together and separate more completely from the yellow whey.
-
Continue Stirring Off-Heat: Once the temperature reaches 106ºF, remove the pot from the heat. Continue stirring the curds gently for 5 more minutes.
-
Rest the Curds: Let the curds stand for an additional 5 minutes.
-
Prepare for Stretching: Meanwhile, in a separate pot, bring 2 to 4 quarts of water to a low boil. Turn off the heat.
-
Drain the Whey: Carefully drain off the whey from the curds using a colander. Allow the curds to drain for 15 minutes.
-
Prepare the Brine: While the curds are draining, prepare your brining solution. In a cup, dissolve 2 to 3 tablespoons of kosher salt in a cup of hot water. Once dissolved, add 1 quart of cool water to create your brine mixture.
-
Set Up Stretching Stations: Arrange three bowls: one with the hot water (from step 10), one with cool water, and the third with your prepared brine mixture.
-
Begin Stretching: Place about 1/6 of the curd mass into the bowl of hot water, just enough to cover it. Wearing heat-resistant gloves is highly recommended for this step. Alternatively, you can use a long-handled wooden spoon. Submerge the curds in the hot water and begin to lightly stretch them. You’ll feel the cheese become very soft and pliable. Continue pulling and folding the cheese back on itself, stretching it repeatedly until it becomes smooth and shiny.
-
Adding Hot Water: If the cheese becomes difficult to stretch, add more hot water to the bowl to help it become more pliable. The more you work the curd at this stage, the drier your mozzarella will be.
-
Shape the Mozzarella: Once the cheese reaches a smooth and shiny consistency, use your hands to shape it into a single ball or pinch off smaller portions to create bocconcini-sized cheeses.
-
Cool the Mozzarella: When the cheese is shaped to your liking, carefully place it in the bowl of cool water (not ice-cold water) for 5 minutes to help it set.
-
Brine the Mozzarella: After cooling, transfer the mozzarella to the bowl containing the brine mixture. Let it sit for a couple of minutes to absorb the salt.
-
Drain and Serve: Remove the mozzarella from the brine and drain it on paper towels. Your fresh, homemade organic raw milk mozzarella is now ready to be enjoyed immediately or wrapped and refrigerated.
Expert Tips & Tricks
- Water Quality is Key: Always use non-chlorinated water for this process. Chlorine can kill the beneficial enzymes in the milk and rennet, hindering proper curd formation. If your tap water is chlorinated, let it sit out in an open container for 24 hours to allow the chlorine to dissipate, or use filtered water.
- Batch Preparation: You can make a large batch of the curd mass and cut it into single-pound portions. Wrap these portions tightly and freeze them. When you’re ready for more fresh mozzarella, simply place a frozen portion in the refrigerator to thaw overnight. The next day, proceed with heating the water for stretching, and you’ll have fresh mozzarella in no time!
- Gentle Handling: During the curd-cooking phase (steps 7 and 8), be as gentle as possible. Overworking or breaking up the curds too much can result in a tougher, drier cheese.
- Achieving Desired Texture: The amount of time and effort you put into stretching the cheese directly influences its final texture. Less stretching results in a softer, more liquidy mozzarella, while more aggressive stretching will yield a firmer, drier cheese. Experiment to find your preference.
- No Microwave, Please! If you care about the nutritional value of your food, avoid microwaving your fresh mozzarella. Microwave ovens can destroy beneficial nutrients.
Serving & Storage Suggestions
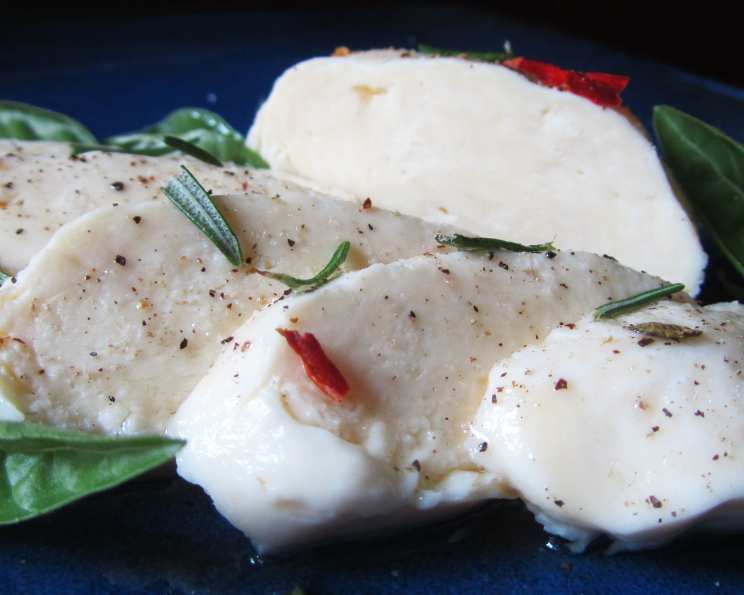
Freshly made mozzarella is best enjoyed the day it’s made. Serve it torn over a Caprese salad with ripe tomatoes, fresh basil, and a drizzle of good olive oil. It’s also exquisite on a simple Margherita pizza, in pasta dishes, or simply enjoyed with crusty bread.
If you have leftovers, wrap the mozzarella tightly in plastic wrap or place it in an airtight container. It will keep in the refrigerator for 2-3 days. While it’s still delicious, its texture will soften over time. For longer storage, consider freezing portions of the stretched cheese before brining (as mentioned in the tips), though the texture may change slightly upon thawing.
Nutritional Information
(Please note: This is an approximate nutritional breakdown and can vary based on the specific milk and ingredients used.)
| Nutrient | Amount per Serving (approx.) | % Daily Value |
|---|---|---|
| Calories | 350 kcal | 18% |
| Total Fat | 25g | 32% |
| Saturated Fat | 15g | 75% |
| Cholesterol | 90mg | 30% |
| Sodium | 250mg | 11% |
| Total Carbohydrate | 4g | 1% |
| Sugars | 4g | 4% |
| Protein | 26g | 52% |
Variations & Substitutions
While this recipe focuses on the purest form of mozzarella, you can infuse it with flavor during the stretching process. Consider adding fresh herbs like finely chopped basil, parsley, or chives to the cheese as you stretch it. A pinch of red pepper flakes can add a subtle kick.
FAQs
Q: Why do I need to use raw milk?
A: Raw milk contains natural enzymes and proteins that contribute to a superior texture and flavor profile in homemade mozzarella. Pasteurized milk, especially ultra-pasteurized, can be more challenging to work with and may not yield the same results.
Q: What is rennet and where can I find it?
A: Rennet is an enzyme that coagulates milk, forming curds. You can typically find liquid animal rennet or vegetable rennet at specialty cheese-making supply stores, health food stores, or online.
Q: My mozzarella is too dry and rubbery. What went wrong?
A: This often happens if the curds were overheated, overworked during the cooking phase, or stretched too aggressively. Ensure you’re heating slowly and gently, and don’t over-stretch the cheese.
Q: Can I use pre-shredded cheese to make mozzarella?
A: No, this recipe relies on the natural properties of whole milk to create fresh mozzarella from scratch. Pre-shredded cheeses contain anti-caking agents that would prevent proper melting and stretching.
Q: How long does the mozzarella last?
A: Fresh mozzarella is best consumed within 1-3 days of making. Its texture and flavor are optimal when it’s young and supple.
Final Thoughts
Crafting your own organic raw milk mozzarella is a deeply satisfying experience, a testament to the beauty of simple ingredients treated with care. The aroma that fills your kitchen, the tactile sensation of stretching the warm cheese, and finally, that first incredible bite – it’s a culinary journey worth taking. Serve this glorious cheese with passion, perhaps alongside a crisp Italian white wine, and savor the pure taste of homemade goodness. Let this recipe be an invitation to explore the heart of traditional cheesemaking and to taste the true essence of milk.