
I Can’t Believe It’s Gluten-Free Bread!
The quest for truly good gluten-free bread can feel like a culinary odyssey, fraught with loaves that crumble like ancient ruins or possess the density of a brick. I remember a particularly disheartening attempt years ago, a beige disc that promised sustenance but delivered only disappointment. It was during that period of gluten-free experimentation that a friend, with a knowing glint in her eye, shared this recipe. The first bite was a revelation – a tender crumb, a delightful crust, and a flavor that genuinely made me pause and think, “I can’t believe it’s gluten-free!” This bread has since become a staple, a testament to how achievable deliciousness can be, even without gluten.
Recipe Overview
- Prep Time: 1 hour 10 minutes
- Cook Time: 30 minutes
- Total Time: 1 hour 40 minutes (plus cooling time)
- Servings: 1 loaf
- Yield: 1 loaf
- Dietary Type: Gluten-Free
Ingredients
This recipe relies on a specific blend of flours and leavening agents to achieve its remarkable texture.
- 2 cups rice flour, white
- 1 cup Bob’s Red Mill gluten-free all-purpose baking flour
- 3 teaspoons xanthan gum
- 1 ½ teaspoons salt
- 2 tablespoons sugar
- 3 eggs
- 2 tablespoons butter, melted
- 1 teaspoon vinegar
- 1 ½ cups warm water (around 105-115°F or 40-46°C)
- 2 tablespoons yeast (active dry or instant)
Equipment Needed
- Bread machine (with a “dough” or “bread” setting)
- Mixing bowl
- Rubber spatula
- 9×5 inch loaf pan
- Tea towel or plastic wrap for covering
- Oven
- Wire cooling rack
Instructions
Crafting this exceptional gluten-free bread is a straightforward process, primarily guided by your trusty bread machine. The key lies in precise measurements and mindful observation.
- Prepare the Wet Ingredients in the Bread Machine: Begin by placing the 3 eggs into the bread machine pan. If you have a bread machine, set it to the “dough” cycle and allow it to beat the eggs for you. This gentle agitation helps to incorporate them thoroughly.
- Add Remaining Wet Ingredients: Once the eggs have been mixed, add the 2 tablespoons of melted butter, 1 teaspoon of vinegar, and 1 ½ cups of warm water to the bread machine pan.
- Incorporate the Dry Ingredients: In a separate mixing bowl, whisk together the 2 cups of white rice flour, 1 cup of Bob’s Red Mill gluten-free all-purpose baking flour, 3 teaspoons of xanthan gum, 1 ½ teaspoons of salt, and 2 tablespoons of sugar. Ensure these dry ingredients are thoroughly combined.
- Add Dry Ingredients and Yeast to Bread Machine: Carefully spoon the combined dry ingredients on top of the wet ingredients in the bread machine pan. Make a small well in the center of the dry ingredients and add the 2 tablespoons of yeast.
- Start the Dough Cycle: Turn the bread machine back on to the “dough” setting.
- Scrape and Monitor the Dough: As the machine begins to mix, you will notice a very loose and sticky dough forming. This is completely normal for gluten-free bread. Using a rubber spatula, scrape down the sides of the dough frequently to ensure all ingredients are incorporated. The recipe recommends letting the machine mix the dough for about 4 minutes, continuing to scrape often. After this initial mixing period, turn the bread machine off.
- Prepare the Loaf Pan: Generously grease a 9×5 inch loaf pan.
- Transfer Dough to Pan: The dough will be very loose and sticky. Pour the dough into the prepared loaf pan. Use your rubber spatula or a wet hand to smooth over the top of the dough, making it as even as possible.
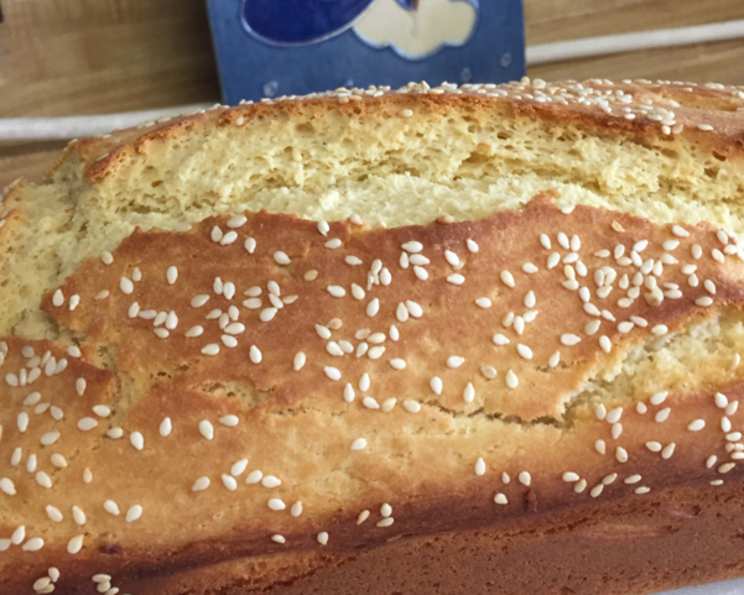
- Optional Toppings: If desired, you can brush the top with a little melted butter or sprinkle with seeds (such as sesame, poppy, or sunflower seeds) at this stage.
- First Rise: Cover the loaf pan with a clean tea towel or plastic wrap. Place the pan on top of your stove (before preheating the oven). Allow the dough to rise for half an hour, or until it has doubled in size. This allows the yeast to work its magic and create air pockets within the dough.
- Preheat the Oven: While the bread is rising, preheat your oven to 400 degrees Fahrenheit (200 degrees Celsius).
- Bake the Bread: Once the bread has doubled in size, place the loaf pan in the preheated oven. Bake for 30 minutes, or until the bread is golden brown and fragrant. The aroma filling your kitchen will be a delightful indicator of its doneness.
- Cooling and Serving: As soon as the bread comes out of the oven, immediately remove it from the pan. If left in the hot pan, the steam trapped inside can make the bottom crust soggy. Place the loaf on a wire cooling rack to cool completely.
Expert Tips & Tricks
The beauty of this recipe lies in its inherent simplicity, but a few chef’s touches can elevate it further.
- Xanthan Gum is Your Friend: Don’t be tempted to skip the xanthan gum. It’s the crucial binder in gluten-free baking, mimicking the elasticity that gluten provides. While it can be pricey, a little goes a long way, and a bag will last you through many baking adventures.
- Warm Water Matters: The temperature of your water is critical for activating the yeast. Too hot and you’ll kill it; too cold and it won’t awaken properly. Aim for a temperature that feels comfortably warm to the touch, around 105-115°F (40-46°C).
- Don’t Overmix (After the Initial Machine Stage): The recipe specifically calls for turning off the bread machine after a short mixing period. This is because overworking gluten-free dough can sometimes lead to a tougher texture. Trust the process; the dough is meant to be sticky.
- Visual Cues for Doneness: While the 30-minute bake time is a reliable guide, you can also tap the bottom of the loaf once it’s out of the oven. A hollow sound indicates that the bread is fully baked.
- The Importance of Immediate Removal: This cannot be stressed enough. The residual heat in the pan will continue to cook the bottom of the bread, potentially making it gummy. Promptly transferring it to a cooling rack ensures a crispier crust all around.
Serving & Storage Suggestions
This gluten-free bread is wonderfully versatile and shines in various applications.
- Serving: Allow the bread to cool completely before slicing. This ensures the internal structure has set, preventing a crumbly mess. It’s fantastic toasted for breakfast, served warm with a smear of butter or jam. It also makes for structurally sound sandwiches, holding up to hearty fillings without falling apart. As mentioned in the original notes, it’s also a superb base for decadent French toast.
- Storage: Once completely cooled, slice the bread. This makes it easier to grab a slice or two as needed. Store the sliced bread in an airtight container or a ziplock bag at room temperature for 2-3 days. For longer storage, freeze the slices. This bread freezes exceptionally well and can be stored in the freezer for up to 2-3 months. Simply toast slices directly from frozen.
Nutritional Information
Here is an approximate nutritional breakdown for this gluten-free bread. Please note that actual values can vary based on specific ingredient brands and precise measurements.
| Nutrient | Amount per Serving (approx.) | % Daily Value |
|---|---|---|
| Calories | 1751.1 kcal | |
| Calories from Fat | 392 kcal | |
| Total Fat | 43.6 g | 67% |
| Saturated Fat | 20.7 g | 103% |
| Cholesterol | 619.1 mg | 206% |
| Sodium | 3927.2 mg | 163% |
| Total Carbohydrate | 289.4 g | 96% |
| Dietary Fiber | 14 g | 56% |
| Sugars | 26.1 g | 104% |
| Protein | 47.6 g | 95% |
(Note: Serving size assumed for this calculation is the entire loaf for approximate total calculation. Individual slice nutrition will be significantly lower.)
Variations & Substitutions
While this recipe is specifically designed for a “fabulous” outcome with the listed ingredients, some minor adjustments can be explored with caution.
- Flour Blends: The original notes mention substituting other gluten-free flours, stating they turn out “fine” but this particular blend is “fabulous.” If you choose to experiment, aim for a similar weight ratio of starches and whole-grain gluten-free flours. Common additions might include sorghum flour or buckwheat flour for a nuttier flavor, but be aware that these can alter the texture and absorption rates. Always ensure your blend contains a binder like xanthan gum.
- Sweetness: For a slightly less sweet loaf, you can reduce the sugar by a tablespoon, but remember sugar also contributes to browning and yeast activity.
- Enrichment: For an even richer bread, you could experiment with adding an extra tablespoon of melted butter or a tablespoon of olive oil.
FAQs
Q: Why is my gluten-free bread dough so sticky?
A: Gluten-free flours absorb liquid differently than wheat flour. This dough is intentionally very wet and sticky; it’s a characteristic of successful gluten-free bread.
Q: Can I make this bread without a bread machine?
A: Yes, you can. You would mix the wet ingredients in a large bowl, then add the dry ingredients and mix until just combined. Knead gently for a few minutes to develop any structure possible. The rest of the steps, including the rise and baking, would remain the same.
Q: What is the role of vinegar in this recipe?
A: The vinegar acts as an acid that reacts with the leavening agents (primarily the yeast and any potential leavening in your all-purpose blend) to help the bread rise and create a more tender crumb.
Q: My bread didn’t rise much. What could have gone wrong?
A: The most common culprits are inactive yeast or water that was too hot or too cold. Ensure your yeast is fresh and your water is at the correct warm temperature. Also, make sure the bread machine’s dough cycle is functioning correctly.
Q: Can I use different types of rice flour?
A: While white rice flour is recommended for its neutral flavor and light texture, brown rice flour can be used for a slightly nuttier flavor and denser crumb. You might need to adjust the liquid slightly if using brown rice flour.
Final Thoughts
This “I Can’t Believe It’s Gluten-Free Bread” is more than just a recipe; it’s a triumph of gluten-free baking. It’s the kind of bread that can reignite your love for homemade loaves, whether you’re managing a gluten intolerance or simply seeking a delicious alternative. Serve it warm with your favorite butter, create impressive sandwiches, or transform it into the most glorious French toast you’ve ever tasted. I encourage you to give it a try – I have a feeling it will become a beloved staple in your kitchen too. Don’t hesitate to share your triumphs and perhaps even your creative adaptations!