
The Irresistible Charm of Individual Oreo Cheesecakes
There’s a certain magic that happens when the familiar, comforting crunch of an Oreo cookie meets the decadent, silky smooth embrace of a classic cheesecake. For me, this culinary alchemy is a potent trip down memory lane. I recall countless birthday parties and family gatherings where a towering, meticulously decorated cheesecake was the undisputed star. But the sheer joy and individual indulgence of these miniature Oreo cheesecakes always held a special place in my heart. Each perfectly portioned treat, crowned with a drizzle of chocolate and a dollop of whipped cream, felt like a personal invitation to pure bliss.
Recipe Overview
- Prep Time: 20 minutes
- Cook Time: 15-20 minutes
- Total Time: 35-40 minutes (plus chilling time)
- Servings: 24 mini cheesecakes
- Yield: 24 mini cheesecakes
- Dietary Type: Dessert
Ingredients
This recipe yields a delightful batch of 24 individual Oreo cheesecakes, perfect for sharing (or not!).
For the Oreo Crust
- 24 Oreo cookies (about 3 standard sleeves)
For the Cheesecake Filling
- 3 (8-ounce) packages cream cheese, softened to room temperature
- 3⁄4 cup granulated sugar
- 3 large eggs
- 1⁄4 cup chocolate chips, melted (for drizzling)
- Whipped cream (optional, for topping)
Equipment Needed
To bring these delightful treats to life, you’ll need a few essential kitchen tools:
- Cupcake tins (standard size, 24 cups)
- Cupcake wrappers (24)
- Medium bowl
- Electric mixer (handheld or stand mixer)
- Rubber spatula
- Measuring cups and spoons
- Small microwave-safe bowl (for melting chocolate chips)
- Wire rack for cooling
Instructions
Crafting these individual Oreo cheesecakes is a straightforward process that promises a beautiful and delicious outcome. Follow these steps carefully for optimal results.
- Prepare the Cupcake Tins: Begin by lining 24 standard cupcake tins with cupcake wrappers. This step ensures that your cheesecakes release easily and maintain their charming presentation.
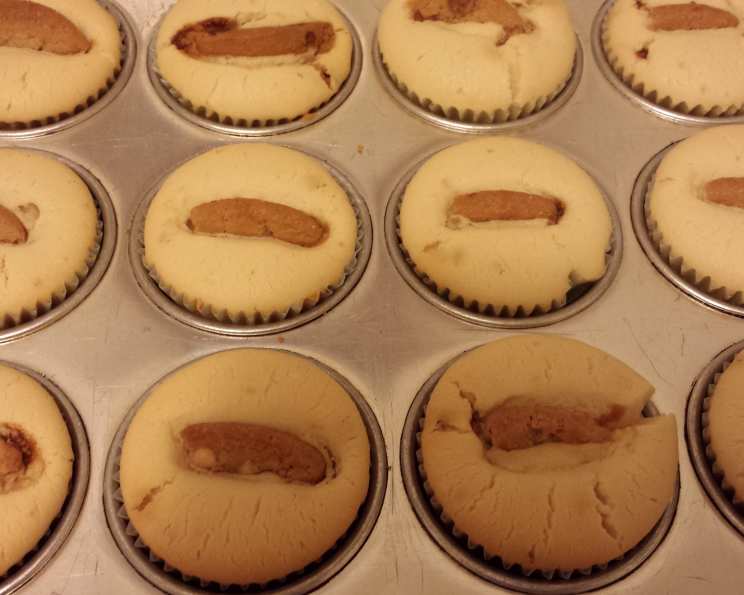
- Create the Oreo Base: Place 1 whole Oreo cookie at the bottom of each cupcake wrapper. If you prefer a more dispersed cookie texture, you can coarsely chop the Oreos and sprinkle them into the bottom of each wrapper instead. This forms the delightful chocolatey foundation for your cheesecakes.
- Mix the Cream Cheese Base: In a medium bowl, combine the softened cream cheese and granulated sugar. Using an electric mixer, beat these ingredients together until the mixture is smooth and well-blended, ensuring no lumps of cream cheese remain. This step is crucial for achieving a silky smooth cheesecake filling.
- Incorporate the Eggs: Add the eggs to the cream cheese mixture one at a time. After each egg is added, mix well until fully incorporated. Be careful not to overmix once the eggs are in, as this can introduce too much air and lead to cracking.
- Fill the Cupcake Wrappers: Spoon the cream cheese mixture evenly into each of the prepared cupcake wrappers, filling them about two-thirds of the way full. This amount will allow the cheesecakes to rise slightly during baking without overflowing.
- Bake to Perfection: Preheat your oven to 350°F (175°C). Carefully place the filled cupcake tins into the preheated oven. Bake for 15 to 20 minutes. The cheesecakes are done when the edges are set and the centers are still slightly jiggly. They will continue to set as they cool.
- Chill and Firm: Once baked, remove the cupcake tins from the oven and place them on a wire rack to cool slightly. Once they are no longer piping hot, transfer the cheesecakes (still in their wrappers) to the refrigerator. Allow them to chill for at least one hour to firm up completely. This chilling period is essential for achieving the characteristic dense and creamy texture of cheesecake.
- Prepare the Chocolate Drizzle: While the cheesecakes are chilling, melt the 1/4 cup of chocolate chips. You can do this by placing them in a small microwave-safe bowl and microwaving in 30-second intervals, stirring between each interval, until smooth and fully melted.
- Garnish and Serve: Once the cheesecakes have firmed up, you can remove them from the refrigerator. Drizzle the melted chocolate over the top of each cheesecake. For an extra touch of indulgence, top with a small spoonful of whipped cream, if desired.
Expert Tips & Tricks
Elevate your individual Oreo cheesecakes from great to extraordinary with these professional insights:
- Room Temperature is Key: Ensure your cream cheese is truly at room temperature. This is non-negotiable for a lump-free, velvety smooth filling. Cold cream cheese will resist blending, leading to a less-than-ideal texture. If you forget to take it out of the fridge in time, you can gently soften it by cutting it into cubes and letting it sit for about 15-20 minutes, or by carefully microwaving it on low power for very short bursts (10-15 seconds), checking frequently.
- Don’t Overmix the Eggs: Once the eggs are added to the cream cheese mixture, mix just until they are incorporated. Overmixing can incorporate too much air, which can cause the cheesecakes to puff up excessively and then crack as they cool.
- The Jiggle Test: The “jiggle test” is your best friend when determining doneness. The centers of the cheesecakes should have a slight wobble, like Jell-O, when gently shaken. They will firm up significantly as they cool in the refrigerator. Overbaking will result in a dry, crumbly texture.
- Cooling for Success: Allow the cheesecakes to cool at room temperature for a bit before refrigerating. This gradual cooling process helps prevent a drastic temperature change that can also contribute to cracking.
- Perfect Drizzle: For a clean drizzle, use a spoon or a small piping bag with a very small tip. If your melted chocolate becomes too thick, add a tiny drop of neutral oil (like vegetable or canola) and stir until smooth.
Serving & Storage Suggestions
These individual Oreo cheesecakes are a delight to serve and a dream to store.
Serving: Present these little beauties on a platter for an elegant dessert spread. They are perfectly self-contained, making them ideal for parties, potlucks, or as a special treat for a movie night. A dusting of cocoa powder or a few chocolate shavings can add an extra decorative flair.
Storage: Leftover cheesecakes can be stored in an airtight container in the refrigerator for up to 3-4 days. They are best enjoyed chilled, as their texture and flavor are most pronounced when cold. Freezing is not recommended as the texture of cheesecake can change upon thawing.
Nutritional Information
Here’s an estimated nutritional breakdown per serving (this is a general estimate and can vary based on specific ingredients used):
| Nutrient | Amount per Serving | % Daily Value |
|---|---|---|
| Calories | 192.6 kcal | |
| Calories from Fat | 118 | |
| Total Fat | 13.1 g | 20% |
| Saturated Fat | 6.7 g | 33% |
| Cholesterol | 54.5 mg | 18% |
| Sodium | 158.1 mg | 6% |
| Total Carbohydrate | 16.7 g | 5% |
| Dietary Fiber | 0.4 g | 1% |
| Sugars | 12.8 g | 51% |
| Protein | 3.2 g | 6% |
Variations & Substitutions
While the classic Oreo cheesecake is undeniably divine, don’t hesitate to explore some creative variations:
- Minty Twist: Add a teaspoon of peppermint extract to the cheesecake filling and use mint-flavored Oreo cookies for a refreshing mint chocolate cheesecake.
- White Chocolate Dream: Swap the dark chocolate chips for white chocolate chips in the drizzle for a sweeter, creamier topping.
- Cookie Butter Crunch: For a nutty, spiced variation, try using Biscoff cookies for the crust and a tablespoon of cookie butter swirled into the filling before baking.
- Dark Chocolate Delight: Use dark chocolate Oreos and dark chocolate chips for an intensely rich, decadent experience.
FAQs (Frequently Asked Questions)
Q: Why did my cheesecakes crack on top?
A: Cracking is often due to overmixing the eggs, baking at too high a temperature, or cooling the cheesecakes too quickly. Gentle mixing, proper baking temperature, and gradual cooling can help prevent this.
Q: Can I make the crust without a whole Oreo cookie at the bottom?
A: Absolutely! You can crush all the Oreos and mix them with a tablespoon or two of melted butter to form a crumb crust at the bottom of each wrapper.
Q: How do I get a perfectly smooth cheesecake filling?
A: Ensure your cream cheese is thoroughly softened. Mix the cream cheese and sugar until completely smooth before adding the eggs, and then add eggs one at a time, mixing just until incorporated.
Q: Can I make these ahead of time?
A: Yes, these cheesecakes can be made a day in advance and kept refrigerated. The flavors meld beautifully overnight.
Q: What if I don’t have cupcake liners?
A: If you don’t have liners, you can lightly grease and flour the cupcake tin cups. However, the liners make for a much cleaner presentation and easier removal.
Final Thoughts
These individual Oreo cheesecakes are a testament to how beloved classics can be reimagined into something wonderfully personal and undeniably delightful. They offer the perfect balance of textures and flavors, making them a guaranteed crowd-pleaser, whether for a grand celebration or a quiet moment of self-indulgence. Bake a batch, savor the rich, creamy filling against the crunchy cookie base, and share your joy. I encourage you to experiment with the variations and discover your own favorite way to enjoy these miniature masterpieces. They pair beautifully with a strong cup of coffee, a glass of dessert wine, or simply a contented sigh of satisfaction.