
Irish Cream Sandwiches: A Taste of Cozy Indulgence
There’s a special kind of magic that happens when humble ingredients come together to create something truly extraordinary. For me, that magic often conjures memories of crisp autumn evenings, the scent of woodsmoke in the air, and the comforting warmth of a kitchen filled with the aroma of freshly baked treats. These Irish Cream Sandwiches, with their delicate chocolate wafers and lusciously smooth filling, transport me back to those moments. The first time I encountered a similar confection, it was a revelation – a perfectly balanced bite that whispered of sophistication and homestyle goodness. It’s that feeling of pure, unadulterated delight, a simple pleasure that feels like a warm hug, that I aim to capture with every batch I make.
Recipe Overview
- Prep Time: 60 minutes (plus chilling time)
- Cook Time: 6-8 minutes per batch
- Total Time: Approximately 3 hours (including chilling and assembly)
- Servings: Approximately 32 sandwich cookies
- Yield: 16-20 sandwich cookies
- Dietary Type: Contains Dairy, Egg, Gluten
Ingredients
This recipe is a delightful symphony of simple components that, when combined with care, create a truly memorable cookie. We’ll be working with a rich chocolate cookie dough and a decadent Irish cream-infused buttercream filling.
For the Chocolate Wafers:
- 3/4 cup (1.5 sticks) unsalted butter, softened
- 3/4 cup granulated sugar
- 1 large egg
- 1 teaspoon vanilla extract
- 1 1/2 cups all-purpose flour
- 3/4 cup unsweetened cocoa powder
- 1/4 teaspoon salt
For the Irish Cream Filling:
- 1 1/2 cups powdered sugar (also known as confectioners’ sugar or icing sugar)
- 1/4 cup (0.5 stick) unsalted butter, softened
- 2-3 teaspoons Irish cream liqueur (such as Baileys). If you prefer not to use alcohol or have it on hand, you can substitute with 2-3 teaspoons of strong brewed coffee for a similar flavor profile.
For Topping (Optional):
- Extra powdered sugar, for dusting
Equipment Needed
To create these delightful Irish Cream Sandwiches, you’ll want to have a few essential kitchen tools at the ready.
- Large mixing bowl
- Electric mixer (handheld or stand mixer)
- Rubber spatula or scraper
- Measuring cups and spoons
- Plastic food wrap
- Sharp knife
- Baking sheets
- Parchment paper (optional, but recommended for easier cleanup)
- Small mixing bowl
- Whisk or electric mixer for the filling
- Cooling rack
Instructions
The process of creating these Irish Cream Sandwiches is broken down into distinct stages, ensuring that each component is perfectly prepared before coming together. Patience is key, especially during the chilling phase, which is crucial for achieving the ideal wafer texture.
- Prepare the Cookie Dough: In a large mixing bowl, combine the softened butter and granulated sugar. Beat them together at medium speed using your electric mixer, scraping down the sides of the bowl often, until the mixture is light and creamy.
- Incorporate Wet Ingredients: Add the egg and vanilla extract to the butter-sugar mixture. Continue beating until everything is thoroughly combined and well incorporated.
- Add Dry Ingredients: Reduce the mixer’s speed to low. Gradually add the all-purpose flour, unsweetened cocoa powder, and salt. Beat just until the dry ingredients are well mixed into the dough. Be careful not to overmix.
- Shape the Dough Logs: Divide the dough in half. On a lightly floured surface, shape each half into an 8-inch long, square log. Aim for sides that are approximately 1 1/2 inches wide.
- Chill the Dough: Wrap each dough log tightly in plastic food wrap. Refrigerate them until they are firm. This will take at least 2 hours, but you can also prepare this step the night before (overnight is even better for a firmer dough).
- Preheat Oven and Prepare Baking Sheets: When you’re ready to bake, preheat your oven to 325°F (160°C). If you’re using parchment paper, line your baking sheets with it now. If not, ensure your baking sheets are clean and ready.
- Slice the Wafers: Using a sharp knife, carefully slice each chilled dough log into 1/4-inch thick squares.
- Arrange on Baking Sheets: Place the sliced squares onto the ungreased (or parchment-lined) baking sheets, leaving about 1 inch of space between each cookie. This allows for a little spread during baking.
- Bake the Wafers: Bake for 6 to 8 minutes, or until the edges appear set. You want them to be firm to the touch, but not overly browned. The exact time will depend on your oven.
- Cool the Wafers: Once baked, transfer the cookies from the baking sheets to a wire cooling rack to cool completely. This is a crucial step for achieving the right texture.
- Prepare the Irish Cream Filling: While the cookies are cooling, prepare the filling. In a small bowl, combine the powdered sugar and the softened butter.
- Mix the Filling: Beat the ingredients together at a low speed using your electric mixer. Gradually add the Irish cream liqueur (or brewed coffee) 1 teaspoon at a time, until you reach your desired spreading consistency. You want a smooth, spreadable filling that isn’t too runny.
- Assemble the Sandwiches: Once the chocolate wafers are completely cool, spread about 1 teaspoon of the Irish cream filling onto the flat side of one cookie. Gently top it with a second cookie, pressing together lightly to create a sandwich.
- Add Optional Topping: If desired, sprinkle a little extra powdered sugar over the assembled cookie sandwiches for a beautiful finish.
Expert Tips & Tricks
As a chef, I’ve learned that a few little adjustments can elevate any recipe. For these Irish Cream Sandwiches, here are a few thoughts from my kitchen:
- Chilling is Crucial: Don’t be tempted to skip or shorten the chilling time for the dough. A firm dough is essential for clean, even slices and for preventing the cookies from spreading too much and becoming soft. If your kitchen is warm, you might even consider a quick 15-minute chill in the freezer before slicing.
- Sharp Knife, Clean Slices: Use your sharpest knife for slicing the dough logs. This will ensure clean, uniform cuts that result in beautifully shaped cookies. A dull knife can crush the dough, leading to uneven baking.
- Oven Temperature Consistency: Ovens can vary. If you find your cookies bake too quickly or not enough, consider investing in an oven thermometer to ensure accurate temperature. The tip about not slicing too thick is particularly important here – thicker cookies will struggle to achieve that desirable crispness.
- Filling Consistency: The amount of Irish cream liqueur (or coffee) needed for the filling can vary based on the humidity and the consistency of your butter. Start with 2 teaspoons and add more only as needed to achieve a spreadable consistency. You want it firm enough to hold its shape but soft enough to spread easily.
- Make-Ahead Magic: The cookie wafers themselves can be baked, cooled completely, and then stored in an airtight container at room temperature for up to 3 days. The filling can also be made a day in advance and refrigerated; allow it to soften slightly at room temperature before assembling.
Serving & Storage Suggestions
These Irish Cream Sandwiches are a perfect treat for any occasion, from afternoon tea to holiday gatherings.
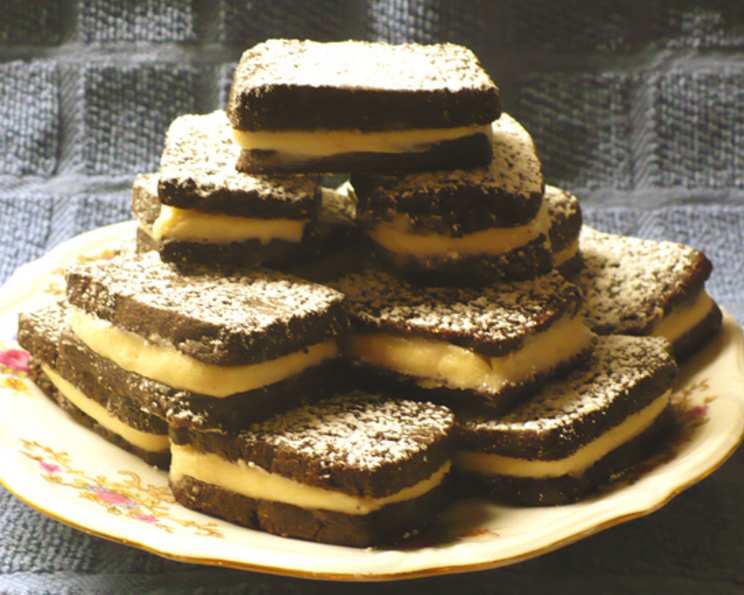
- Serving: Arrange them attractively on a platter. They look particularly festive dusted with powdered sugar, perhaps alongside a cup of coffee, hot chocolate, or even a small glass of Irish cream. They are best enjoyed at room temperature.
- Storage:
- At Room Temperature: Once assembled, store the cookie sandwiches in an airtight container at room temperature for up to 3 days. They tend to soften slightly over time as the filling moistens the cookies.
- Refrigerated: If you prefer a firmer filling, you can refrigerate the assembled cookies. However, be aware that refrigeration can sometimes lead to a slightly chewier cookie.
- Freezing: The un-filled cookie wafers can be frozen for up to 1 month. Prepare cookies as directed; cool completely. Freeze in an airtight container up to 1 month. When ready to use, thaw cookies completely. Prepare filling and assemble cookie sandwiches as directed.
Nutritional Information
Please note that nutritional information is an estimate and can vary based on specific ingredients and brands used.
| Nutrient | Amount per Serving | % Daily Value |
|---|---|---|
| Calories | 382 kcal | |
| Total Fat | 20 g | 26% |
| Saturated Fat | 12.4 g | 62% |
| Cholesterol | 67.4 mg | 22% |
| Sodium | 229.6 mg | 10% |
| Total Carbohydrate | 51.1 g | 18% |
| Dietary Fiber | 2.6 g | 9% |
| Sugars | 32.8 g | 66% |
| Protein | 4 g | 8% |
Variations & Substitutions
While this recipe is delightful as is, there’s always room for a touch of personal creativity in the kitchen!
- Spice it Up: For a hint of warmth, add a pinch of cinnamon or a tiny amount of espresso powder to the cookie dough.
- Different Liqueurs: If Irish cream isn’t your preference, try using a different coffee liqueur, hazelnut liqueur, or even a touch of orange extract in the filling for a citrusy twist.
- Chocolate Variety: For an even richer chocolate flavor in the cookies, consider using Dutch-processed cocoa powder.
FAQs
Q: Can I make these cookies without Irish cream liqueur?
A: Absolutely! You can substitute the Irish cream liqueur with 2-3 teaspoons of strong brewed coffee for a delicious coffee-flavored filling.
Q: Why are my cookies spreading too much?
A: This is often due to the butter being too soft when shaping the logs, or the dough not being chilled long enough. Ensure your butter is firm but pliable, and allow ample chilling time.
Q: How do I get clean slices for the cookie logs?
A: Use a very sharp knife and a steady hand. Chilling the dough thoroughly is the most important factor for clean slices.
Q: Can I make the cookie wafers gluten-free?
A: You can experiment with a gluten-free all-purpose flour blend, but it may alter the texture. You might need to adjust the liquid or chilling time.
Q: How long does the filling last?
A: The filling can be made up to 24 hours in advance and stored in an airtight container in the refrigerator. Allow it to soften slightly at room temperature before using.
Final Thoughts
These Irish Cream Sandwiches are more than just a cookie; they’re an experience. They’re the perfect balance of rich chocolate, creamy filling, and a whisper of warmth that makes every bite a moment of pure bliss. They are a testament to the fact that simple ingredients, treated with care and a touch of flair, can yield truly remarkable results. I encourage you to try making them, to share them with loved ones, and to savor the delicious comfort they bring. When you do, perhaps you’ll find yourself transported to your own cherished memories with every delightful morsel.