
Irish Roly Scones with Cream and Jam: A Hug in a Pastry
There are certain smells that instantly transport me back in time, and the sweet, buttery aroma of freshly baked scones is one of them. I remember my grandmother, with her apron dusted in flour and her hands forever busy, pulling trays of these glorious swirls from her oven. She’d call them “roly scones,” and the very name conjures up images of warm, comforting indulgence. The sight of them, golden brown and glistening, served with a generous dollop of real whipped cream and a spoonful of tart raspberry jam, was pure magic. It wasn’t just a treat; it was an embrace, a tangible expression of love that warmed me from the inside out, a memory I cherish with every bite.
Recipe Overview
- Prep Time: 20 minutes
- Cook Time: 25 to 35 minutes
- Total Time: 45 to 55 minutes
- Servings: 6-8
- Yield: Approximately 12-16 roly scones
- Dietary Type: Vegetarian
Ingredients
To create these delightful Irish Roly Scones, you’ll need the following:
- 6 cups flour
- 2 teaspoons baking powder
- 3/4 cup butter, cut into small chunks
- 3/4 cup sugar
- 1/2 cup raisins or 1/2 cup chocolate chips (for a delightful twist!)
- 2 large eggs
- 1/2 cup milk
Equipment Needed
You’ll find these kitchen staples particularly useful for this recipe:
- Large mixing bowl
- Smaller mixing bowl
- Whisk or fork
- Measuring cups and spoons
- Baking sheets
- Parchment paper or a good quality non-stick baking mat
- Pastry blender or your fingertips (for cutting in butter)
- Rolling pin
- Sharp knife or pizza cutter
Instructions
Bringing these Irish Roly Scones to life is a rewarding process, and the result is simply divine. Follow these steps carefully for the best outcome:
-
Begin by preheating your oven to 375°F (190°C). Lightly grease your baking trays or line them with parchment paper. This step is crucial to prevent sticking and ensure your scones bake evenly.
-
In a large mixing bowl, combine the 6 cups of flour with the 2 teaspoons of baking powder. Whisk them together briefly to ensure the baking powder is evenly distributed throughout the flour.
-
Now, add the 3/4 cup of butter, which should be cut into small chunks. Using your fingertips or a pastry blender, cut the butter into the flour mixture until it resembles coarse breadcrumbs. This process is key to creating a tender scone. Make sure there are no large lumps of butter remaining.
-
In a separate, smaller bowl, beat the 2 large eggs with the 1/2 cup of milk. Whisk them together until well combined.
-
Create a well in the center of the flour mixture. Pour the egg and milk mixture into this well.
-
If you are using raisins, add the 1/2 cup of raisins now. If you’ve opted for chocolate chips, add them at this stage.
-
Gently mix everything together until a soft dough forms. Be careful not to overmix; you want the mixture to be soft but not runny or sticky. The dough should just come together.
-
Lightly flour a clean work surface. Carefully turn the dough out onto the floured surface.
-
Using a rolling pin, roll out the mixture to your desired thickness. Aim for a relatively even thickness across the dough.
-
With a sharp knife or a pizza cutter, cut the rolled-out dough into long stripes. The width of these stripes will determine the size of your roly scones.
-
Now comes the fun part! Roll each stripe into a swirly circle, resembling a snail’s shell or a cinnamon roll. These are your roly scones! Place them onto the prepared baking trays, ensuring there’s a little space between each one to allow for expansion.
-
Bake in the preheated oven for 25 to 35 minutes, or until the roly scones are golden brown and cooked through. The exact baking time will depend on your oven and the thickness of your scones. You can check for doneness by gently pressing the center; it should spring back slightly.
-
Once baked to perfection, remove the roly scones from the oven. Allow them to cool slightly on the baking tray before transferring them to a wire rack to cool further.
-
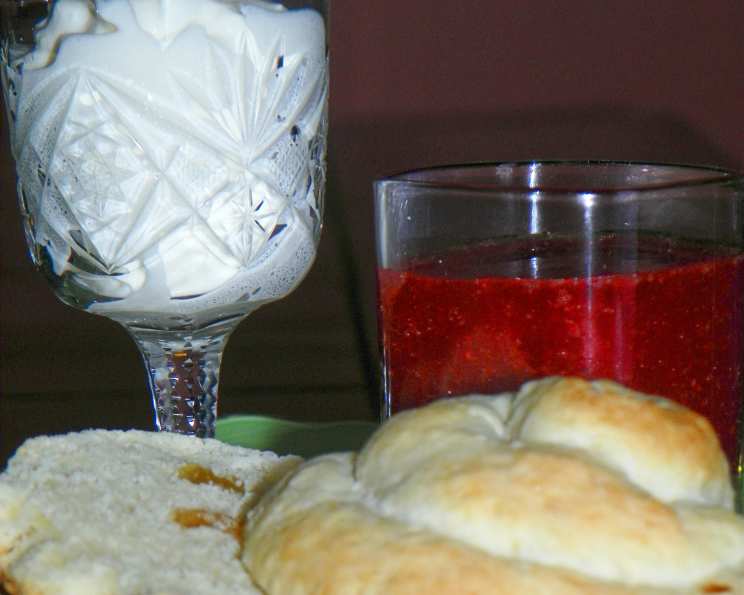
Serve hot or cold with generous amounts of whipped cream and your favorite raspberry jam. The contrast between the warm, slightly sweet scone, the cool, creamy whipped cream, and the tartness of the jam is absolutely divine.
Expert Tips & Tricks
As a chef, I’ve learned that a few small touches can elevate even the simplest of recipes. Here are some tips to make your Irish Roly Scones truly exceptional:
- Butter Temperature is Key: Ensure your butter is cold but not frozen. Cold butter creates pockets of steam during baking, which results in a lighter, flakier texture. If your kitchen is warm, you might want to chill the butter briefly before cutting it into the flour.
- Don’t Overwork the Dough: Overmixing develops the gluten in the flour, leading to tough scones. Mix just until the ingredients are combined and the dough forms.
- Even Rolling: Try to roll out the dough to a consistent thickness. This ensures that all your roly scones bake at the same rate, preventing some from being overcooked while others are underdone.
- The “Raisin Trick”: If you’re using raisins, you can plump them up by soaking them in warm water or a little Irish whiskey for about 10 minutes before draining them thoroughly. This adds an extra layer of moisture and flavor.
- Chocolate Chip Variation: If opting for chocolate chips, use good quality chocolate that melts well. Mini chocolate chips can also distribute more evenly.
- Oven Know-How: Ovens can vary. Keep an eye on your scones during the last 10 minutes of baking. If they’re browning too quickly, you can loosely tent them with foil.
Serving & Storage Suggestions
The beauty of Irish Roly Scones lies in their versatility. They are absolutely sensational served warm, straight from the oven, with a generous dollop of freshly whipped cream and a spoonful of vibrant raspberry jam. The classic pairing is undeniably delicious, but don’t be afraid to experiment. A good quality butter is also a simple yet satisfying accompaniment.
For storage, these scones are best enjoyed within a day or two of baking. If you have leftovers, store them in an airtight container at room temperature. They will retain their best texture this way. If you need to store them for longer, they can be kept in the refrigerator for up to 3 days, though they may become slightly drier. To reheat, you can gently warm them in a low oven (around 300°F/150°C) for a few minutes until they are warmed through.
Nutritional Information
Here’s an estimated nutritional breakdown for these delightful Irish Roly Scones. Please note that these values are approximate and can vary based on specific ingredients and portion sizes.
| Nutrient | Amount per Serving | % Daily Value |
|---|---|---|
| Calories | 732.2 kcal | |
| Calories from Fat | ||
| Total Fat | 26.6 g | 40% |
| Saturated Fat | 15.8 g | 78% |
| Cholesterol | 125.8 mg | 41% |
| Sodium | 361.1 mg | 15% |
| Total Carbohydrate | 106.4 g | 35% |
| Dietary Fiber | 3.8 g | 15% |
| Sugars | 7.6 g | 30% |
| Protein | 16.3 g | 32% |
Variations & Substitutions
While the classic recipe is a treasure, feel free to infuse your own personality into these roly scones!
- Citrus Zest: Add the zest of one lemon or orange to the dry ingredients for a bright, fragrant twist.
- Spiced Delight: Incorporate a teaspoon of ground cinnamon or a pinch of nutmeg into the flour mixture for a warm, autumnal flavor.
- Nutty Addition: Fold in 1/2 cup of finely chopped nuts, such as walnuts or pecans, along with the raisins or chocolate chips.
- Dairy-Free Option: For a dairy-free version, you can substitute the butter with a good quality dairy-free spread or coconut oil and use a plant-based milk like almond or soy milk. Keep in mind that the texture might vary slightly.
FAQs
Q: Why is my scone dough sticky?
A: If your dough is too sticky, it’s usually a sign that you might have added too much liquid or not enough flour. You can try adding a tablespoon of flour at a time until the dough is manageable, but be careful not to overwork it.
Q: Can I make these ahead of time?
A: While they are best served fresh, you can prepare the dough (up to step 7) and refrigerate it for up to 24 hours. Bring it to room temperature slightly before rolling and baking.
Q: What’s the difference between roly scones and regular scones?
A: Regular scones are typically drop scones or cut into wedges, while roly scones are made by rolling out dough into a flat sheet and then rolling it up into a log before slicing and baking, creating a distinct spiral shape.
Q: My scones are hard. What did I do wrong?
A: Hard scones are usually a result of overmixing the dough or overbaking. Ensure you mix only until the ingredients are just combined and bake until golden brown, not excessively browned.
Q: Can I freeze the baked roly scones?
A: Yes, baked roly scones can be frozen. Allow them to cool completely, then store them in an airtight container or freezer bag for up to 2-3 months. Thaw at room temperature or reheat gently.
These Irish Roly Scones are more than just a baked good; they are an experience. They evoke a sense of tradition, comfort, and simple joy. I encourage you to gather your ingredients, embrace the process, and share these delightful swirls with loved ones. Whether enjoyed with a cup of strong Irish tea on a blustery afternoon or as a sweet ending to a family meal, they are sure to leave a lasting impression. Let me know your favorite variations in the comments below!