
The Italian Cream Cake: A Treasured Family Recipe
There are some recipes that don’t just sit on a page; they live in our memories, carrying with them the warmth of kitchens past and the laughter of loved ones. This Italian Cream Cake is precisely one of those for me. I recall the comforting aroma that would waft through my grandmother’s house on special occasions, a sweet perfume of vanilla, coconut, and toasted pecans that signaled something truly wonderful was underway. Every bite of this cake, with its incredibly moist crumb and rich, dreamy frosting, is a direct link to those cherished moments, a taste of tradition that never fails to bring a smile to my face.
Recipe Overview
- Prep Time: 25 minutes
- Cook Time: 45 minutes
- Total Time: 1 hour 10 minutes (plus cooling time)
- Servings: 14
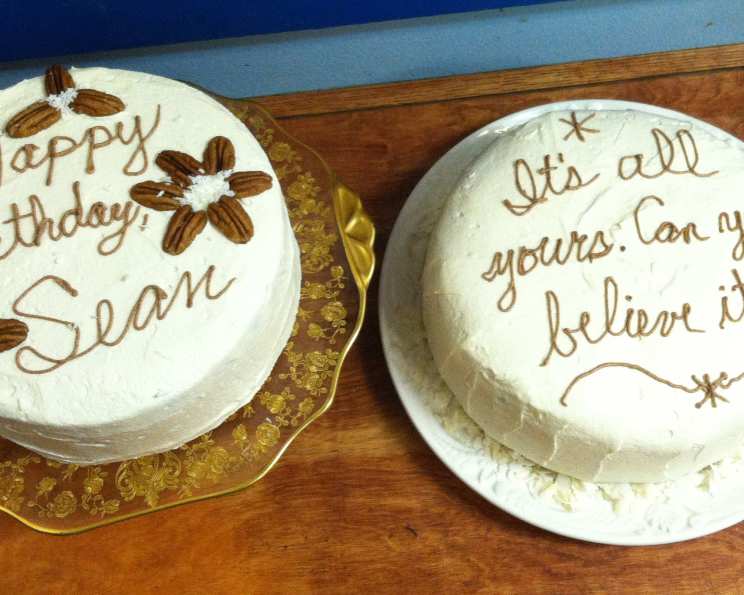
- Yield: One 9×13 inch cake or two 9-inch round cakes
- Dietary Type: Contains dairy and eggs
Ingredients
For the Cake:
- 1/4 pound butter, softened
- 1/2 cup shortening
- 2 cups granulated sugar
- 5 large eggs, separated
- 1 cup buttermilk
- 1 teaspoon baking soda
- 2 cups all-purpose flour
- 1 teaspoon vanilla extract
- 1 cup shredded coconut (sweetened or unsweetened, your preference)
- 1/2 cup chopped pecans
For the Cream Cheese Frosting:
- 1 (8-ounce) package cream cheese, softened
- 1/4 pound butter, softened
- 1 teaspoon vanilla extract
- 1 (16-ounce) box powdered sugar (also known as confectioners’ sugar)
- 1/2 cup chopped pecans
Equipment Needed
- Electric mixer (stand mixer or hand mixer)
- Large mixing bowls (at least two)
- Measuring cups and spoons
- Whisk
- Rubber spatula
- Sifter (optional, for flour)
- 9×13 inch baking pan OR two 9-inch round cake pans
- Wire cooling rack
- Offset spatula or butter knife for frosting
Instructions
Let’s bring this delightful Italian Cream Cake to life, step by step. The process is straightforward, but paying attention to a few key techniques will ensure a perfect result every time.
-
Preheat and Prepare: Begin by preheating your oven to 325 degrees F (160 degrees C). This moderate temperature is crucial for ensuring the cake bakes through evenly without drying out. While the oven heats, grease and flour your chosen baking pan(s). If you’re using a 9×13 inch pan, a thorough greasing and flouring is essential. For round pans, you might also consider lining the bottoms with parchment paper after greasing and before flouring for extra insurance against sticking.
-
Cream the Fats and Sugar: In a large mixing bowl, cream together the softened butter, shortening, and granulated sugar. Use your electric mixer on medium speed. This step is about incorporating air, which contributes to the cake’s tender texture. Continue beating until the mixture is light, fluffy, and pale yellow. This usually takes about 3–5 minutes.
-
Incorporate the Egg Yolks: Now, it’s time to add the egg yolks. Add them one at a time, beating well after each addition. This gradual incorporation helps to emulsify the mixture, ensuring a smooth batter and preventing the yolks from scrambling. Scrape down the sides of the bowl as needed to ensure everything is evenly combined.
-
Combine Wet and Dry Ingredients: In a separate, medium-sized bowl, whisk together the buttermilk and baking soda. The baking soda will react with the acidity in the buttermilk, causing it to foam slightly – this is a good sign! In another bowl, sift the all-purpose flour if you prefer an even lighter cake, though it’s not strictly necessary.
-
Build the Batter: Gradually add the sifted flour to the creamed butter mixture, alternating with the buttermilk mixture. Begin and end with the flour. For example, add about a third of the flour, mix until just combined, then add half of the buttermilk mixture, mix, add another third of the flour, mix, add the remaining buttermilk mixture, mix, and finally add the remaining flour and mix until just incorporated. Be careful not to overmix at this stage; overmixing can develop the gluten in the flour too much, leading to a tougher cake.
-
Add Flavor and Texture: Stir in the vanilla extract, shredded coconut, and chopped pecans. Use a rubber spatula for this to ensure you don’t overwork the batter. These ingredients add wonderful flavor and texture to the cake itself.
-
Whip the Egg Whites: In a clean, dry bowl (it’s important there’s no trace of fat on the bowl or beaters, as this will prevent the whites from whipping properly), beat the egg whites until stiff peaks form. Stiff peaks mean that when you lift the beaters out of the egg whites, the peaks stand straight up without curling over.
-
Fold in the Egg Whites: This is a delicate step that creates an incredibly light and airy cake. Gently fold about a third of the beaten egg whites into the cake batter using a rubber spatula. This lightens the batter, making it easier to incorporate the remaining whites. Then, fold in the remaining egg whites in two more additions until no streaks of white remain, but be careful not to deflate the mixture.
-
Bake the Cake: Pour the batter evenly into your prepared 9×13 inch cake pan or divide it between the two 9-inch round pans. Bake for 45 minutes, or until a wooden skewer or toothpick inserted into the center comes out clean. If you are baking in two round pans, they may bake slightly faster, so start checking around the 35-minute mark.
-
Cool Completely: Once baked, remove the cake(s) from the oven and place them on a wire cooling rack. Allow the cake(s) to cool completely in their pans before attempting to frost them. This is crucial for the frosting to set properly and to prevent the cake from breaking.
-
Prepare the Frosting: While the cake cools, let’s make the luscious cream cheese frosting. In a clean mixing bowl, beat the softened cream cheese and butter together until smooth and creamy.
-
Add Flavor and Sweetness: Add the vanilla extract, powdered sugar (start with about half and gradually add the rest), and chopped pecans to the cream cheese mixture.
-
Achieve Spreading Consistency: Continue to beat the frosting until it reaches a smooth, spreadable consistency. You may need to add more powdered sugar if the frosting is too thin, or a tiny splash of milk (1 teaspoon at a time) if it’s too stiff. Taste and adjust sweetness as needed.
-
Frost the Cake: Once the cake is completely cool, spread the cream cheese frosting evenly over the top. If you made a layered cake, frost the top of one layer, then place the second layer on top and frost the entire cake.
Expert Tips & Tricks
- Room Temperature Ingredients are Key: For both the cake and the frosting, ensure your butter, shortening, eggs, cream cheese, and buttermilk are at room temperature. This allows them to emulsify properly, creating a smoother batter and a creamier frosting, and also helps the egg whites whip to their fullest potential.
- Don’t Overmix: Overmixing cake batter, especially after adding flour, can lead to a tough, dense cake. Mix only until the ingredients are just combined.
- Separating Eggs: For the cleanest separation, crack eggs into a small bowl one at a time. If you get any yolk in the white, set that egg aside and use a fresh one for whipping.
- Buttermilk Substitute: If you don’t have buttermilk, you can make your own by measuring 1 cup of milk and stirring in 1 tablespoon of white vinegar or lemon juice. Let it sit for 5–10 minutes until it looks slightly curdled.
- Toast the Pecans: For an extra layer of nutty flavor, lightly toast the pecans for both the cake and the frosting. Spread them on a baking sheet and bake at 350°F (175°C) for about 5-8 minutes, watching them carefully to prevent burning. Let them cool completely before chopping and using.
Serving & Storage Suggestions
This Italian Cream Cake is a showstopper on its own, but it pairs beautifully with a scoop of vanilla bean ice cream or a dollop of whipped cream for an extra touch of indulgence. For a classic presentation, ensure the frosting is spread smoothly and the chopped pecans are evenly distributed over the top.
Leftovers can be stored in an airtight container at room temperature for up to 2 days, provided your kitchen isn’t too warm. For longer storage, or in warmer climates, it’s best to refrigerate the cake. It will keep well in the refrigerator for up to 4–5 days. When ready to serve, allow it to come to room temperature for about 30 minutes for the best flavor and texture. This cake also freezes beautifully; wrap it tightly in plastic wrap, then in foil, and it can be stored in the freezer for up to 2–3 months. Thaw in the refrigerator overnight before bringing to room temperature.
Nutritional Information
| Nutrient | Amount per Serving | % Daily Value |
|---|---|---|
| Calories | 646.6 kcal | |
| Calories from Fat | 339 g | |
| Total Fat | 37.8 g | 58% |
| Saturated Fat | 18.4 g | 91% |
| Cholesterol | 128.9 mg | 42% |
| Sodium | 277.6 mg | 11% |
| Total Carbohydrate | 73 g | 24% |
| Dietary Fiber | 2.2 g | 8% |
| Sugars | 56.8 g | 227% |
| Protein | 7.2 g | 14% |
(Note: Nutritional information is an estimate and can vary based on specific ingredients used.)
Variations & Substitutions
- Gluten-Free: For a gluten-free version, you can substitute a good quality gluten-free all-purpose flour blend for the all-purpose flour. You may need to slightly adjust the liquid content depending on the blend you use.
- Nut-Free: If you need to omit the pecans, simply leave them out of the cake and the frosting. The cake will still be delicious and moist.
- Coconut Options: While shredded coconut is traditional, you could experiment with finely chopped fresh coconut for a different texture. Unsweetened shredded coconut will reduce the overall sweetness slightly.
- Citrus Zest: For a subtle bright note, consider adding a teaspoon of orange or lemon zest to the cake batter along with the vanilla.
FAQs
Q: Why is my cake dry?
A: Dryness can often be a result of overbaking. Ensure you’re baking only until a toothpick comes out clean and avoid opening the oven door too frequently. Also, make sure all your ingredients are measured accurately.
Q: Can I make this cake ahead of time?
A: Yes, absolutely! The unfrosted cake can be baked a day in advance and stored at room temperature, well-wrapped. The frosting can also be made a day ahead and refrigerated; just bring it back to room temperature and re-whip it briefly before frosting the cooled cake.
Q: What’s the difference between shortening and butter in this recipe?
A: Butter provides flavor, while shortening contributes to a tenderer crumb and helps maintain moisture. The combination creates a balanced texture.
Q: My frosting seems too stiff. What should I do?
A: If your frosting is too stiff, add a teaspoon of milk or buttermilk at a time and beat until it reaches your desired spreadable consistency.
Q: Can I use a different type of nut in this cake?
A: While pecans are traditional and complement the flavors beautifully, you could try walnuts or almonds if you prefer. Ensure they are finely chopped.
Final Thoughts
This Italian Cream Cake is more than just a dessert; it’s an invitation to create new memories while honoring cherished ones. Whether you’re a seasoned baker or just starting out, this recipe is a rewarding journey that culminates in a truly spectacular cake. It’s the perfect centerpiece for birthdays, holidays, or simply a Sunday gathering. I encourage you to gather your ingredients, put on some good music, and let the aroma fill your kitchen. Share a slice with someone you love, and savor the sweet, comforting taste of tradition. I’d be delighted to hear about your baking adventures and how this cake graces your table.