
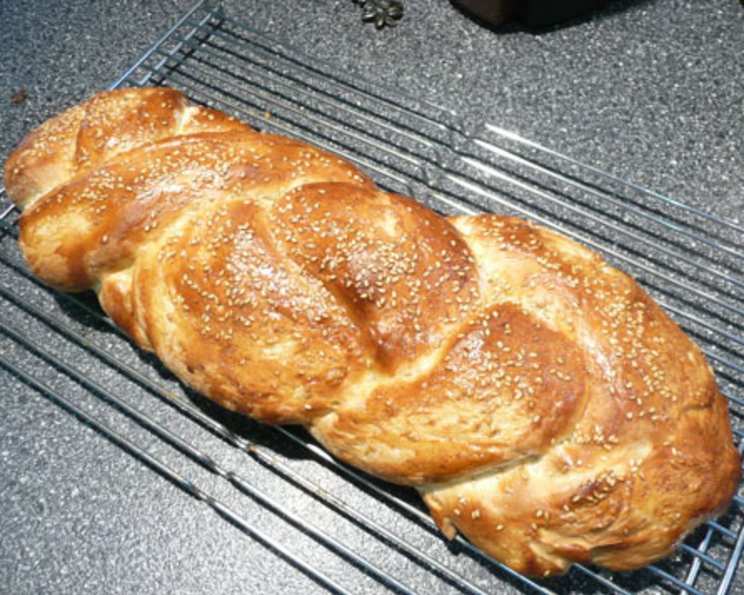
The Art of the Italian Herb Braid: Aromatic Hearth Bread to Elevate Your Table
There are certain aromas that instantly transport me back to my grandmother’s kitchen – the scent of simmering tomato sauce, the sweet promise of baking biscotti, and most vividly, the yeasty, herbaceous perfume of freshly baked bread. This Italian Herb Braid, with its fragrant blend of oregano and thyme, is one such magical conjurer of memories. I recall the anticipation as a child, watching my nonna expertly shape the dough, her hands dusted with flour, transforming simple ingredients into a golden, edible masterpiece. It wasn’t just bread; it was a labor of love, a centerpiece for family gatherings, and a taste of pure comfort.
Recipe Overview
- Prep Time: 40 minutes (plus rising time)
- Cook Time: 25 minutes
- Total Time: 1 hour 5 minutes (plus rising time)
- Yields: 1 loaf
- Serves: 8
- Dietary Type: Vegetarian
Ingredients
This bread relies on a beautiful balance of simple ingredients, allowing the herbs to truly shine.
-
For the Dough:
- 2 ¾ – 3 ¼ cups bread flour, plus more for kneading
- 2 tablespoons sugar
- ¼ ounce fast-rise yeast (or 2 ¼ teaspoons active dry yeast)
- ½ teaspoon dried oregano
- ½ teaspoon dried thyme
- 1 teaspoon salt
- ¾ cup water
- 3 tablespoons butter, softened
- ¼ cup milk
-
For the Wash and Garnish (Optional but Recommended):
- 1 large egg, beaten (for egg wash)
- Sesame seeds (for sprinkling)
Equipment Needed
While not overly complicated, a few key tools will ensure success.
- Large mixing bowl
- Medium mixing bowl
- Measuring cups and spoons
- Whisk or fork
- Microwave-safe bowl or small saucepan (for heating liquids)
- Electric mixer with dough hook attachment (optional, but helpful)
- Spatula or wooden spoon
- Clean kitchen towel or plastic wrap
- Baking sheet
- Parchment paper (optional, for easier cleanup)
- Small bowl (for egg wash)
- Pastry brush
- Wire cooling rack
Instructions
Crafting this Italian Herb Braid is a rewarding process, engaging all the senses. From the feel of the dough to the intoxicating aroma as it bakes, each step brings you closer to a delicious outcome.
-
In a large bowl, combine 1 ¼ cups of the bread flour, sugar, fast-rise yeast, oregano, thyme, and salt. Whisk these dry ingredients together to ensure they are well distributed. This initial blend sets the stage for the aromatic foundation of your bread.
-
In a separate medium bowl, combine the water, softened butter, and milk.
-
Gently heat the liquid mixture until it reaches 130 degrees Fahrenheit (54 degrees Celsius). You can do this in the microwave by heating in 30-second intervals, stirring in between, until the desired temperature is reached. Alternatively, warm it gently in a small saucepan over low heat. Be careful not to overheat, as this can kill the yeast.
-
Gradually add the warmed liquid mixture to the dry ingredients in the large bowl.
-
Using an electric mixer with a dough hook attachment, beat the mixture for 2 minutes on medium speed. This initial beating helps to start developing the gluten.
-
After the initial 2 minutes, increase the mixer speed to high and beat for an additional 2 minutes. The dough should start to come together and become smoother.
-
With a spoon or spatula, begin to stir in more bread flour, gradually, until a soft, elastic dough forms. You want the dough to be slightly sticky but manageable.
-
Turn the dough out onto a lightly floured surface and knead in additional flour as needed to create a dough that is not sticky to the touch. Continue kneading for about 4 minutes, or until the dough is smooth and elastic. If you’re using a stand mixer, continue with the dough hook on medium speed for about 6-8 minutes until the dough is smooth and pulls away from the sides of the bowl.
-
Divide the dough into three equal portions.
-
On a lightly floured surface, roll each portion of dough into a 24-inch rope. Aim for even thickness along each rope.
-
Carefully braid the three ropes together, pinching the ends to seal. Once braided, tuck the ends under to create a neat, finished look.
-
Place the braided dough onto a greased baking sheet. For an added touch of moisture and a softer crust, you can place the baking sheet over a shallow pan that is half-full of boiling water.
-
Cover the braided dough loosely with a clean kitchen towel or plastic wrap. Allow it to rise for 25 minutes. During this time, the dough will become puffier and more airy.
-
While the dough is rising, preheat your oven to 400 degrees Fahrenheit (200 degrees Celsius).
-
Once the dough has risen, brush the top generously with the beaten egg wash. This will give the bread a beautiful golden-brown sheen.
-
If desired, sprinkle the top with sesame seeds for added texture and visual appeal.
-
Bake for 25 minutes, or until the bread is golden brown and sounds hollow when tapped on the bottom.
-
Remove the bread from the oven and transfer it to a wire cooling rack to cool completely. Allowing the bread to cool on a rack ensures air circulation, preventing a soggy bottom.
Expert Tips & Tricks
- Flour Power: The amount of flour needed can vary slightly depending on humidity and the type of flour used. Start with the lower amount of flour and add more gradually until the dough is soft but no longer sticky. Over-flouring can result in a dry, dense bread.
- Yeast Whisperer: Ensure your yeast is fresh. If it doesn’t foam when proofed (if using active dry yeast), it’s likely inactive and you’ll need to start with new yeast. Fast-rise yeast doesn’t typically require proofing, but it’s still important to check its expiration date.
- The Magic of Steam: Placing the braided loaf over a pan of boiling water while it rises and bakes creates a steamy environment. This helps the crust develop a lovely crispness and encourages a better oven spring.
- Perfect Braid: For an even braid, try to roll your ropes to a consistent thickness. If one rope feels much longer than the others, you can slightly stretch or thin it out to match.
Serving & Storage Suggestions
This Italian Herb Braid is a versatile delight, perfect for any occasion.
- Serving: Serve warm, sliced, with a pat of butter, or alongside your favorite Italian dishes. It’s also fantastic as a base for bruschetta or as a flavorful accompaniment to soups and salads.
- Storage: Once completely cooled, store the bread in an airtight container or bread bag at room temperature for up to 2-3 days. For longer storage, you can freeze the bread. Wrap it tightly in plastic wrap and then in aluminum foil or a freezer bag. It will keep in the freezer for up to 2-3 months.
- Reheating: To refresh day-old bread, lightly mist it with water and warm it in a 350°F (175°C) oven for 5-10 minutes, or until heated through and the crust is re-crisped.
Nutritional Information
(Please note: These values are approximate and can vary based on specific ingredients and brands used.)
| Nutrient | Amount per Serving | % Daily Value |
|---|---|---|
| Calories | 214.6 kcal | |
| Calories from Fat | 21 % | |
| Total Fat | 5.1 g | 7 % |
| Saturated Fat | 3 g | 14 % |
| Cholesterol | 12.5 mg | 4 % |
| Sodium | 334.5 mg | 13 % |
| Total Carbohydrate | 36.7 g | 12 % |
| Dietary Fiber | 1.4 g | 5 % |
| Sugars | 3.3 g | 13 % |
| Protein | 5.1 g | 10 % |
Variations & Substitutions
While this recipe is wonderful as is, feel free to explore its potential.
- Herb Swap: Don’t hesitate to experiment with other dried herbs like rosemary, marjoram, or a touch of garlic powder. A blend of “Italian Seasoning” can also be used.
- Cheese Inclusion: For a cheesy twist, knead about ½ cup of finely grated Parmesan cheese into the dough during the last few minutes of kneading.
- Garlic Lover’s Dream: Add 1-2 cloves of finely minced fresh garlic or ½ teaspoon of garlic powder to the dry ingredients for an extra layer of flavor.
- Seeded Sensation: Beyond sesame seeds, consider topping your braid with poppy seeds, flax seeds, or sunflower seeds for added texture and visual interest.
FAQs (Frequently Asked Questions)
Q: Why is my dough so sticky?
A: This can happen due to humidity or the type of flour. Gradually add more bread flour, a tablespoon at a time, until the dough becomes manageable and no longer sticks excessively to your hands or the bowl.
Q: Can I use all-purpose flour instead of bread flour?
A: While you can, bread flour has a higher protein content, which develops more gluten and results in a chewier, more elastic texture ideal for this braid. If using all-purpose, you might need to adjust the flour quantity slightly and expect a slightly less chewy result.
Q: My bread didn’t rise much. What went wrong?
A: The most common culprit is inactive yeast. Ensure your yeast is fresh and your water was not too hot (which kills yeast) or too cold (which slows it down). Proper rising also requires a warm, draft-free environment.
Q: How do I get that beautiful golden crust?
A: The egg wash is key! It creates a glossy finish and helps the bread brown beautifully. Ensure your oven is properly preheated to the correct temperature.
Q: Can I make this recipe ahead of time?
A: You can mix and knead the dough, then let it rise in the refrigerator overnight. In the morning, shape, let it come to room temperature, and then proceed with the baking instructions.
Final Thoughts
This Italian Herb Braid is more than just a recipe; it’s an invitation to create something truly special in your own kitchen. It’s a testament to how humble ingredients, combined with a little care and attention, can transform into something extraordinary. Imagine the delight on your loved ones’ faces as they break apart this fragrant, golden loaf. Pair it with a robust red wine, a fresh garden salad, or a hearty minestrone soup for a meal that speaks of tradition and comfort. I encourage you to give it a try, embrace the process, and savor every aromatic bite. Happy baking!