
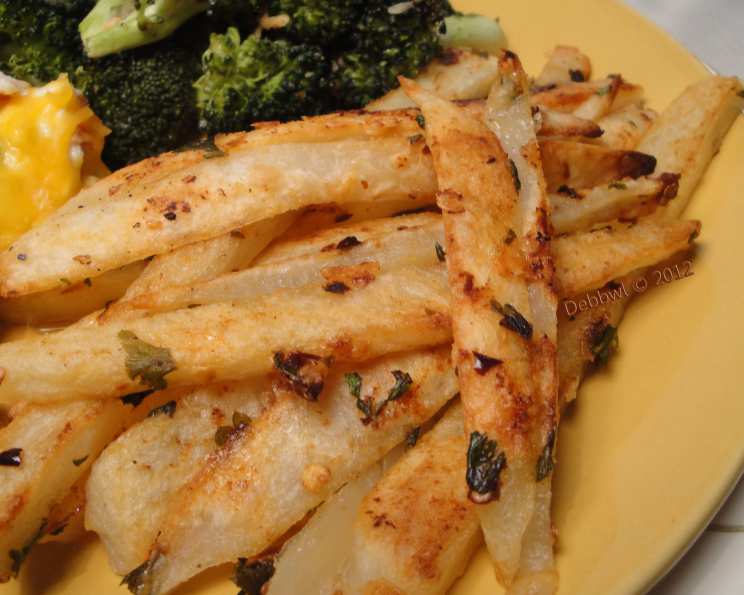
Italian Seasoned Fries: A Healthier, Flavor-Packed Twist
There are few culinary experiences as universally comforting and satisfying as a perfectly crisp, golden fry. I remember, early in my career, the sheer indulgence of a basket of hand-cut fries, the salty aroma filling the kitchen. But as I delved deeper into the world of health-conscious cooking, I often found myself yearning for that same satisfaction without the guilt. This recipe, born from a desire to recreate that joy in a lighter, more nourishing way, became a kitchen staple. It’s a testament to the fact that you don’t need to drench potatoes in oil to achieve that irresistible crunch and depth of flavor; sometimes, a few well-chosen Italian herbs and a whisper of olive oil are all it takes.
Recipe Overview
- Prep Time: 10 minutes
- Cook Time: 18-20 minutes
- Total Time: 28-30 minutes
- Servings: 1
- Yield: 1 serving of fries
- Dietary Type: Low-Fat, Vegetarian
Ingredients
- 1 medium baking potato, peeled and cut into sticks about 1/2 inch thick
- 1/2 teaspoon extra virgin olive oil
- 1 1/2 teaspoons grated reduced-fat Parmesan cheese
- 1/2 teaspoon finely chopped fresh flat-leaf parsley
- 1/8 teaspoon garlic powder
- 1/2 teaspoon crushed red pepper flakes
- Salt to taste
Equipment Needed
- Oven
- Medium nonstick baking sheet
- Parchment paper or Reynolds Release foil
- Large bowl
Instructions
- Preheat your oven to 400°F (200°C). This higher temperature is crucial for achieving that desirable crispness without excessive oil.
- Prepare your baking sheet by lining a medium nonstick baking sheet with parchment paper or Reynolds Release foil. This ensures the fries won’t stick and makes for easier cleanup.
- In a large bowl, combine the potato sticks with the extra virgin olive oil. Use your hands or a spatula to ensure each stick is lightly coated. This minimal amount of oil is key to keeping the fries low in fat while still promoting crisping.
- Next, add the grated reduced-fat Parmesan cheese, finely chopped fresh flat-leaf parsley, garlic powder, and crushed red pepper flakes to the bowl with the potatoes. Season with salt to your preference. Toss everything together gently but thoroughly, making sure the seasonings are evenly distributed over the potato sticks.
- Arrange the seasoned potato sticks in a single layer on the prepared baking sheet. It’s vital that the fries are not touching each other; overcrowding will cause them to steam rather than bake and crisp up, defeating the purpose.
- Place the baking sheet in the preheated oven and bake for 8 minutes.
- After 8 minutes, flip the potato sticks carefully using a spatula. This ensures even browning and crisping on all sides.
- Continue to bake for an additional 10 to 12 minutes. The goal is for the potatoes to be tender on the inside with some desirable browned spots on the exterior, but not completely browned or burnt. Keep a close eye on them during this final stage, as oven temperatures can vary.
- Once they reach your desired level of tenderness and browning, serve immediately. These fries are best enjoyed fresh from the oven.
Expert Tips & Tricks
- Potato Choice is Key: While a baking potato is ideal for its starchy texture that crisps up beautifully, you can experiment with other starchy varieties. However, avoid waxy potatoes, as they tend to become mushy when baked.
- Uniformity Matters: Cutting the potato sticks to a consistent thickness ensures they cook evenly. Aim for approximately 1/2 inch thick. If some are much thicker, they may remain undercooked while thinner ones burn.
- The Parchment Advantage: Parchment paper is your best friend here. It creates a non-stick surface that allows the fries to crisp up without clinging to the pan, and it significantly simplifies the post-meal cleanup. Reynolds Release foil is another excellent alternative.
- Don’t Overcrowd the Pan: I cannot stress this enough! Giving each fry a little breathing room on the baking sheet is paramount for achieving that perfect, bakery-style crisp. If you’re doubling the recipe, use two baking sheets.
- Listen to Your Oven: Ovens can be finicky. Get to know yours and adjust the baking time slightly if needed. The visual cues – tender interior and nicely browned edges – are more important than a strict timer.
- The “Flip” is Fundamental: Flipping halfway through ensures all sides of the fry get exposed to the oven’s heat, leading to uniform crispness.
Serving & Storage Suggestions
These Italian Seasoned Fries are best served hot and fresh, right out of the oven, for maximum crispness. They make a delightful side dish to a lightened-up Italian meal, such as grilled chicken breast with marinara sauce, baked fish, or a hearty lentil soup. You can also serve them as a healthier snack on their own, perhaps with a side of sugar-free ketchup or a light, herbed aioli.
Given their delicate crispness, these fries are not ideal for long-term storage. If you do happen to have leftovers, allow them to cool completely before storing them in an airtight container in the refrigerator. They will typically last for 1-2 days. To reheat, the best method is to place them on a baking sheet in a 400°F (200°C) oven for about 5-8 minutes, or until they regain some of their crispness. Microwaving will likely result in a soft, undesirable texture.
Nutritional Information
| Nutrient | Amount per Serving | % Daily Value |
|---|---|---|
| Calories | 152 kcal | 8% |
| Total Fat | 3.1 g | 4% |
| Saturated Fat | 0.8 g | 3% |
| Cholesterol | 2.2 mg | 1% |
| Sodium | 45 mg | 2% |
| Total Carbohydrate | 28.1 g | 10% |
| Dietary Fiber | 2.6 g | 9% |
| Sugars | 1.4 g | 2% |
| Protein | 3.6 g | 7% |
(Note: Nutritional values are estimates and can vary based on specific ingredients used.)
Variations & Substitutions
The beauty of homemade fries lies in their adaptability. While this recipe focuses on classic Italian flavors, don’t hesitate to explore:
- Herb Swap: Instead of parsley, try fresh rosemary or thyme. A blend of dried Italian herbs (oregano, basil, thyme, rosemary) also works wonderfully.
- Spicy Kick: If you enjoy more heat, increase the crushed red pepper flakes or add a pinch of cayenne pepper.
- Garlic Lover’s Delight: For an even more pronounced garlic flavor, add a clove of minced fresh garlic along with the powder. Just be sure it’s minced very finely.
- Cheese Alternatives: If you’re dairy-free or prefer other flavors, you can omit the Parmesan or try a nutritional yeast sprinkle for a cheesy, umami note.
- Sweet Potato Twist: For a different flavor profile and added nutrients, try using sweet potatoes instead of baking potatoes. Adjust the baking time slightly, as sweet potatoes can cook a bit faster.
FAQs
Q: Why are my fries not crispy enough?
A: Ensure your oven is fully preheated to the correct temperature, the fries are in a single layer without touching, and you haven’t overloaded the baking sheet. A final blast under the broiler for a minute or two can also help achieve extra crispness, but watch them very closely to prevent burning.
Q: Can I use a different type of oil?
A: While extra virgin olive oil offers a lovely flavor, a neutral oil like canola or avocado oil can be used if preferred. The key is the small amount.
Q: How can I make these fries ahead of time?
A: These fries are best served immediately. For make-ahead, you could par-bake them for about 10 minutes, cool them completely, and then refrigerate. When ready to serve, finish baking them for the remaining time to crisp them up.
Q: What are the best potatoes for fries?
A: Starchy potatoes like Russets or Idaho (which are types of baking potatoes) are ideal because they bake up fluffy and crisp.
Q: Can I make these fries without cheese?
A: Absolutely! The recipe is still delicious without the Parmesan. You might want to slightly increase the other seasonings to compensate for the loss of salty, cheesy flavor.
Final Thoughts
There’s a certain magic in transforming a humble potato into something so wonderfully flavorful and satisfying, especially when you can do it with a focus on health. These Italian Seasoned Fries are a perfect example of how a few simple, quality ingredients and a little culinary know-how can elevate a familiar favorite. They’re proof that lighter eating doesn’t mean sacrificing taste or enjoyment. I encourage you to try this recipe, play with the seasonings, and discover your own perfect low-fat fry. Share your creations and any flavor variations you discover – happy cooking!