
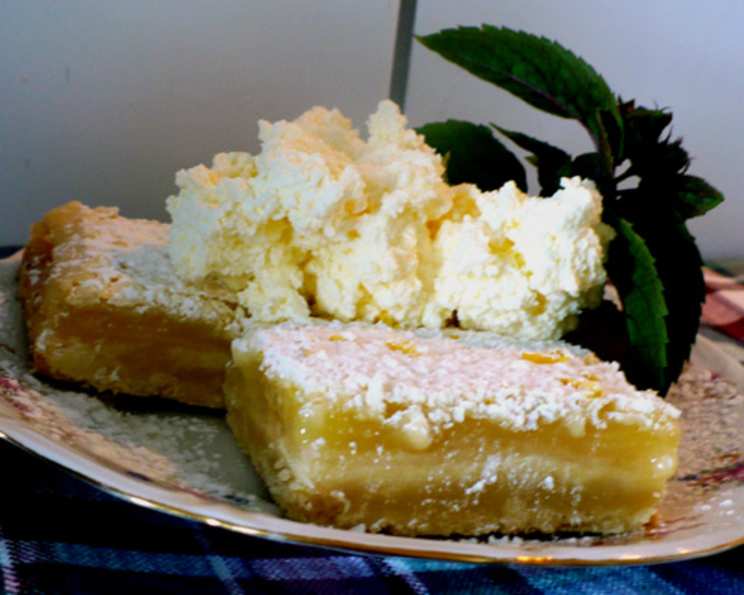
Katie Couric’s Lemon Bars: Sunshine in Every Bite
There are certain recipes that arrive in your life like a burst of unexpected sunshine, and Katie Couric’s Lemon Bars are precisely that. I remember tearing this one out of People magazine years ago, drawn in by the promise of a quintessential springtime treat, perfect for Mother’s Day celebrations. What struck me most was Couric’s description: a delightful duality of cakey bottom and a gooey, pie-like topping, all underscored by a bright, lemony tartness reminiscent of those beloved lemon drop candies. I was intrigued, and the moment I pulled them from the oven, the aroma alone was enough to convince me. The texture, that perfect balance of crumbly crust and luscious filling, was exactly as promised – pure bliss. This recipe has since become a staple in my repertoire, a dependable source of simple, unadulterated joy.
Recipe Overview
- Prep Time: 30 minutes
- Cook Time: 45 minutes
- Total Time: 1 hour 15 minutes
- Servings: 20
- Yield: 20 bars
- Dietary Type: Vegetarian
Ingredients
This recipe yields two distinct components: a tender crust and a vibrant lemon filling.
For the Crust:
- 1/4 cup confectioners’ sugar
- 2 cups all-purpose flour (or cake flour, as I prefer for an even lighter texture)
- 1 pinch salt
- 1 cup butter, softened and cut into 8 pieces
For the Filling:
- 4 large eggs
- 2 cups granulated sugar
- 6 tablespoons all-purpose flour
- 6 tablespoons fresh lemon juice (from about 2-3 large lemons)
- 1 lemon, rind of, finely grated
Equipment Needed
To bring these delightful lemon bars to life, you’ll need a few essential kitchen tools:
- A food processor (highly recommended for achieving the perfect crust texture) or a pastry blender/fork and a bowl
- A 13×9 inch baking pan
- A whisk
- A measuring cup and measuring spoons
- An oven
- A cooling rack
- A sieve for dusting confectioners’ sugar
Instructions
Crafting these lemon bars is a straightforward process, yielding impressive results. Follow these steps carefully for a truly delightful outcome.
- Preheat the Oven: Begin by preheating your oven to 350 degrees Fahrenheit (175 degrees Celsius). This ensures the oven is at the optimal temperature when your crust is ready to bake.
- Prepare the Baking Pan: Lightly grease a 13×9 inch baking pan. This prevents the crust from sticking and makes for easy removal of the finished bars. Set the prepared pan aside.
- Make the Crust: In the bowl of a food processor, combine the 1/4 cup confectioners’ sugar, 2 cups flour, and the 1 pinch of salt. Pulse these dry ingredients a few times to ensure they are well mixed.
- Incorporate the Butter: Add the 1 cup of butter, cut into 8 pieces, to the food processor. Pulse until the mixture resembles coarse crumbs. Be careful not to over-process; you want a crumbly texture, not a smooth dough.
- Press the Crust: Transfer this crumbly mixture into your prepared 13×9 inch baking pan. Using your fingers or the bottom of a flat glass, press the mixture firmly and evenly into the bottom of the pan. Ensure an even layer for consistent baking.
- Blind Bake the Crust: Place the pan in the preheated oven and bake for 20 minutes. This initial bake helps to set the crust and prevent it from becoming soggy when the filling is added.
- Prepare the Filling: While the crust is baking, prepare the luscious lemon filling. In a medium bowl, beat the 4 eggs until they are well combined.
- Add Filling Ingredients: To the beaten eggs, add the 2 cups granulated sugar, 6 tablespoons flour, and 6 tablespoons fresh lemon juice. Whisk these ingredients together until the mixture is smooth and thoroughly combined.
- Incorporate Lemon Zest: Stir in the finely grated rind of 1 lemon. This adds a wonderful fragrant aroma and an extra layer of bright citrus flavor.
- Pour the Filling: Once the crust has baked for 20 minutes, carefully remove it from the oven. Pour the prepared lemon filling evenly over the hot crust.
- Bake the Bars: Return the pan to the oven and bake for an additional 25 minutes. The filling will set and become slightly firm around the edges, with a slight jiggle in the center.
- Cool Completely: This is a crucial step for achieving the best texture. Remove the bars from the oven and let them cool completely on a wire rack. This usually takes at least 1-2 hours. Rushing this step can lead to bars that fall apart.
- Dust and Cut: Once fully cooled, sprinkle the top generously with sifted confectioners’ (powdered) sugar. Use a sieve for an even, beautiful finish. Finally, cut the bars into squares to serve.
Expert Tips & Tricks
- Butter Consistency: For the crust, ensuring your butter is at room temperature is key. It should be soft enough to indent with your finger but not melted. This allows it to incorporate evenly into the flour mixture, creating those desirable crumbs.
- Lemon Juice: Freshly squeezed lemon juice is non-negotiable here. Bottled juice simply doesn’t have the same vibrant, nuanced flavor that will make these bars truly sing.
- Don’t Overmix the Filling: When combining the filling ingredients, whisk until just combined and smooth. Over-whipping can incorporate too much air, which might lead to a less dense, more cakey filling than desired.
- The Jiggle Test: When checking the filling for doneness after the second bake, it should be set around the edges and have a slight, tender jiggle in the very center. It will continue to firm up as it cools.
- Cooling is Crucial: I cannot stress this enough: allow the bars to cool completely before slicing. This allows the filling to set properly, resulting in clean cuts and the perfect texture. If you try to cut them while warm, they will be far too soft and may crumble.
Serving & Storage Suggestions
These lemon bars are a delightful treat served chilled or at room temperature. For an elegant presentation, dust them with confectioners’ sugar just before serving. They pair wonderfully with a cup of tea, coffee, or even a glass of sparkling wine.
Storage:
- Room Temperature: Leftover lemon bars can be stored in an airtight container at room temperature for up to 2 days. They are best enjoyed within this timeframe.
- Refrigerator: For longer storage, keep them in an airtight container in the refrigerator for up to 5 days. The chill will firm up the filling slightly.
- Freezer: Lemon bars freeze remarkably well. Wrap individual bars tightly in plastic wrap, then place them in a freezer-safe bag or container. They can be frozen for up to 2 months. Thaw overnight in the refrigerator before serving.
Nutritional Information
Here’s an estimated breakdown of the nutritional content per serving of Katie Couric’s Lemon Bars:
| Nutrient | Amount per Serving | % Daily Value |
|---|---|---|
| Calories | 235 kcal | 12% |
| Total Fat | 10.3 g | 13% |
| Saturated Fat | 6.2 g | 31% |
| Cholesterol | 61.6 mg | 21% |
| Sodium | 103.6 mg | 4% |
| Total Carbohydrate | 33.5 g | 12% |
| Dietary Fiber | 0.5 g | 2% |
| Sugars | 21.7 g | 43% |
| Protein | 2.9 g | 6% |
Note: Nutritional information is an estimate and can vary based on specific ingredients and portion sizes used.
Variations & Substitutions
While this recipe is wonderful as is, here are a few ideas for customization:
- Citrus Swap: For a different citrus flavor profile, try using lime juice and lime zest for delicious lime bars. Grapefruit juice can also be used, but you might want to slightly adjust the sugar content as grapefruits can be more tart or bitter.
- Gluten-Free Crust: To make this recipe gluten-free, you can experiment with a gluten-free all-purpose flour blend in the crust. Ensure it has a good binding agent like xanthan gum. The texture might vary slightly.
- Edible Flowers: For a truly stunning presentation, especially for events, consider garnishing the top with edible flowers after the confectioners’ sugar dusting.
FAQs
Q: Can I use all-purpose flour for the crust instead of cake flour?
A: Absolutely! The original recipe suggests using all-purpose flour, and it yields a wonderful crust. Cake flour will produce a slightly more tender and delicate texture, but both are delicious.
Q: My lemon bars seem a bit too tart. Can I adjust the sugar?
A: You can slightly increase the sugar in the filling by a tablespoon or two if you prefer a sweeter bar, but be mindful that too much sugar can affect the texture and setting of the filling.
Q: How long do the lemon bars last?
A: They can be stored in an airtight container at room temperature for up to 2 days, or in the refrigerator for up to 5 days.
Q: Can I make these bars ahead of time?
A: Yes, these lemon bars are excellent candidates for making ahead. They actually benefit from chilling as the flavors meld and the filling fully sets.
Q: What’s the best way to get a clean cut on the bars?
A: For the cleanest cuts, ensure the bars are completely cooled. Use a sharp knife and wipe the blade clean with a damp cloth between each cut.
Final Thoughts
Katie Couric’s Lemon Bars are a testament to the power of simple, well-executed recipes. They are the perfect embodiment of brightness and zest, a ray of sunshine that can lift any occasion. Whether you’re celebrating Mother’s Day, looking for a delightful picnic treat, or simply craving a burst of citrusy happiness, this recipe is sure to become a cherished favorite. Bake them, share them, and savor every tangy-sweet bite – I guarantee they’ll bring a smile to your face.