
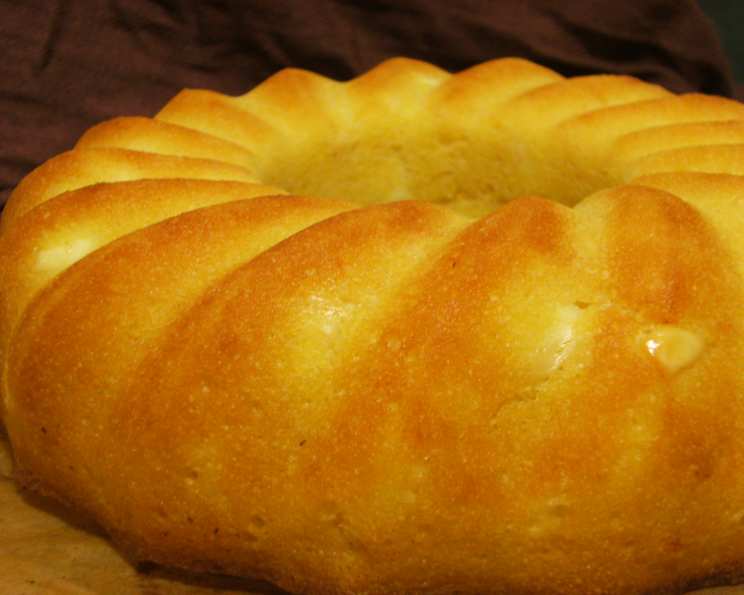
Kato’s Mellow Cornbread: A Hug in a Pan
There’s a particular kind of magic that happens when a simple ingredient, like cornmeal, is treated with a little extra care. I remember the first time I encountered Kato’s Cornbread, not in a bustling restaurant kitchen, but in the quiet comfort of my grandmother’s home. She’d always been a baker, but this cornbread was different. It wasn’t crumbly or overly sweet; it possessed a delightful tenderness, a mellow sweetness that spoke of patience and a secret. She’d pull it from the oven, the aroma of toasted corn and warm milk filling the air, and serve it with a dollop of honey butter, a humble yet deeply satisfying treat that felt like a warm embrace. It was this very technique – letting the cornmeal bloom in the milk – that she attributed to its unique, velvety texture, a lesson in culinary thoughtfulness I’ve carried with me ever since.
Recipe Overview
- Prep Time: 20 minutes
- Cook Time: 25 minutes
- Total Time: 45 minutes
- Servings: 8
- Yield: 1 pie (approximately 9-inch)
- Dietary Type: Vegetarian
Ingredients
This recipe celebrates the beauty of simplicity, relying on a few key ingredients to create something truly special. The star, of course, is the cornmeal, and the gentle blooming process is what elevates it.
- 3⁄4 cup cornmeal
- 1 1⁄4 cups milk
- 1 cup all-purpose flour (sifted together with other dry ingredients)
- 1⁄3 cup granulated sugar
- 3 teaspoons baking powder
- 1 teaspoon salt
- 1 large egg, beaten
- 1⁄4 cup vegetable oil or 1/4 cup shortening, melted
- Bacon, crisply fried (optional, for mixing in)
- Cheddar cheese, shredded (optional, for mixing in)
- Hot pepper, finely chopped (optional, for mixing in)
Equipment Needed
For this delightful cornbread, you won’t need any overly specialized equipment. A few basics will have you covered:
- A medium-sized bowl for blooming the cornmeal.
- A separate bowl for combining dry ingredients.
- A whisk for mixing.
- A 9-inch pie dish or a similar-sized oven-safe baking dish.
- A spatula or spoon for folding in any optional additions.
- An oven, preheated and ready.
Instructions
The beauty of Kato’s Cornbread lies not only in its flavor but also in its straightforward preparation. The key, as Grandma always emphasized, is patience during the initial stage.
- Preheat your oven to 400 degrees Fahrenheit (200 degrees Celsius). A hot oven is crucial for achieving that perfect crust and tender crumb.
- In a medium-sized bowl, combine the 3⁄4 cup of cornmeal with the 1 1⁄4 cups of milk. Stir them together gently. Now, and this is the secret, let this mixture sit at room temperature for 10 to 15 minutes without stirring. This crucial step allows the cornmeal to absorb the milk, softening its texture and effectively eliminating any grittiness, resulting in a wonderfully mellow bread.
- While the cornmeal mixture is blooming, in a separate bowl, sift together the 1 cup of flour, 1⁄3 cup of sugar, 3 teaspoons of baking powder, and 1 teaspoon of salt. Sifting ensures that your dry ingredients are well-aerated and free of lumps, which contributes to a lighter final product.
- Once the cornmeal and milk have rested for their allotted time, add the sifted dry ingredients to the cornmeal mixture.
- Next, beat 1 large egg until it’s uniformly yellow and slightly frothy. Add the beaten egg to the cornmeal and flour mixture.
- Finally, pour in the 1⁄4 cup of vegetable oil or melted shortening. This fat contributes richness and tenderness to the cornbread.
- Gently stir all the ingredients together until just combined. Be careful not to overmix; a few small lumps are perfectly fine. If you are adding any of the optional ingredients like crisply fried bacon, shredded cheddar cheese, or finely chopped hot pepper, this is the time to fold them in gently, distributing them evenly throughout the batter. Remember to add these in moderation to maintain the delicate balance of flavors.
- Lightly grease your 9-inch pie dish or baking pan. This will prevent the cornbread from sticking and ensure easy removal.
- Pour the batter into the prepared pan.
- Bake in the preheated oven at 400 degrees Fahrenheit (200 degrees Celsius) for 25 minutes. The cornbread is done when it’s golden brown on top and a wooden skewer or toothpick inserted into the center comes out clean.
Expert Tips & Tricks
Elevating this already wonderful cornbread is all about small details and thoughtful preparation.
- Cornmeal Quality Matters: While any yellow cornmeal will work, a good quality medium-grind cornmeal will yield the best texture. Avoid instant or quick-cooking cornmeal, as they have a different starch structure and won’t benefit as much from the blooming process.
- Don’t Overmix: Overmixing develops the gluten in the flour, which can lead to a tough cornbread. Mix until just combined, and don’t fret about a few small lumps.
- Optional Additions: When adding ingredients like bacon or cheese, ensure they are fully cooked and drained (for bacon) or shredded (for cheese) to avoid adding excess moisture to the batter. If using hot peppers, consider rinsing them to reduce their heat if you prefer a milder kick.
- Pan Choice: While a pie dish is traditional and creates a lovely presentation, a cast-iron skillet also works beautifully and can contribute to a wonderfully crisp bottom crust. If using a cast-iron skillet, ensure it’s well-seasoned.
- Checking for Doneness: Beyond the toothpick test, you can also gently press the top of the cornbread. It should spring back slightly when it’s ready. The edges should also be pulling away from the sides of the pan.
- Oven Variations: Ovens can vary. If your oven tends to run hot, keep an eye on the cornbread during the last few minutes of baking and consider loosely tenting it with foil if the top is browning too quickly.
Serving & Storage Suggestions
Kato’s Cornbread is a versatile companion, perfect for breakfast, brunch, lunch, or as a side to hearty stews and chilis.
Serve it warm, directly from the oven, with a generous smear of butter. A drizzle of honey or maple syrup is also a delightful addition, complementing its subtle sweetness. It pairs wonderfully with a side of buttermilk fried chicken, a hearty bean soup, or a vibrant corn and black bean salsa.
Leftovers can be stored at room temperature, tightly wrapped or in an airtight container, for up to two days. For longer storage, refrigerate for up to a week. To reheat, you can gently warm individual slices in a toaster oven or microwave, or reheat the entire piece in a low oven (around 300°F / 150°C) until warmed through. The texture is best enjoyed within a day or two of baking.
Nutritional Information
Here’s an estimated nutritional breakdown per serving, assuming 8 servings and no optional additions:
| Nutrient | Amount per Serving | % Daily Value |
|---|---|---|
| Calories | 225 kcal | 11% |
| Total Fat | 9.4 g | 12% |
| Saturated Fat | 2 g | 10% |
| Cholesterol | 29 mg | 10% |
| Sodium | 459 mg | 20% |
| Total Carbohydrate | 31.3 g | 11% |
| Dietary Fiber | 1.3 g | 5% |
| Sugars | 8.4 g | 17% |
| Protein | 4.6 g | 9% |
Note: Nutritional values are estimates and can vary based on specific ingredients used.
Variations & Substitutions
While the original recipe is a masterpiece of simplicity, there’s always room for personalization.
- For a Gluten-Free Version: Experiment with a good quality gluten-free all-purpose flour blend. You might need to adjust the liquid slightly, as gluten-free flours can absorb moisture differently.
- Dairy-Free Delight: Substitute the milk with a plant-based alternative like unsweetened almond milk, soy milk, or oat milk. For a richer dairy-free option, consider using full-fat coconut milk. Ensure your shortening is also dairy-free.
- Sweetness Adjustment: If you prefer a less sweet cornbread, you can reduce the sugar to 1/4 cup.
- Herbal Infusion: Consider adding a tablespoon of fresh, finely chopped herbs like chives or rosemary to the batter for an aromatic twist.
- Spicy Kick: For those who love heat, increase the amount of finely chopped hot pepper or add a pinch of cayenne pepper to the dry ingredients.
FAQs
Q: Why does the recipe call for letting the cornmeal sit in milk?
A: This “blooming” process softens the cornmeal granules, significantly reducing any grittiness and creating a more tender, mellow texture in the finished cornbread.
Q: Can I use self-rising flour instead of all-purpose flour?
A: Yes, you can substitute all-purpose flour with self-rising flour, but you’ll need to omit the baking powder and salt from the recipe, as they are already included in self-rising flour.
Q: How can I tell if my cornbread is truly done?
A: A wooden skewer or toothpick inserted into the center should come out clean. The top should be golden brown, and the edges should be starting to pull away from the sides of the pan.
Q: What’s the best way to store leftover cornbread to keep it fresh?
A: Store it tightly wrapped or in an airtight container at room temperature for up to two days, or refrigerate for longer storage.
Q: Can I add fresh corn kernels to this recipe?
A: Absolutely! If you have fresh corn, you can add about 1/2 cup of kernels to the batter along with any other optional mix-ins. This will add a delightful burst of sweetness and texture.
Final Thoughts
Kato’s Cornbread is more than just a recipe; it’s a testament to the power of simple ingredients treated with care. It’s a dish that evokes warmth, comfort, and the joy of home cooking. Whether you’re a seasoned baker or just starting your culinary journey, this cornbread is approachable, rewarding, and endlessly adaptable. So, gather your ingredients, take a moment to appreciate the gentle blooming of the cornmeal, and bake a batch of this mellow delight. I’m confident it will quickly become a cherished favorite in your kitchen, just as it has in mine. Share it with loved ones, savor each tender bite, and perhaps, pass on the secret of the bloom.